Ready to tackle some easy outdoor DIY projects? Learn how to DIY trellis for your garden in three easy steps. The material is cheap – costs less than $5! Plus you can customize the size to fit your specific gardening needs.
Why I decided to DIY after buying several trellis from store
Do you have any climbing plants in your garden? Such as pea, squash, passion fruit or any other lovely plants who is so ready to produce fruit but just need a little bit support (AKA “trellis”)?
If you love gardening, I bet you have experienced the “biting the bullet” moment when paying for trellis at home improvement stores. It took me a few times to finally start to look into DIY trellis.
And guess what? I wish I had started DIY trellis way earlier so that I could save tons of money. I can spend hundreds of dollars on trees(in fact I already did), as trees are getting bigger and stronger; but for outdoor furniture or plant support, I tend to get a bit frugal.
Every time I think about them standing in rain and wind, I just don’t want to spend tons of money on it and feel sad when they get worn off and break down.
I used to buy trellis from my local Home Depot store for ~ $25 each, and usually need to buy a bunch for my plants. However no one had ever told me that DIY trellis costs less than $5.
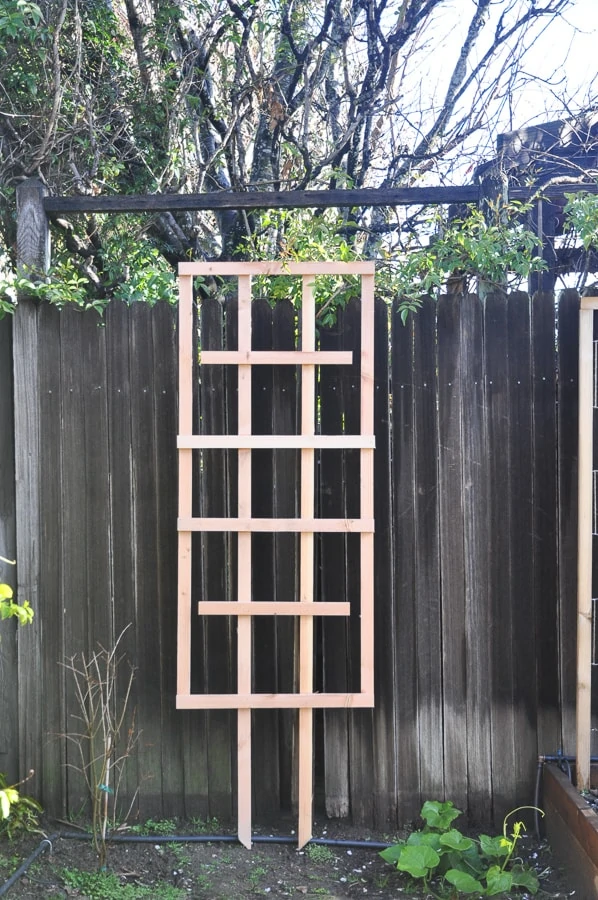
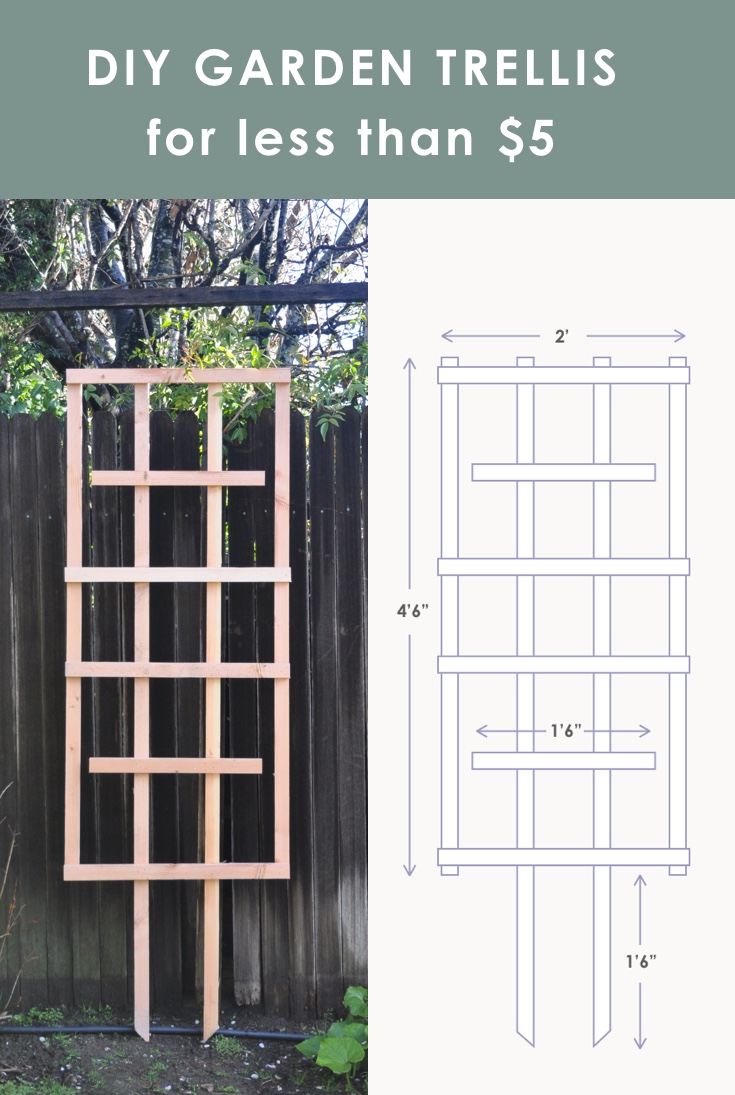
Yes, this 5 feet tall and 2 feet wide trellis only cost me less than five dollars on the material, with the tools I already have on hand, such as nails, glue, etc.
So are you ready to save money and do some fun project? Let’s get started!
Get the Ultimate Garden Planner
Stay organized and achieve gardening success with this Garden Planner, featuring essential tools for every step of your gardening journey. Click the image to check it out.
DIY Trellis Materials
Brad nails 1 1/4″ – make sure to buy stainless steel so it won’t corrode outdoors
Brad nailer (if you don’t have brad nailer, a normal hammer and nail would work just fine)
DIY Trellis Instructions
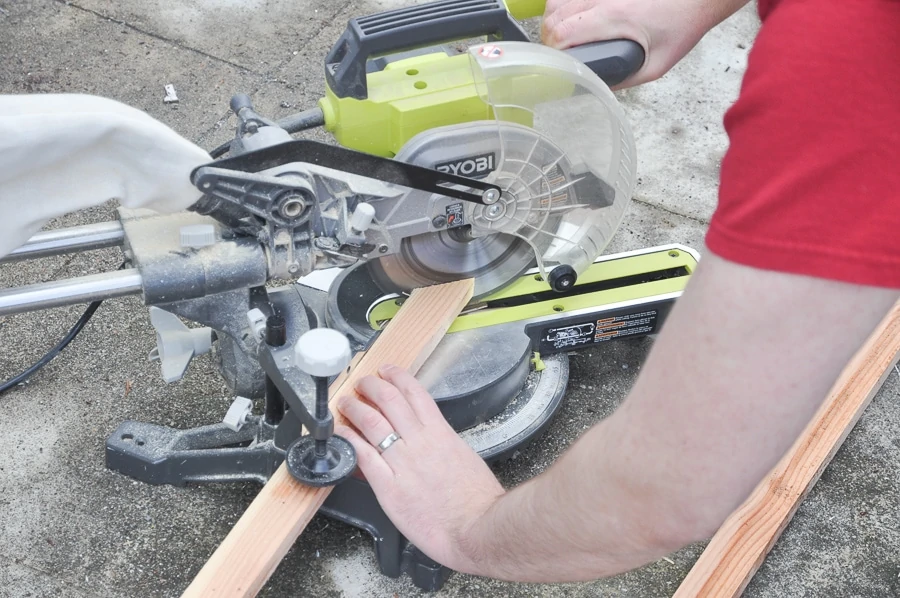
1. Cut the board.
First, divide the four boards into two groups: 2 boards will produce the vertical longe legs with a sharp angle on one end. With that the trellis can stick into the ground.
The other 2 boards will each produce one vertical bar parallel to the legs.
Both leftover part of the board will be used for those horizontal bars.
For exact measurement of how to cut these 1×2 boards, download the FREE Cutting Guide at the end of this post to maximize your material usage.
This project costs exactly four 1×2 boards. If you want all the horizontal bars to be the same length, you can get one more 1×2 boards.
For me, I like bringing the cost down by making the most use of each board. The space created by those two shorter bars doesn’t really affect plants climbing.
2. Dry fit
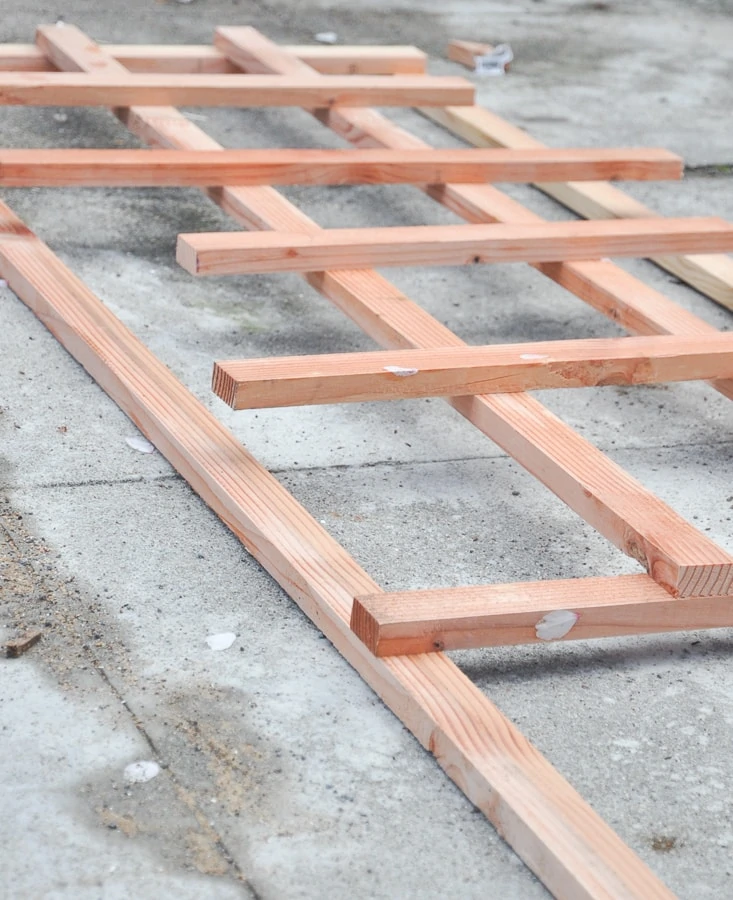
After you’ve done cutting, but before glueing the boards together, it is a good time to lay all the pieces together and make sure they fit nicely.
This is also a great opportunity to adjust the spacing to fit your needs
3. Glue and nail
Once everything looks good during the dry fit, you can go ahead and secure them together.
Apply exterior grade wood glue to where those boards contact, then nail them together by a couple of outdoor brad nails or hammering with a nail.
Then just let it try overnight so the wood glue has a chance to cure.
If you want your trellis to last longer and not take on a weathered look, you can apply a couple coat of protective finish.
This is my favorite wood sealant to use because it doesn’t change the wood color, and it is water soluble so super easy to clean up the brush.
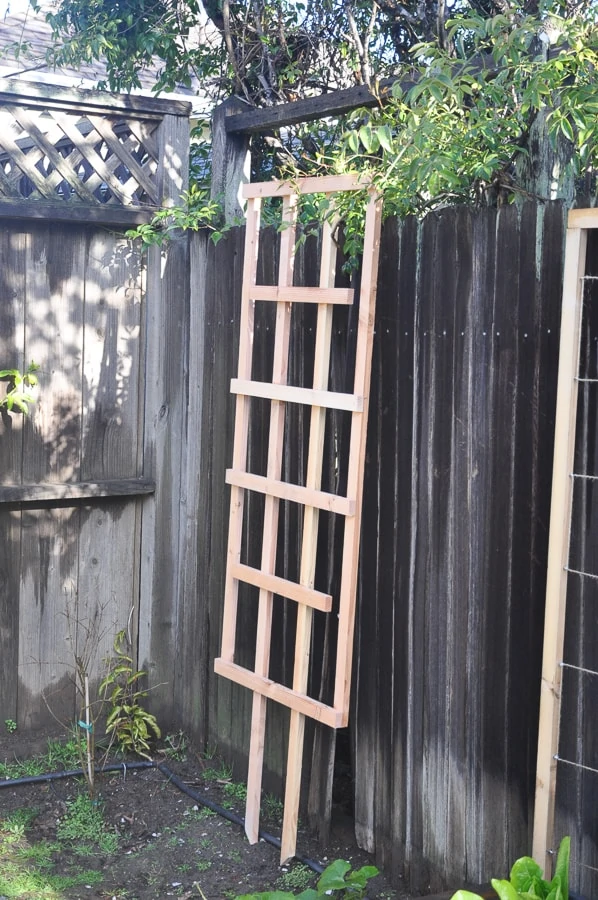
So that’s it – 3 simple and easy steps to DIY trellis for your garden!
With this method in mind, you can produce endless trellis possibilities. This specific design is cost effective as it used 99% of the four 1×2 boards. Next I’m planning to make some 5′ by 5′ trellis with the same method to create a wall for some evergreen clematis to climb.
I hope you enjoy this DIY trellis tutorial and will give it a try 🙂
Download DIY Trellis Cutting Guide
Other budget friendly garden DIY ideas
DIY Tiered Strawberry Planter | Vertical Garden Ideas
Pin it for later
Thank you for this tutorial! I just made this trellis for my poor neglected clematis! It looks great and cost less than $4 (I had some scrap laying around I couldn’t throw out- now I know why)
That’s wonderful Tia! Yup yup sounds like those scraps were meant to be your trellis 🙂