Easy tutorial on DIY outdoor plant shelf with 3 tiers. Taking advantage of vertical space by building an outdoor shelf for plants is a great idea if you want to keep all your outdoor plants organized. It can also work as an indoor plant rack!
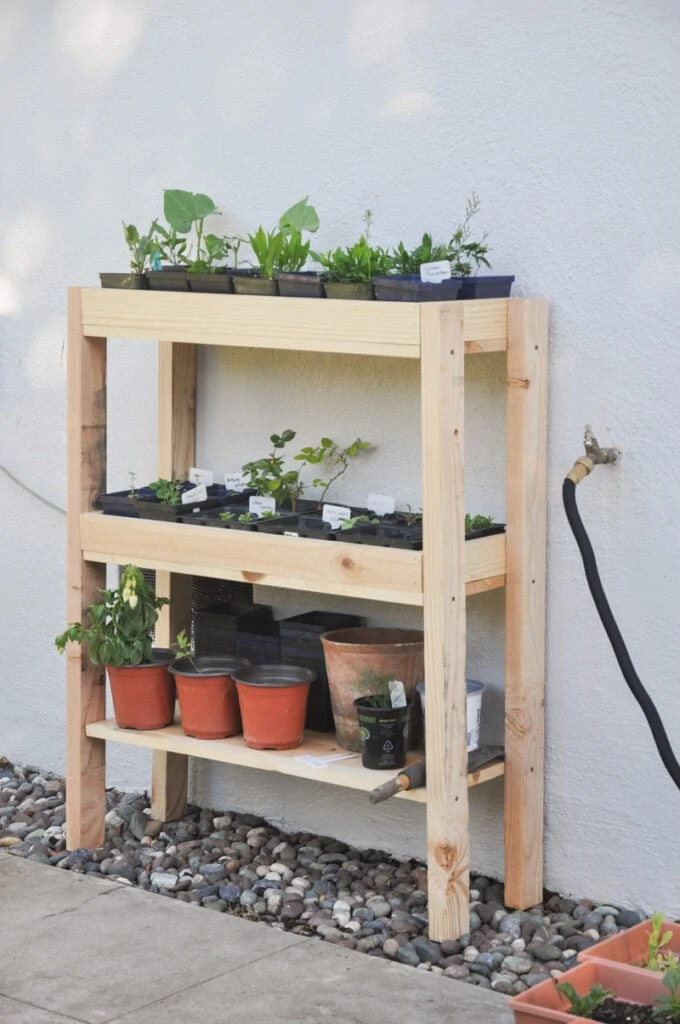
Why DIY outdoor plant shelves?
Do you have many plants or seedlings outdoors or indoors? Why not keep your plants organized by building a tiered plant shelf!
This is an easy DIY project for all plant lovers! By “easy” I mean both time-wise and skill-wise.
Actually, this 3-tier outdoor plant shelf is a project that is long overdue.
I have many seedlings and propagated plants laying around my patio. Most of them were either too small to be transplanted to my garden bed or not fully rooted yet, so I need to babysit them and water them everyday.
Over time my collection expanded and they just took up so much floor space in my patio and I can no longer keep the area tidy.
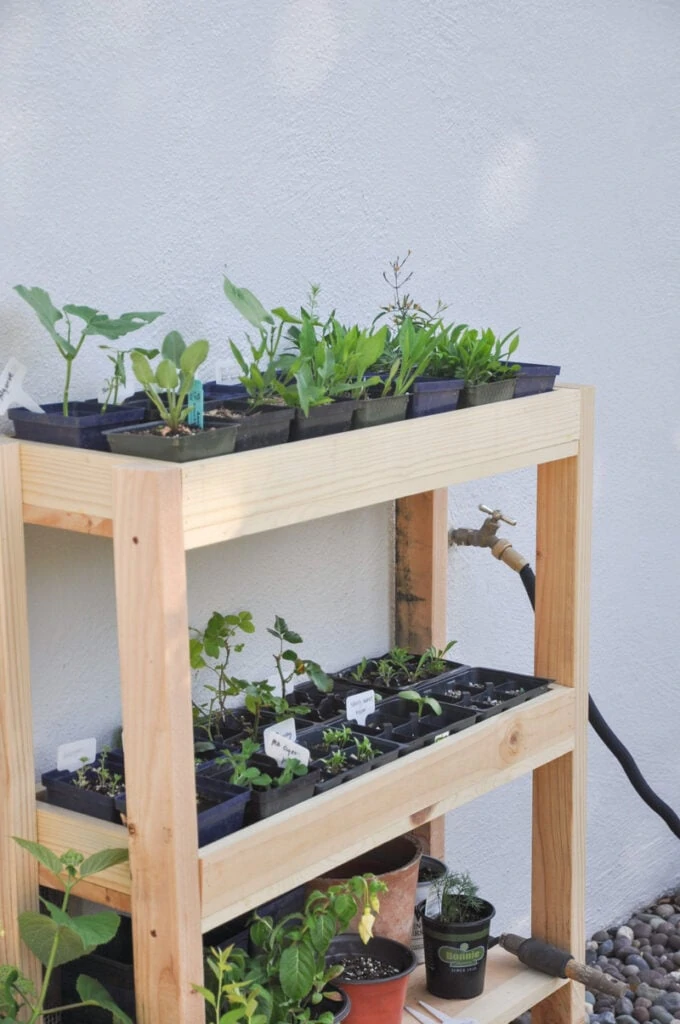
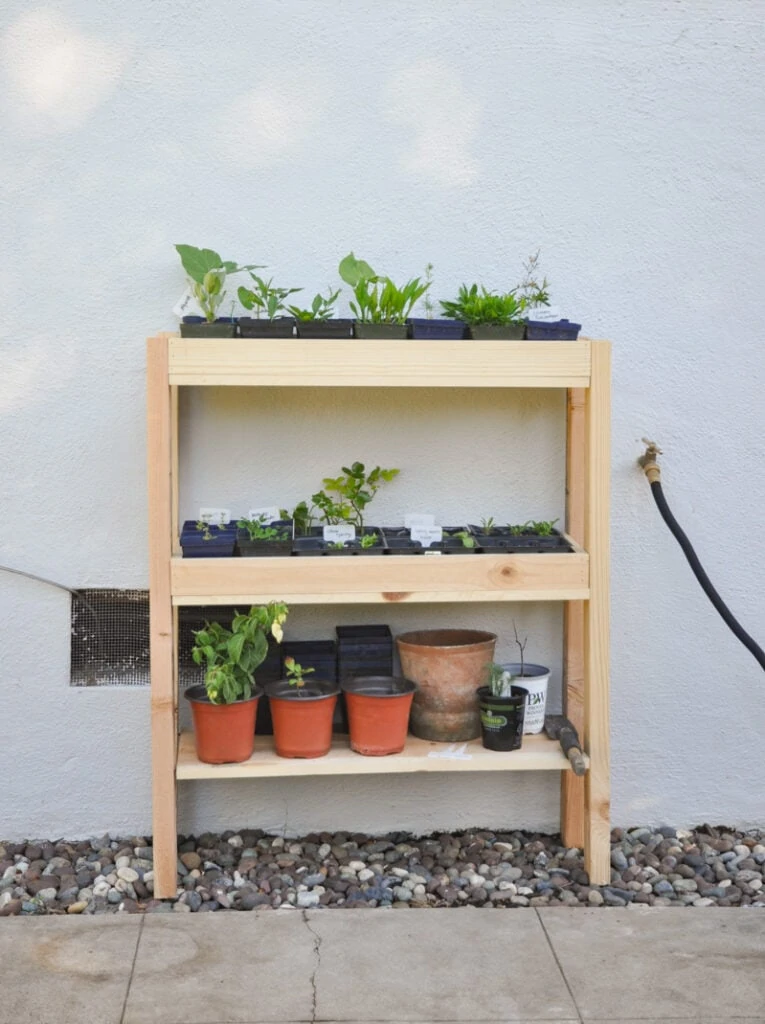
So I designed and built this 3 tier shelf for my outdoor plants to take advantage of the vertical space and also make watering a breeze. I used the top two shelves for my baby plants, and the bottom shelf for storing empty pots and gardening tools.
Most of my plants are in 4-inch nursery pots that they fit perfectly into each shelf. I was able to fit 2 rows of pots.
Also you can be strategic with placing them depending on the sunlight requirements!
Because the middle shelf receives less sunlight from the sun, I used it for seed sprouting, whereas I placed sun loving plants on the top shelf.
This could work as an indoor plant shelf too, but you’ll need to add a saucer to catch the water, and probably skip the step of drilling drainage holes.
Also you can paint it with a nice color to match your space 🙂
DIY outdoor plant shelf materials & cut list

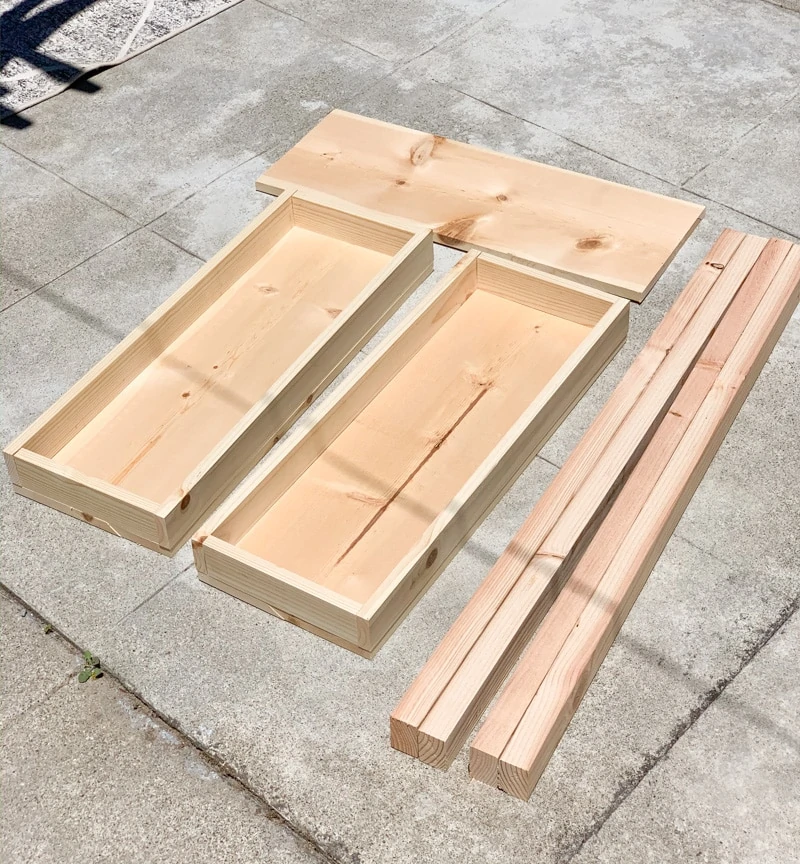
Wood board cut list.
For this project, I used interior/exterior grade common board from Home Depot.
I designed it so you only need to do cross cut, no rip cut needed! Great news for anyone who doesn’t own a circular saw or table saw.
- 1x12x8ft: x1 —– cut 3 pieces, 30″ long
- 1x3x8ft: x2 —– cut 4 pieces, 30″ long and 4 pieces, 9 3/4″ long
- 2x4x8ft : x2 —– cut 4 pieces, 45″ long
Tools
DIY outdoor plant shelf video
Sometimes it is just easier to learn by watching videos!
I made this video tutorial so that you can get a general idea on what the DIY process looks like, and refer to this post for in-depth instructions.
If you’d like to watch more videos like this in the future, consider subscribing to my Youtube channel.
DIY outdoor plant shelf step by step instructions
Step 1. Cut wood boards to size
Cut boards to size as listed on the cut list section above.
I used a miter saw to make cutting easier, but you can use a jigsaw or hand saw. Because my miter saw only cuts up to 10 inches and the bottom board is 11 ½ inches, I cut the board once then flipped it to cut from the other end.
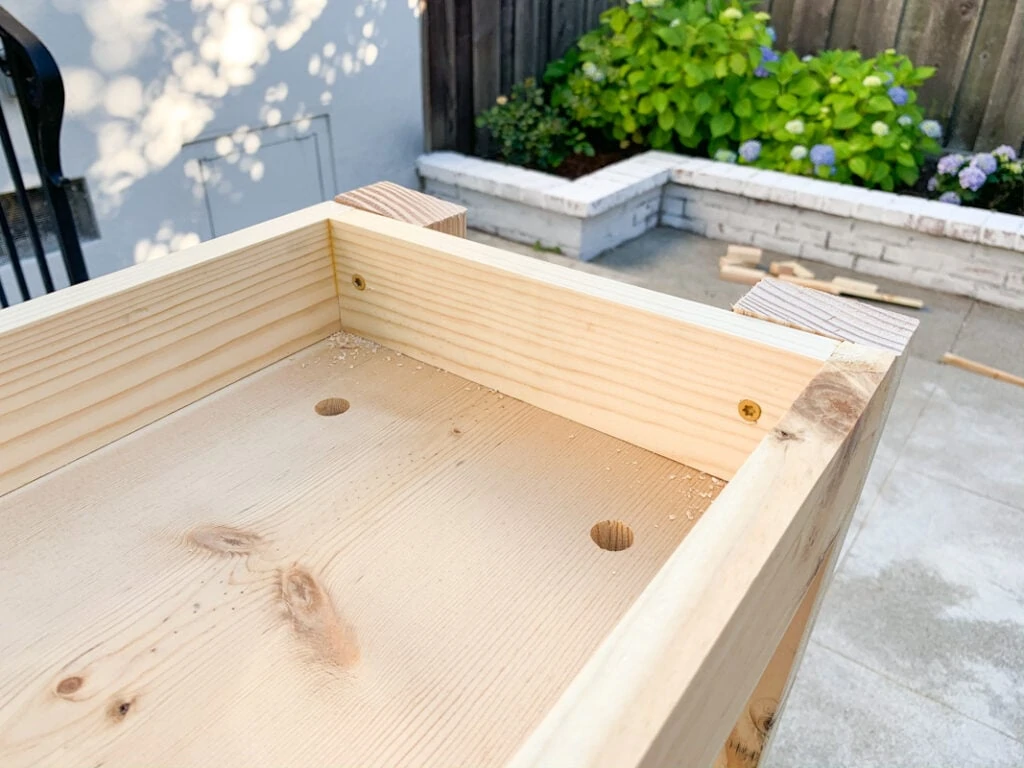
For the top 2 shelves, I used ½ inch spade drill bit to add drainage holes. I added 8 holes per shelf in 2 rows. This is useful because when you are watering, the water won’t accumulate in the top 2 shelves.
If you are building an indoor plant shelf, you can skip this step.
Step 2. Assemble top 2 plant shelves
For each top shelf, I assembled the four sides into a rectangular frame, by applying outdoor wood glue.
Then I used stainless steel brad nails to secure it, so they will hold even though they will come into contact with water a lot. I then used the same method to attach the bottom board to the frame, with glue and nails.
I then left the top 2 shelves sitting for 24 hours so the glue can dry and cure. This step is optional but I did it to make sure my plant shelf is super sturdy in case I put something heavy in the future.
For the bottom shelf, I intentionally left it very simple as I plan to use it for storing empty pots, so no need to add any side boards.
Step 3. Add legs to the top 2 shelves
Now it’s time to assemble them!
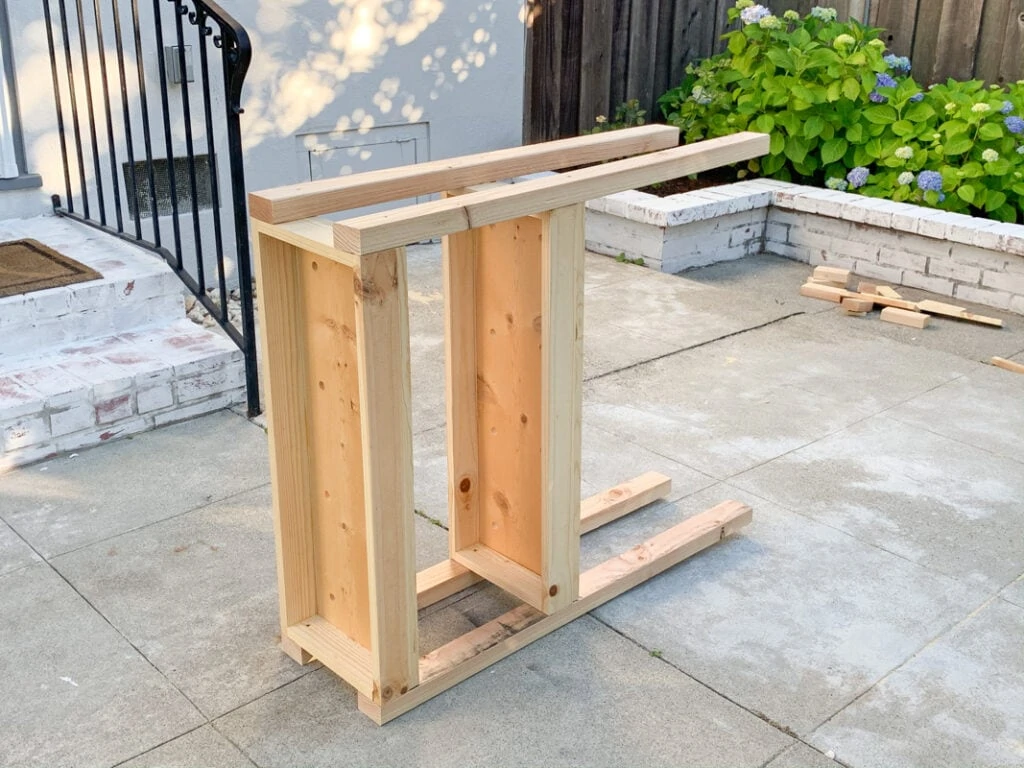
I used outdoor screws to attach the top tier to 2 legs, then the second tier. I created a pilot hole for each screw hole to prevent the wood from splitting.
Then I attached the other 2 legs to the top 2 tiers.
Now the basic structure is built, all I need to do is add screws to make them more secure.
Basically for each tier, I have 2 screws attaching the tier to the legs, and another 2 screws, attaching the legs to the bottom board of each tier.
Step 4. Attach 3rd shelf
For the bottom tier, I attached it by drilling a screw from the leg to the shelf, one screw per leg.
Drilling pilot holes is very important at this step to prevent the board from splitting.
If you own a pocket hole jig, I would suggest you to add pocket holes to the bottom board, and attach it to the legs. This way the connection is easier to build, and won’t split the wood either.
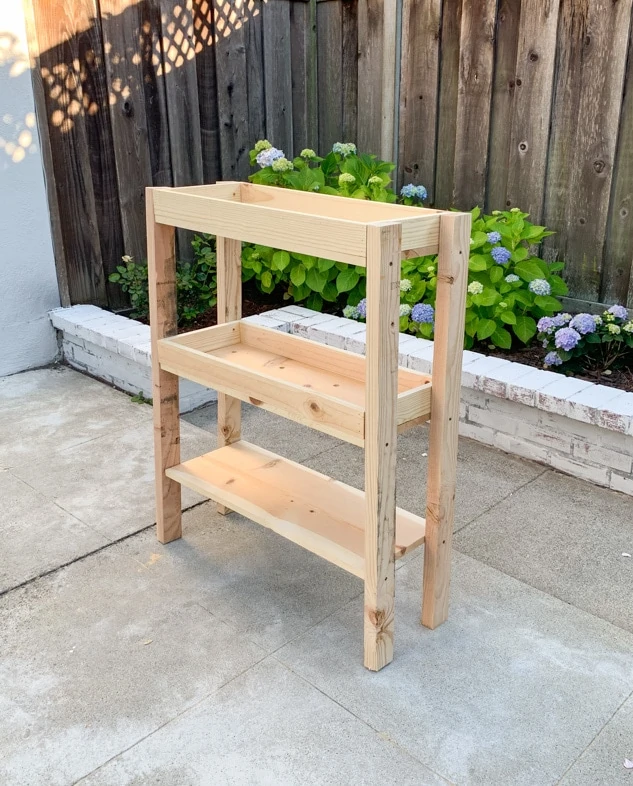
In case you are wondering about the spacing between all three tiers of this outdoor plan shelf, so I made each tier about 12in apart from each other.
Step 5. Move your plants to their new home
Now that you have completed this DIY plant stand, it’s time to move your plants and pots to their new home!
I was able to fit 80% of my plants onto this shelf, but given I’m ready to transplant some baby plants to my vegetable garden in a couple weeks I should be able to fit 100% of my baby plants in this DIY outdoor plant shelf.
As a result I freed up 80% of the space they were taking, and I’m so happy about it!
I hope you found this tutorial helpful and are ready to DIY your own indoor or outdoor plant stand!
More garden Ideas and projects
Backyard Garden Tour 2020 Summer
Easy DIY Trellis for Less Than $5
Pin it for later

Why will you not allow us to pin this? I’ve tries at least a dozen times using various methods, pinterest keeps saying it’s not allowed
I love it when people pin my content! I’m not sure what happened to your end, maybe reinstall pinterest plug-ins? You can also copy the url of this post, go to Pinterest, and create a new pin from website(where you can put the url) to save it to your account. Hope it helps!
This is what I really need for my small apartment porch! Fiance made me a raised box with wheels for planting and he did a great job, plus he’s pretty good with projects with wood! Again, thank you!
That’s so nice of him!