Want to build a long desk with drawers at a low cost? This post is for you. I’m sharing how I DIY my home office desk built-in with Ikea Alex desk and Alex drawers hack, plus how to attach Alex drawers to a table top for a more built-in setup.
Also, for more DIY ideas to make your home beautiful and functional, be sure to follow me on Instagram!
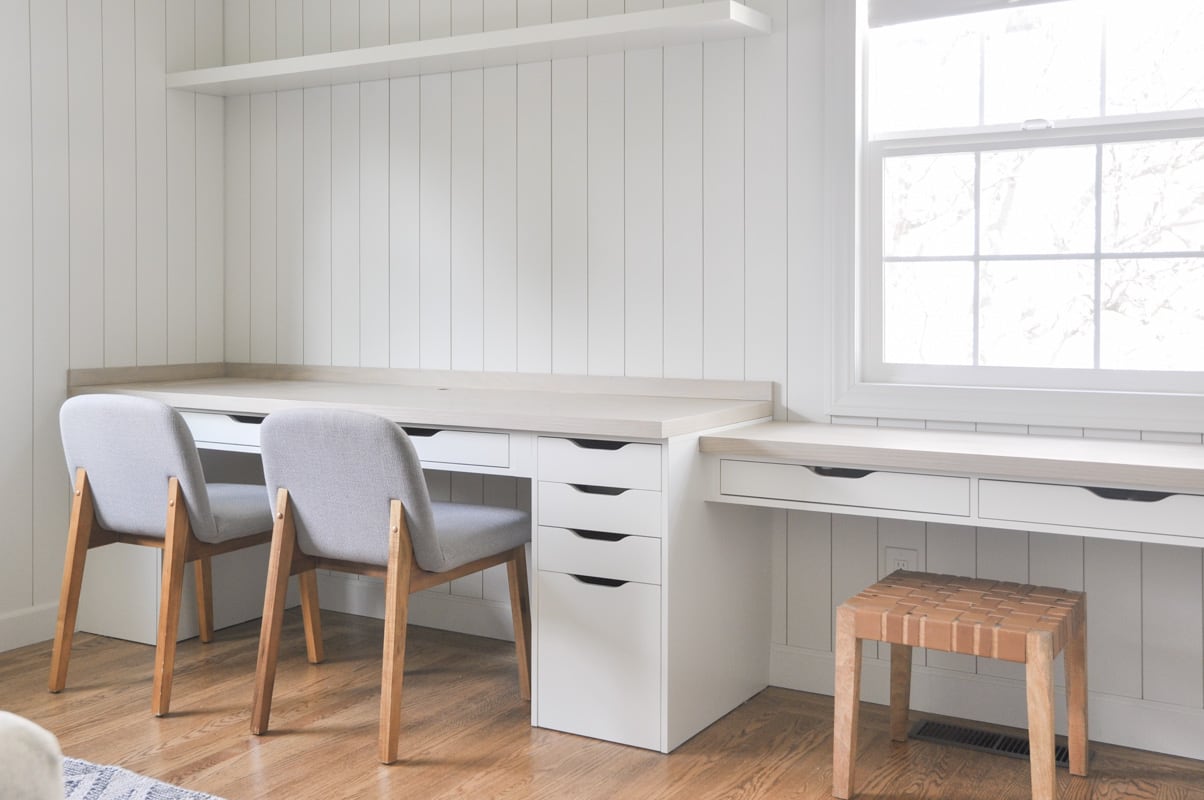
How to Hack Ikea Alex Drawers Quick Video
Here’s a video trailer of this project so you get an overview on what I did.
You can watch the full length video which is embedded later in this post. Just scroll down and you’ll find it near the Instructions.
If the video doesn’t work here, you can watch it on YouTube here. I’m posting DIY videos on my channel on a regular basis, so subscribe if you like to see more videos like this!
Want some tips on IKEA hacks?
How to plan your desk with Ikea Alex desk and drawer hack
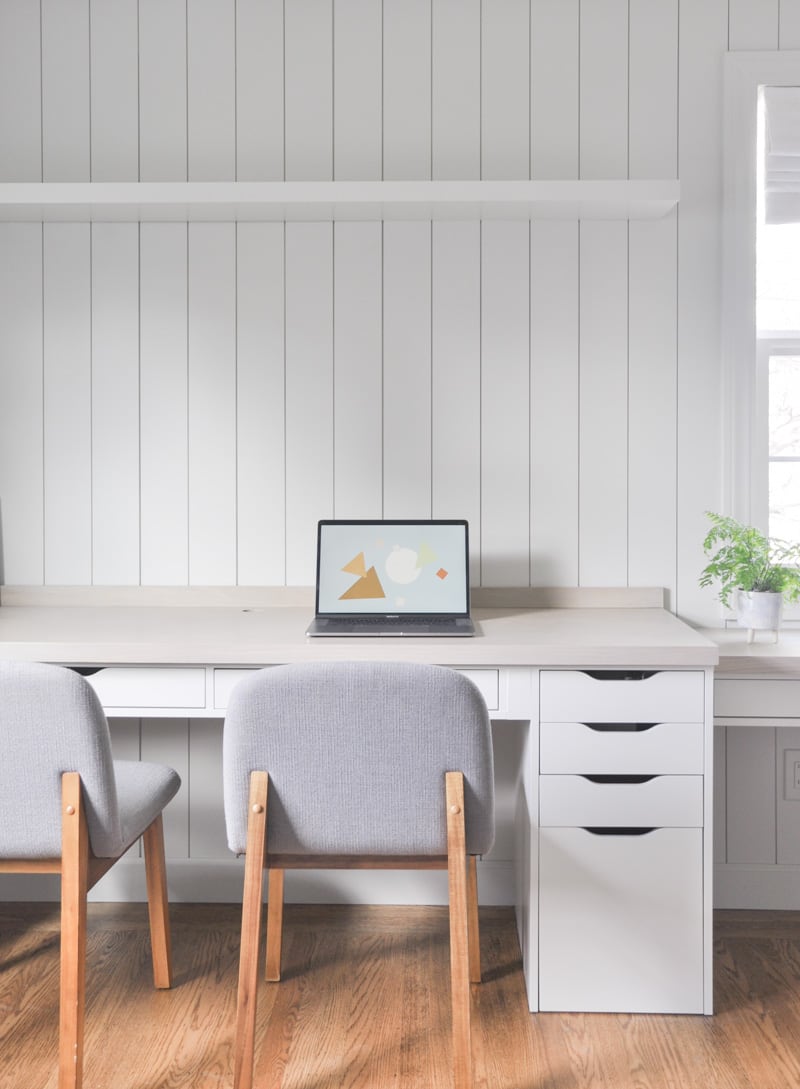
About the space
First of all, I want to talk briefly about my home office floor plan, so you can decide wether you would like to an entire Alex desk hack like me or take part of this Ikea hack to apply for your home office.
I’ve shared my home office space in depth on my home office renovation plan post, but to recap:
My home office is 11ft by 11ft, and it is intended to be used primarily as a home office and craft room and occasionally as a guest bedroom, given it is one of the only two bedrooms we have in our 1000 sqft house.
Why Ikea Alex desk hack? How much does it cost?
To maximize the workspace and achieve a custom look, I decided to create a built-in desk with tons of drawer storage.
I have consulted with a local custom cabinet company before I committed to doing an Ikea hack desk built-in, and they quoted more than $3000 with the medium grade drawer options and table top materials.
In contrast, this long desk with drawers built-in with Ikea Alex hack is well under $500, including all the materials, with tons of drawers for storage and customization possibilities. So the answer is clear – DIY a desk with Ikea Alex Hack is the way to go!
Desk built-in desk design with Ikea Alex drawer and Ekby Alex shelf hack
Before I got right down to the DIY part, I used SketchUp to create a 3D model of this desk built-in and figured out the dimensions.
This step is totally optional but I like viewing the space in 3D to make sure my plan will work since I have not seen any design like this before.
Here’s a render. After tweaking it multiple times I’m pretty happy with the design solution and the amount of desk space and drawer storage.
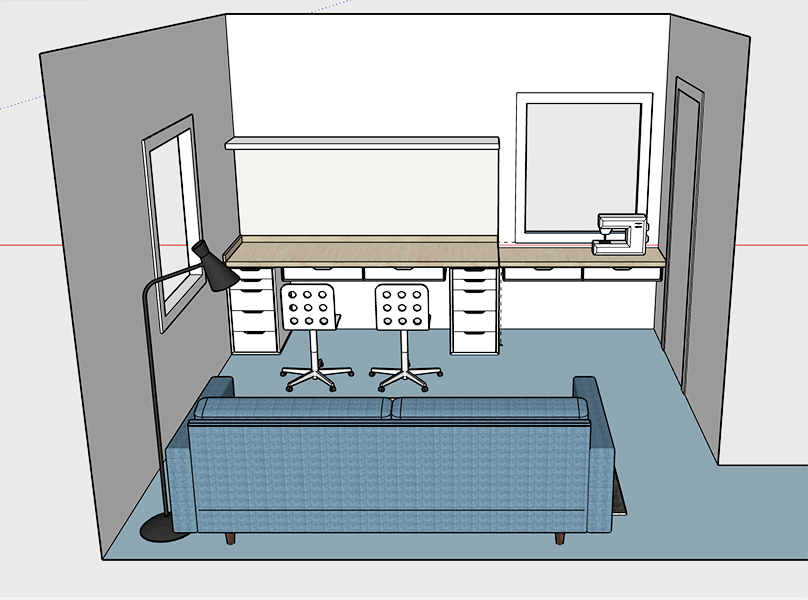
With the window on the wall and closet door to the right, I couldn’t have a super long desk which goes wall to wall.
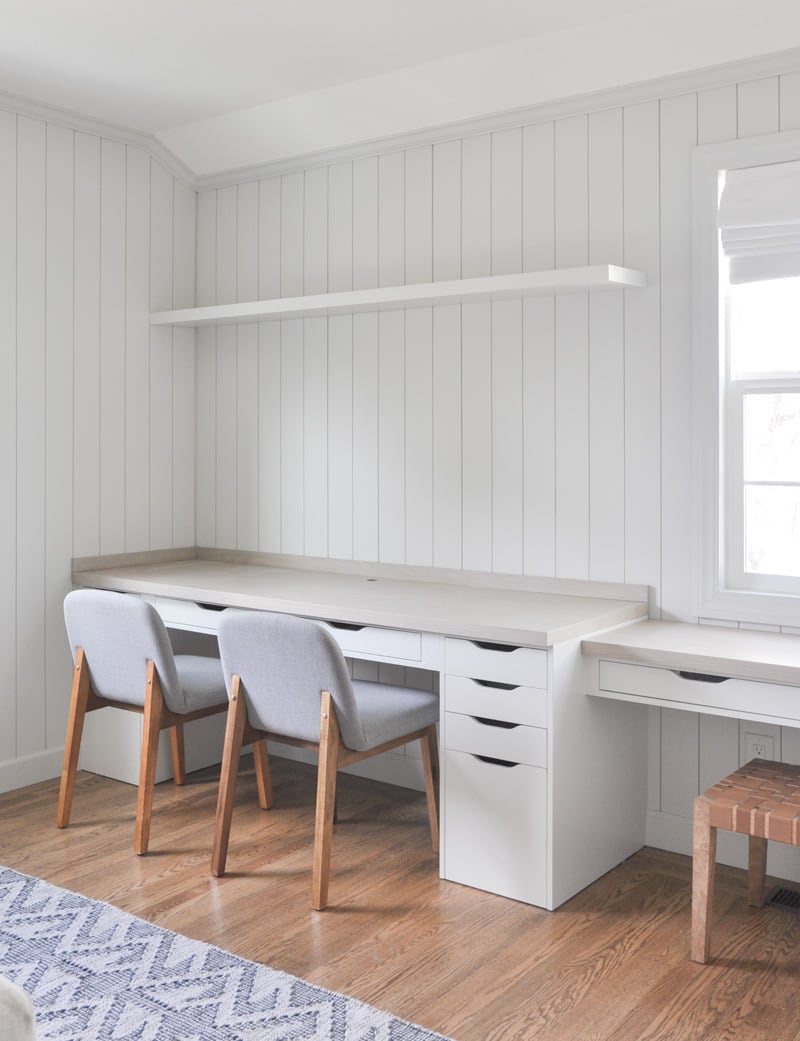
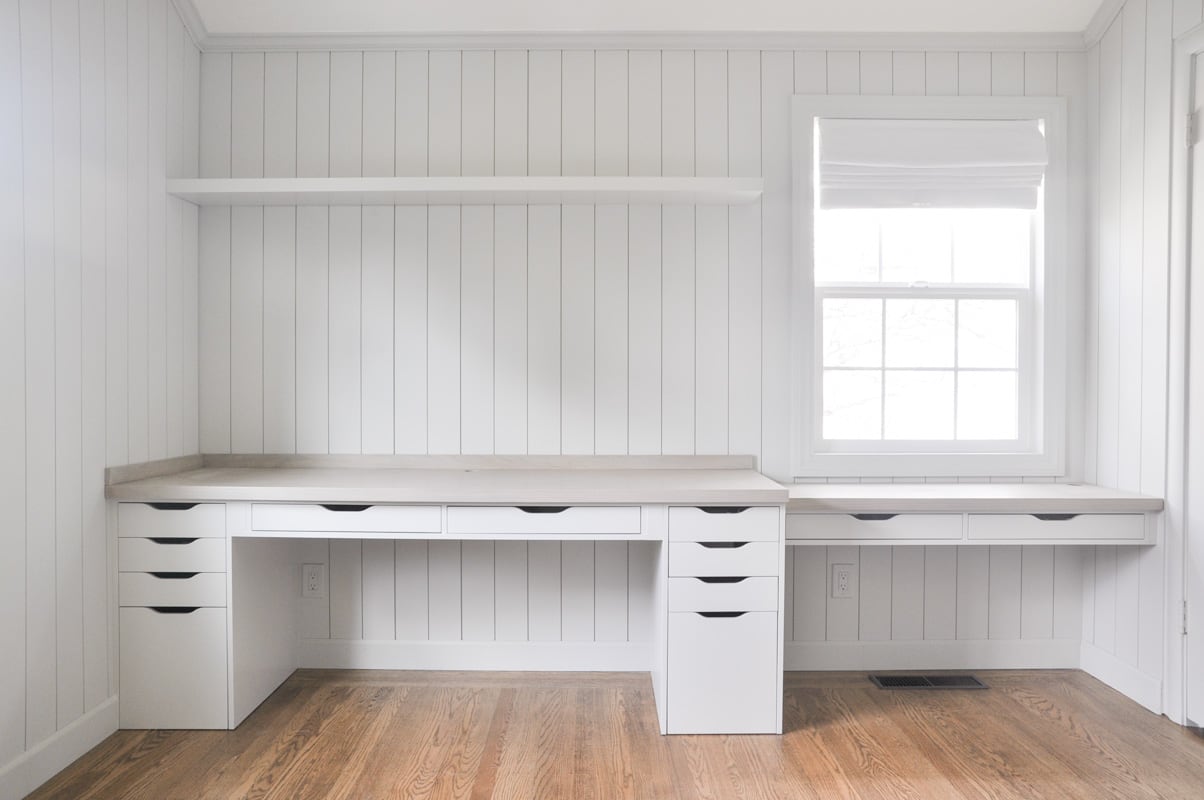
So instead, I dedicated 60% of the space to a long desk with 2 Alex drawers with filing cabinet option, and use the remaining space for a sewing nook which is lower than the desk to accommodate the window, and shallower depth so it won’t block the closet door.
You can see in this rendering that the sewing table is next to the closet door casing.
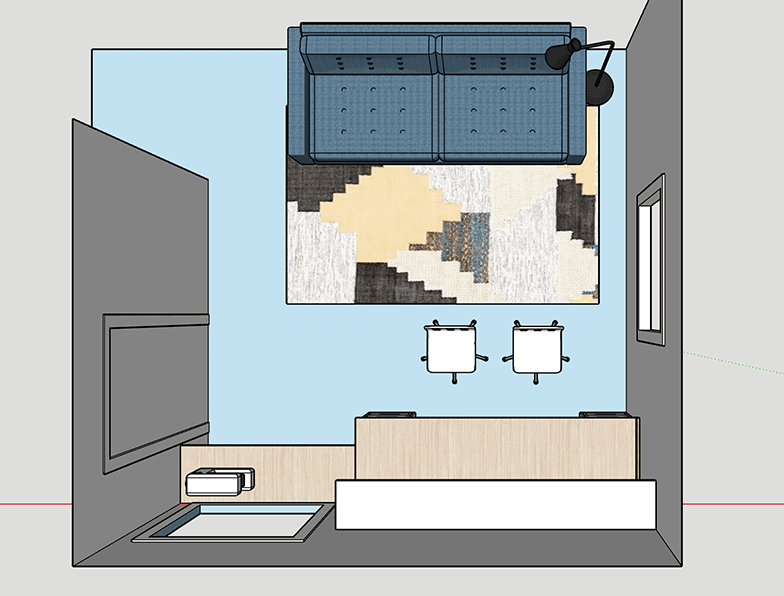
To add more storage, especially for the sewing nook, I decided to do an Ekby Alex hack by attaching it to the table top.
As a result, the sewing table will be just wide enough to allow me to attach the Ekby Alex shelf with drawers(46 ⅞”), leaving enough space for the desk area to enable my husband and I work side to side.
Here’s all Ikea furniture I bought to hack for my home office built-in desk and sewing nook:
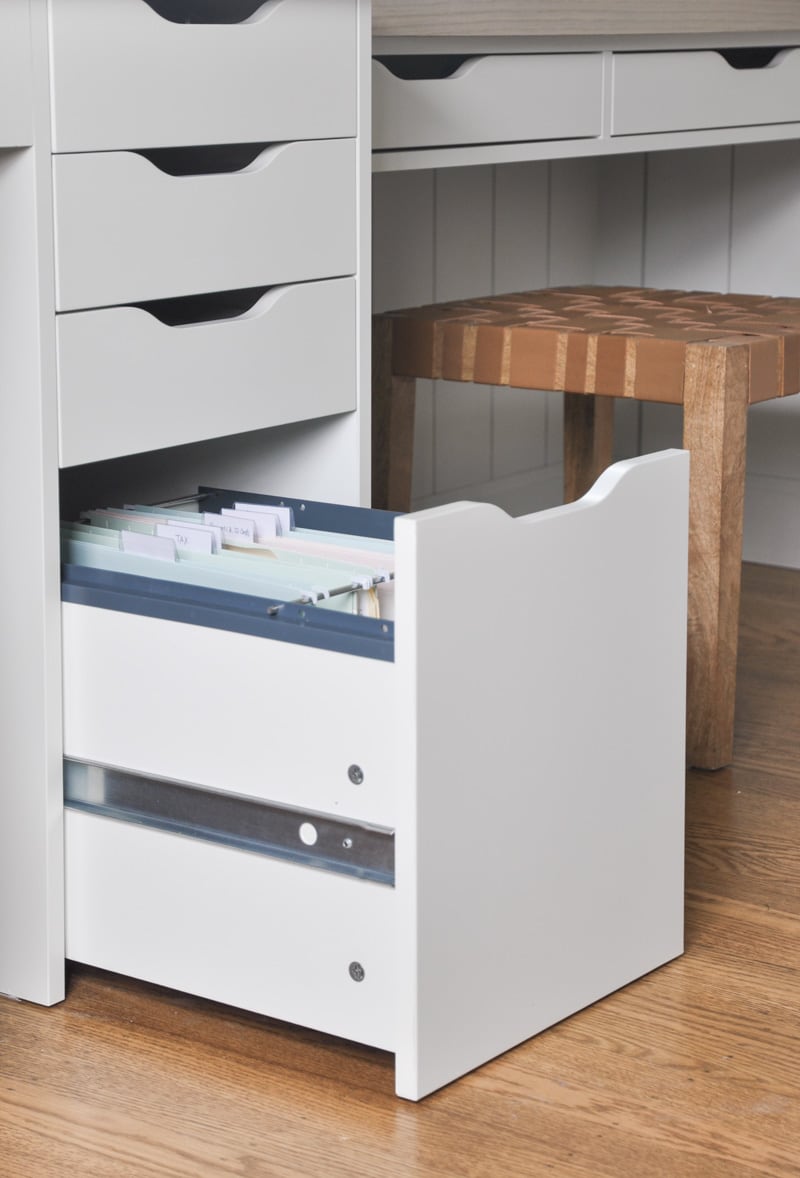
There are two configurations for Ikea Alex drawer unit, one is with filling cabinet drawer, and the other one replaces the file drawer to two shallower drawers.
I picked the filling cabinet(also called drop file on Ikea’s site) configuration because I want to keep my file organized in my home office instead of having a separate file cabinet.
DIY Ikea Alex desk hack video
This short video will give you an overview of how to plan your space with Ikea Alex drawer units, as well as walk you through the DIY process.
I recommend you to watch it first and read through this blog post for the full DIY instructions to understand the step by step process of building a desk with drawers with Ikea hacks.
Also you can subscribe to my Youtube Channel if you like to watch more videos like this. I usually post video first before posting a blog post. So consider SUBSCRIBE 🙂
Step by step instructions on Ikea Alex desk built-in hack
Assemble Alex drawer unit
First, I assembled both Ikea Alex drawer units fully. At this point, you can assemble the drawers, but don’t put them in the cabinet yet. Leaving the drawers out will make the future installation easier, which I’ll explain in the later steps.
For Ekby Alex shelf, I assembled the drawers and the frame, but left the top board of the frame unattached. This is because later I will attach the top frame to the desk table top first, individually.
DIY custom wood table top for Ikea Alex desk
Now it is time to prepare the long table top which will sit on those Alex drawer units, plus another table top for my sewing nook.
If you want to buy a table top, you can get Ikea tabletop such as Linnmon. If you like a wood finish like me, there are also some affordable wood table top options, such as this walnut finish tabletop, or this beautiful light wood table top.
For this project, but I decided to DIY my own custom table top for the following reasons:
- I wanted a wood table top because the natural wood grain hides dirt and scratches pretty well
- I need a longer table top to put on top of the drawers. Ikea Linnmon tabletop is shy of a couple inches from my desired length.
In terms of table top material, I bought two ¾” thickness PureBond plywood from my local Home Depot. I chose this specific plywood because it has a very fine finish and is formaldehyde-free.
I picked the red oak finish for the beautiful oak grain. They also have maple and birch finish available.
Here’s how I created the thick and sturdy table top using the plywood:
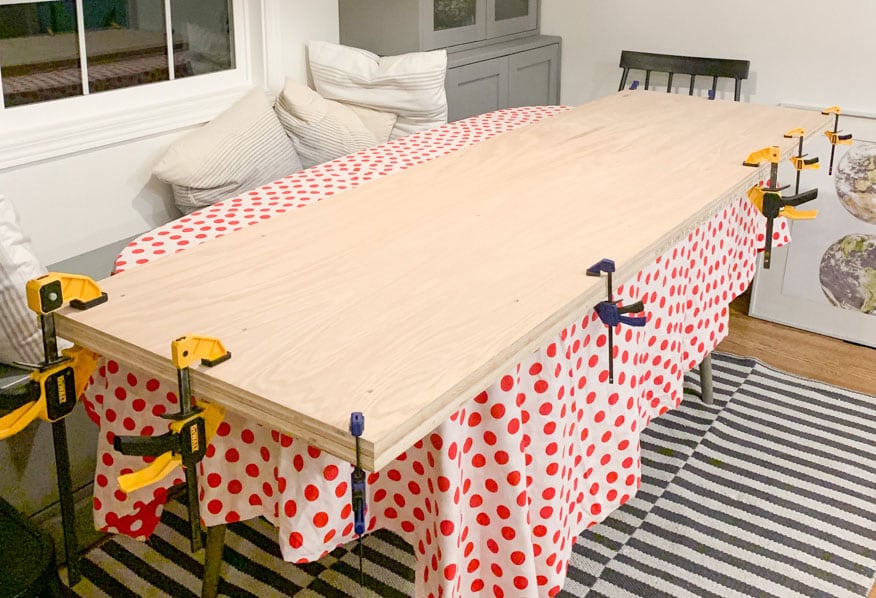
1.Attach 2 plywood together.
First I did some rough cut to the plywood so they are roughly the size of the desk and my sewing table, leaving 1-2 inches as a buffer; This also allows me to save some extra materials for a tiny backsplash as seen in my photos.
My house is old and the wall is curved. With the backsplash pieces I can cover the gap without the need to scribe the long table top to the wall shape.
I used wood glue and 1 inch screws to attach 2 plywood together. After giving them 1 day to dry and cure, I cut them to size with a circular saw.
When you cut them, be mindful of which side will be facing up since the saw blade has a direction which will result in one side being rougher than the other. I also encourage you to use painter’s tape to protect the cut line before cutting in order to achieve a sharper cut edge.
You might want to leave a little wiggle room when you cut and trim them shorter later to ensure the entire built-in will go wall to wall without any gaps.
2. Add wood veneer tape
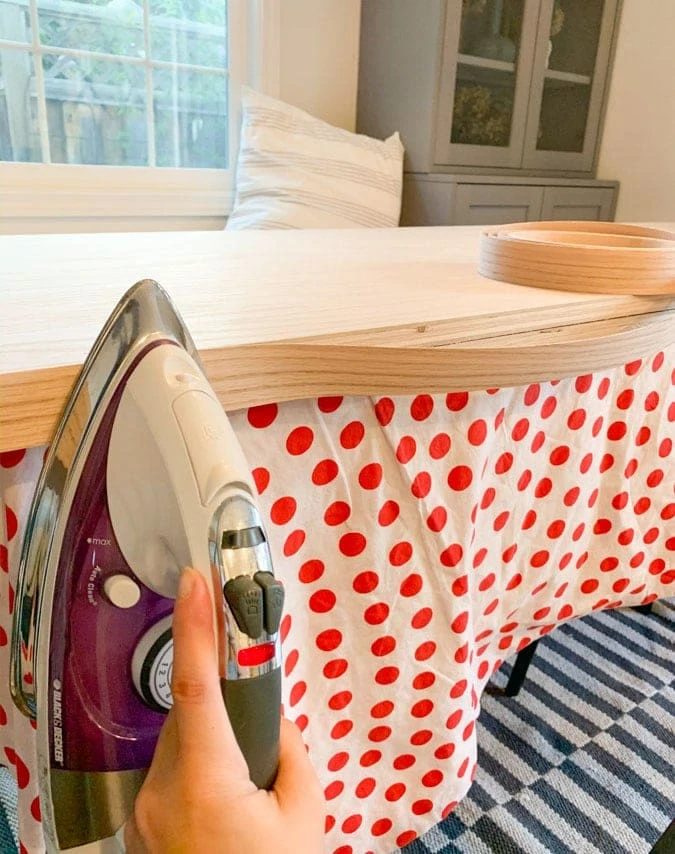
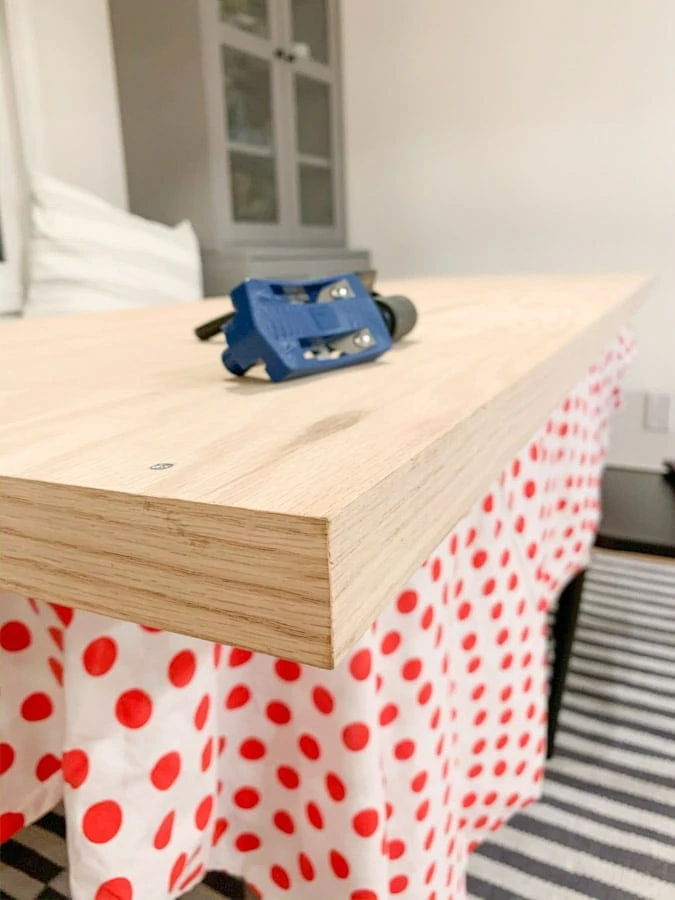
Now the table top is cut to size, I applied 1 1/2 inch wood veneer to the edges which will be seen, and trim with edge band cutter, then polish the edge with fine sanding paper.
In my case, I covered the front edge and the right edge. I also applied veneer to the backsplash pieces. I used red oak veneer so the entire piece will look cohesive when I stain them later.
After the veneer, it looks like a solid wood piece rather than something that is made of plywood.
3. Staining the table top
This step is optional as you can just seal the table top as is by applying a few coats of sealer.
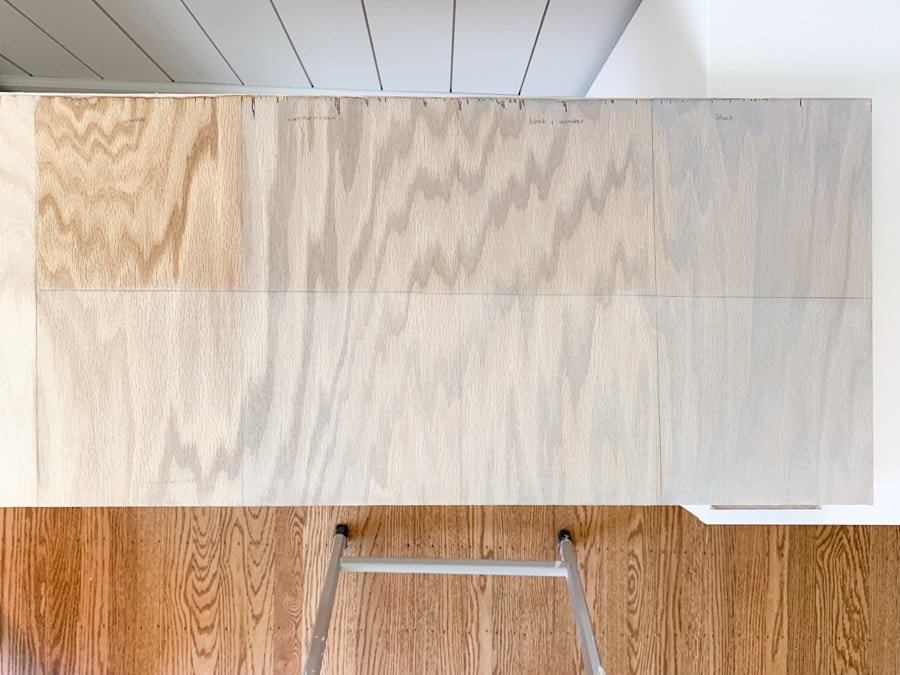
For my table top, I wanted a lighter and grayer color, so I mixed and matched several water based stains from Varathane, and landed with a finish that is Weathered Oak + Sunbleached + white wax.
Then I applied three coats of water based sealer.
This sealer is actually my go to wood sealer as it is water based, so easy to clean and also doesn’t change the wood color.
Don’t forget to stain and seal the edge with wood veneer as well.
Attach Alex drawers to table top and secure to the walls
Now it’s time to set up the desk built-in. I first placed the long table top on the 2 Alex drawer units.
At this point you can move the drawer unit until they lineup with the table top nicely. Once I was happy with the location, I attached both drawer units to the surrounding wall.
I originally had baseboards as part of the DIY vertical shiplap wall project, so to make the drawer units flush to the walls, I cut my baseboard using Ryobi multi tool attachment to remove parts of the baseboard.
To add support for the super long table top, I add a 1 inch thick piece of wood and attach it to the wall stud.
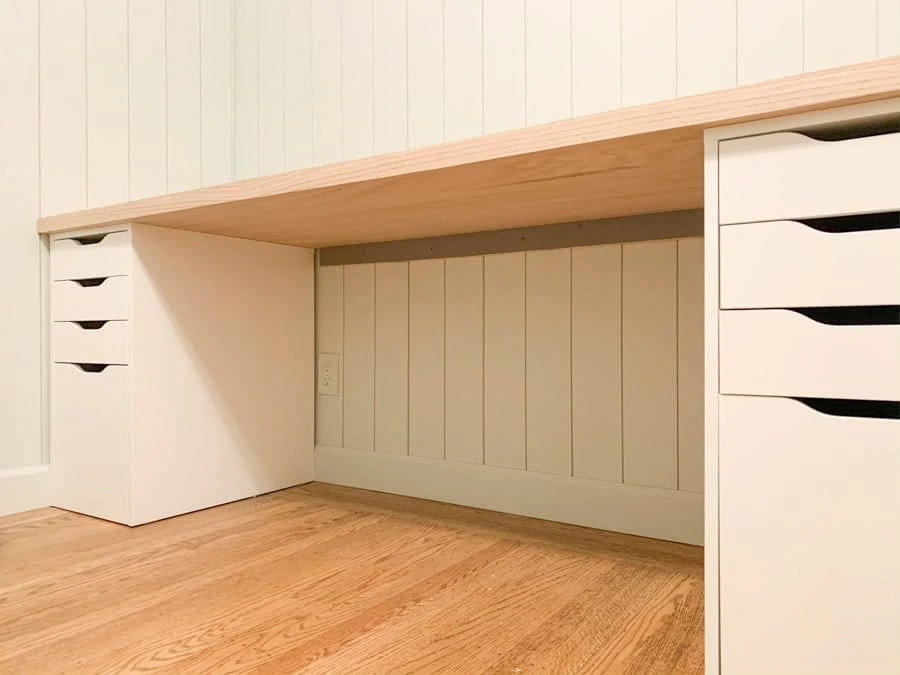
And for the sewing table, I used three pieces: one piece to the back wall, just like the long desk top; 1 piece attached to the Alex drawer to the left; 1 piece attached to the right side wall.
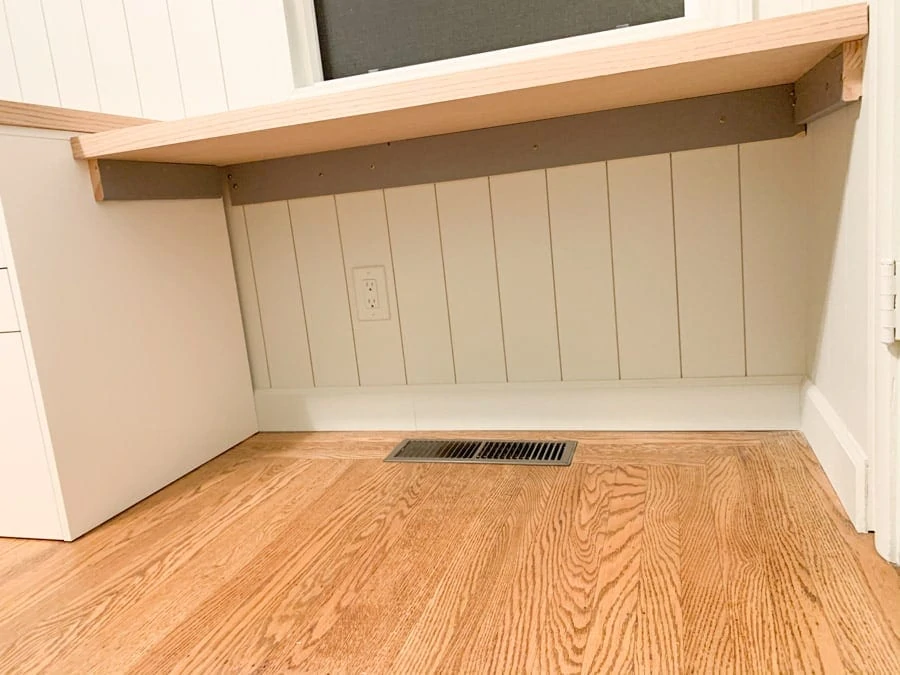
Try to attach them to as many studs as possible for maximum support. I used Stud Buddy to find studs, and marked the studs with painter’s tape.
Alternatively you can use the Ikea Adils leg to support the center of the desk but I want to keep a clean look and to make sure there’s enough space to hang the pencil drawers.
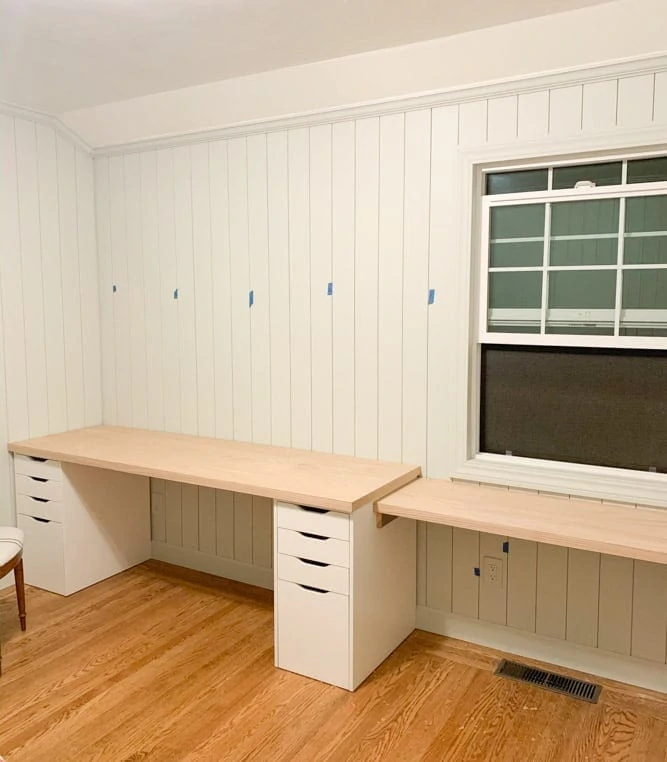
Once you are sure with the placement of tabletop, You can secure it in place. Since the tabletop is already placed on the Ikea Alex drawer units, I used a few L brackets to attach the table to the wall – in my case, it is attached to the horizontal wood board right below tabletop.
For the Alex drawer, I attached them to the wall behind and on the side with screws.
Add pencil drawers (Ekby Alex hack)
Before adding the pencil drawers, confirm that you are able to comfortably fit your legs.
The space is perfect for me. However, my husband is 6’2″ and he is not able to comfortably fit his legs under the pencil drawers. If that’s the case for you, you will need to decide whether you want to go without the pencil drawer, or raise the desk a few more inches to fit comfortably.
At this step, I covered those table top supporting boards with by Ekby Alex shelf. This way they hide those structural board, and offer additional storage that is very accessible.
Remember at the furniture assembly stage I recommended leaving the top off? This is the step where it will come in handy 🙂
I first attached pencil drawer top frame to the table top with 1.5 inch screws, then added the rest of the drawer frame, following the installation manual came with Ikea. Once I attached the entire frame to the table top, I slid in the drawers.
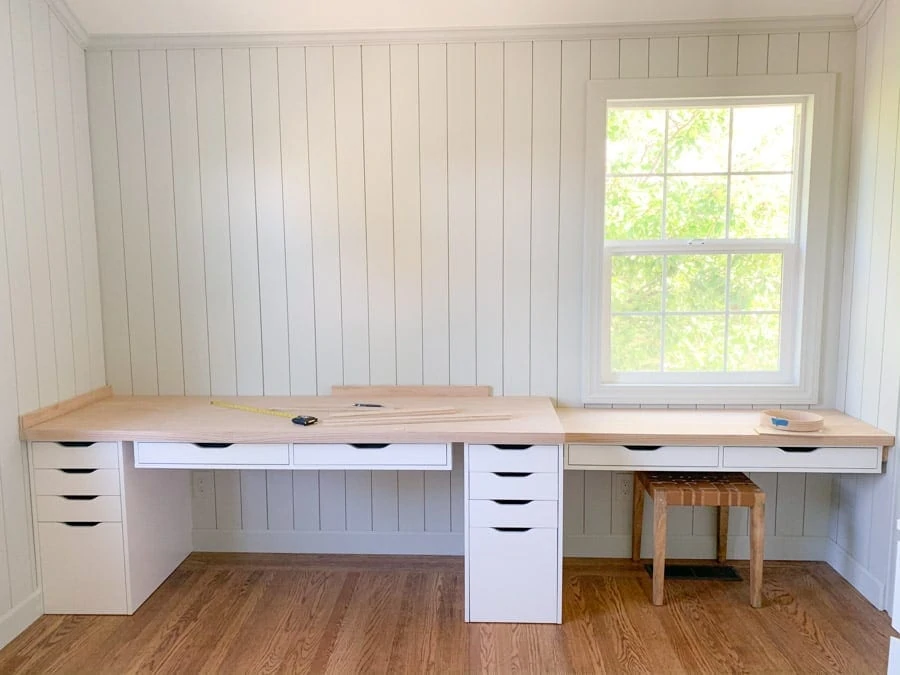
The same method applies to the sewing table. As an additional step, I secured the pencil drawer frame to the left and right supporting boards. This is made possible due to the pencil drawer is sandwiched right between the supporting boards.
You can see in the photo above that there’s gaps between the Ekby shelves and Alex drawers for the left desk. Don’t worry, we will fill the gap in the next step.
Add filler pieces to the desk built-in, and paint over
Now it is time to fill the gap between the Ekby shelf and Alex drawer unit.
I covered the front and bottom sides of the gap with ¼ inch MDF boards. I basically glued some scrap pieces to the left and right side of the inner gap, and glued the filler piece to them.
I did the same below those gaps too, and have the bottom filler piece to go as keep as Alex Ekby shelf/drawer.
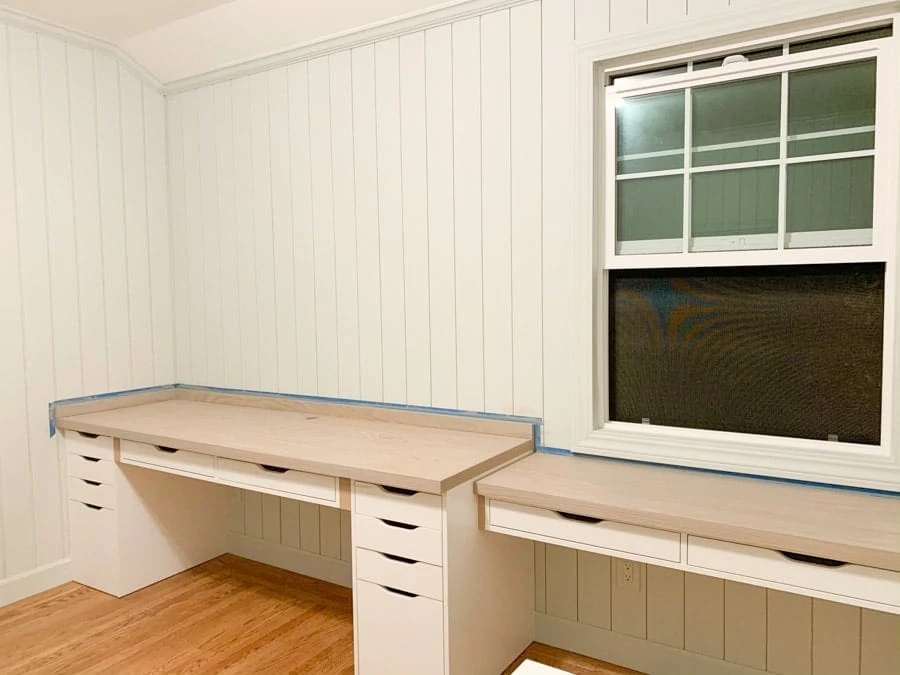
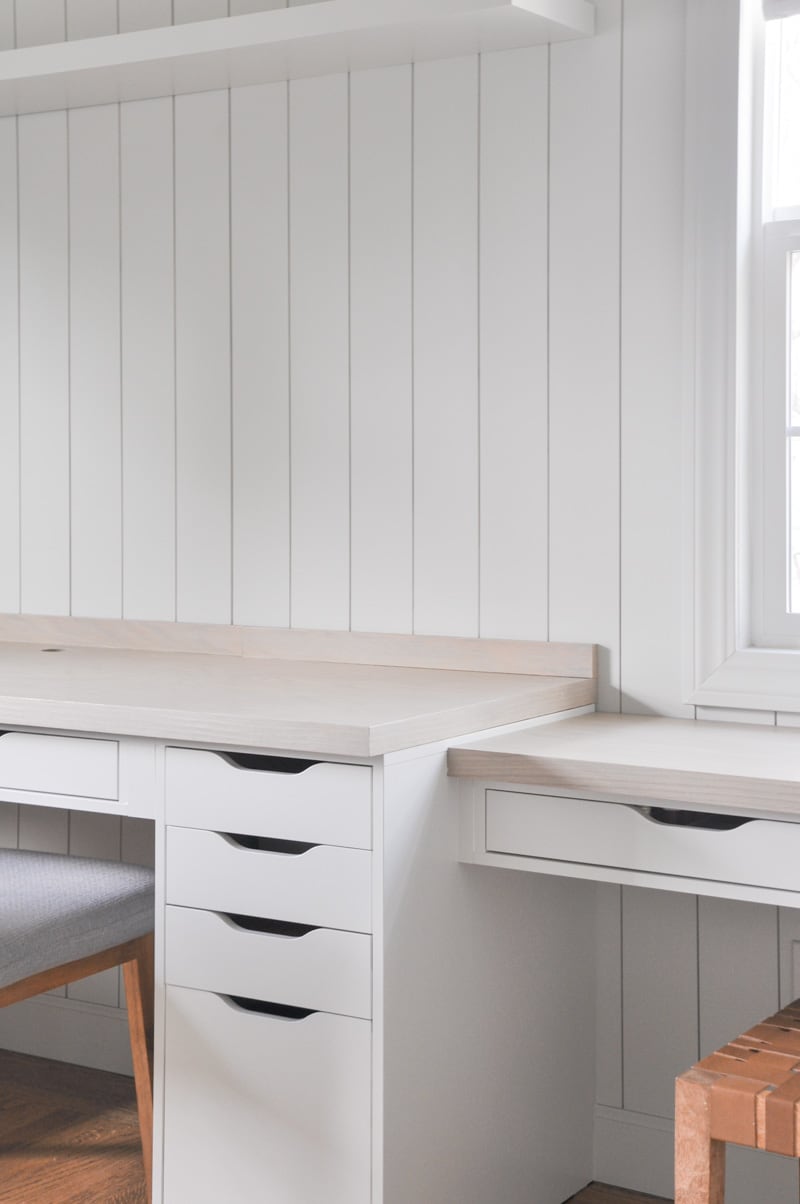
I then covered visible seams with speckle. I didn’t cover it completely because the Ikea Alex series has it seams between each board, so I was basically embracing that look.
Then it is time for the painting job. I first primed it with Zinsser Bulls Eye primer which works great with Ikea laminated finishes.
Then I painted the entire built-in with 3 coats of Benjamin Moore Moonshine ( the same as my wall paint color). I did use a different sheen and product line within Benjamin Moore for durability : satin finish from their Advanced line.
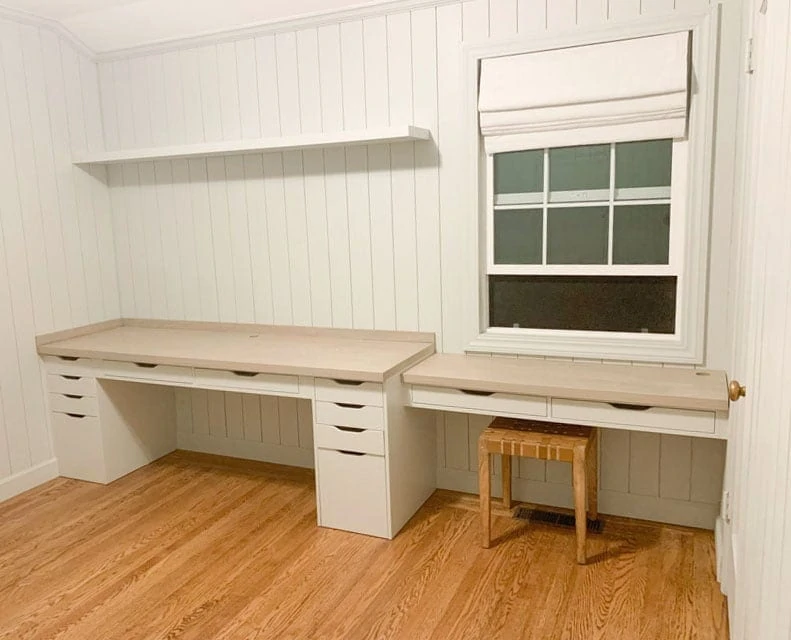
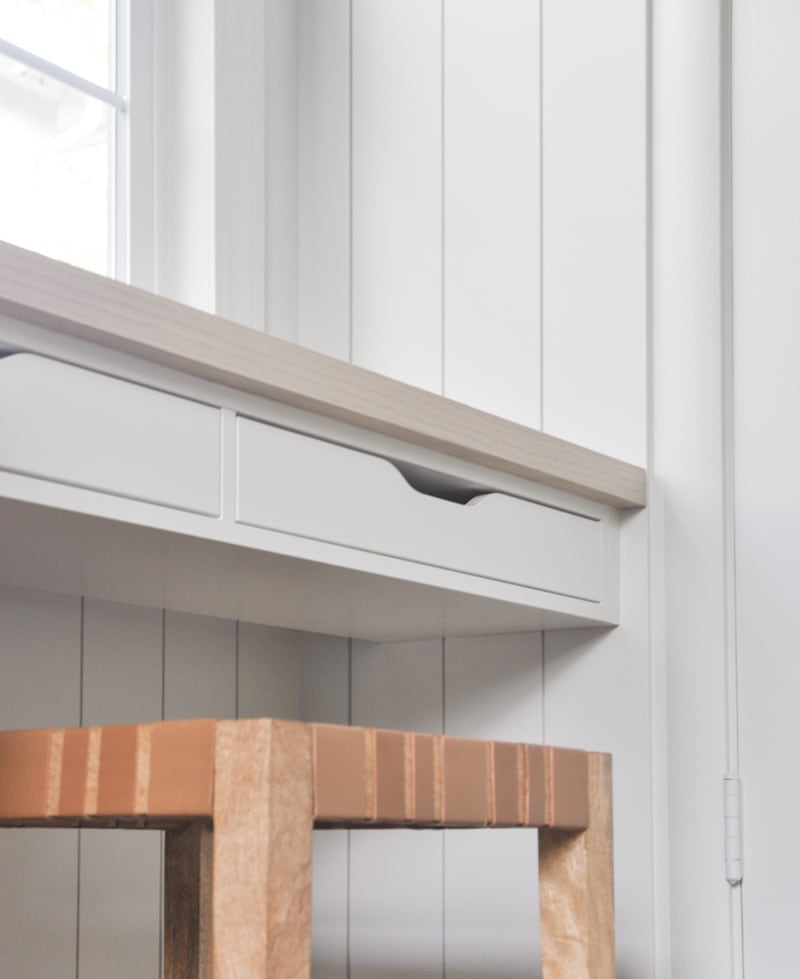
Here’s close up of what it looks like after painting it over:
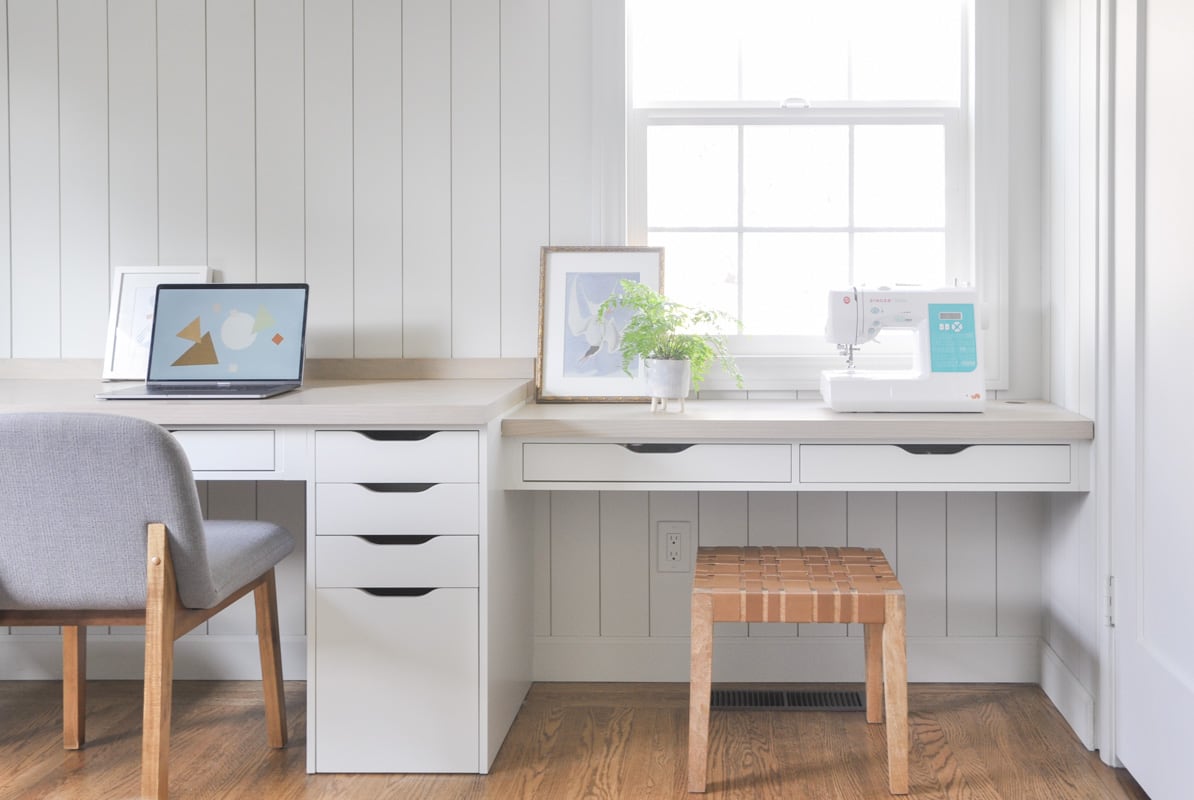
That is the entire DIY process for the desk built-in, by hacking Ikea Alex drawers!
Next I’ll talk about some upgrades you can do to it, such as DIY organization dividers for Alex drawers, plus how I modified the chair height for my sewing nook since it is lower than normal table height.
Want some tips on IKEA hacks?
Alex drawer organization DIY
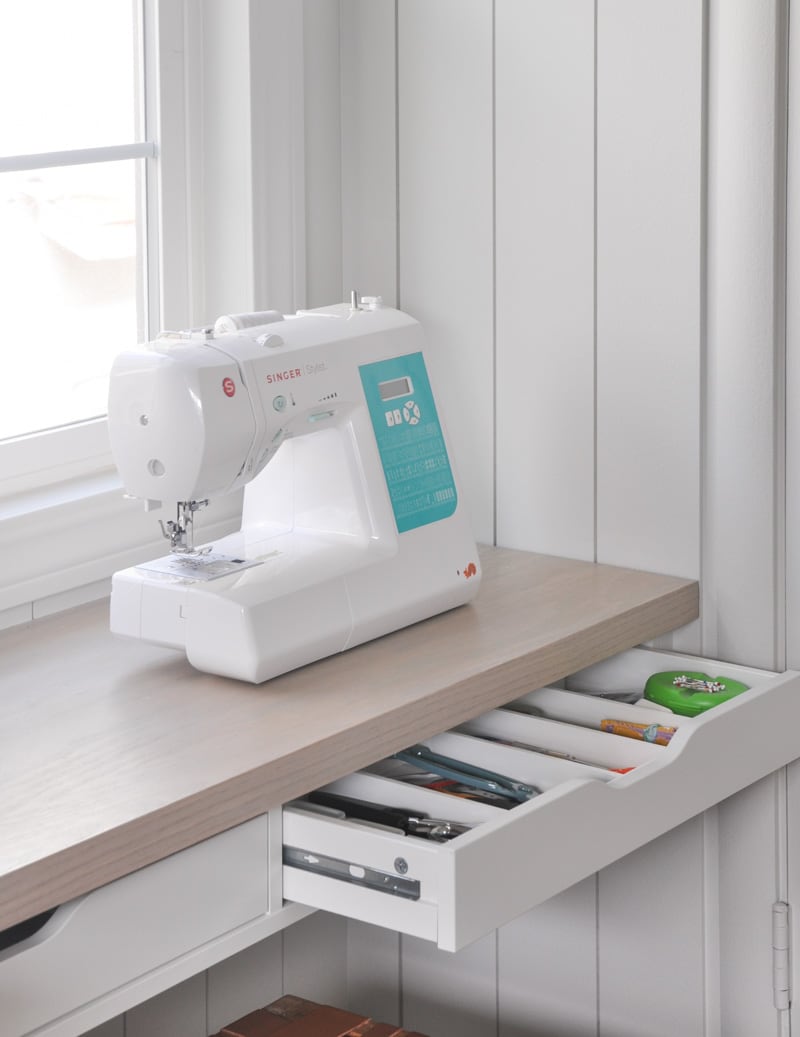
Most of my sewing storage will be in my home office closet, so I wanted the sewing pencil drawers to be able to hold the most commonly used tools.
And what’s a better solution for storing sewing tools by building a drawer divier?
For the drawer divider material, I used 1/4in MDF boards, which is the leftover from this project – in the filler step.
I start by measuring the inside of Ekby Alex drawer, and decide on how many slots I want for this drawer. I then cut them to size and glued them with wood glue.
My recommended height for the divider is 1.5 inch. The reason is each drawer has a cutout serving as drawer pull and you probably want the divider to be below that. Also avoid having any divider in the cutout part.
You can see in this photo below I left the center free of divider so I can pull the drawer open without touching the divider.
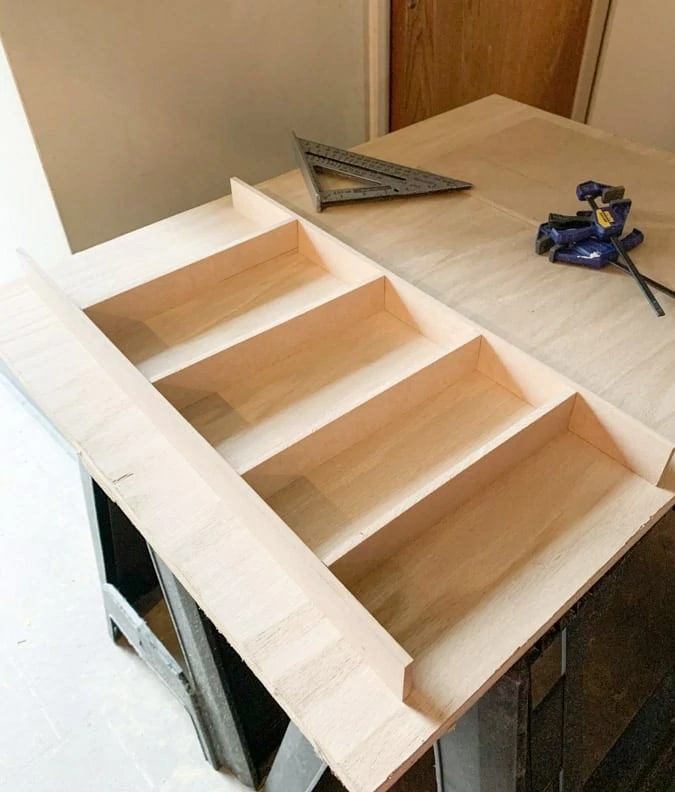
I waited 24 hours for the wood glue to dry and cure. Then I painted it white to match the inside of Ikea Alex drawer. Since it is entirely held by glue, do handle it gently until it safely arrives inside the drawer.
One thing to note is Alex drawer won’t come all the way out, unlike drawers from Ikea kitchen cabinet line. Just something to keep in mind while you design the drawer divider for organization.
Adjust chair height for sewing table
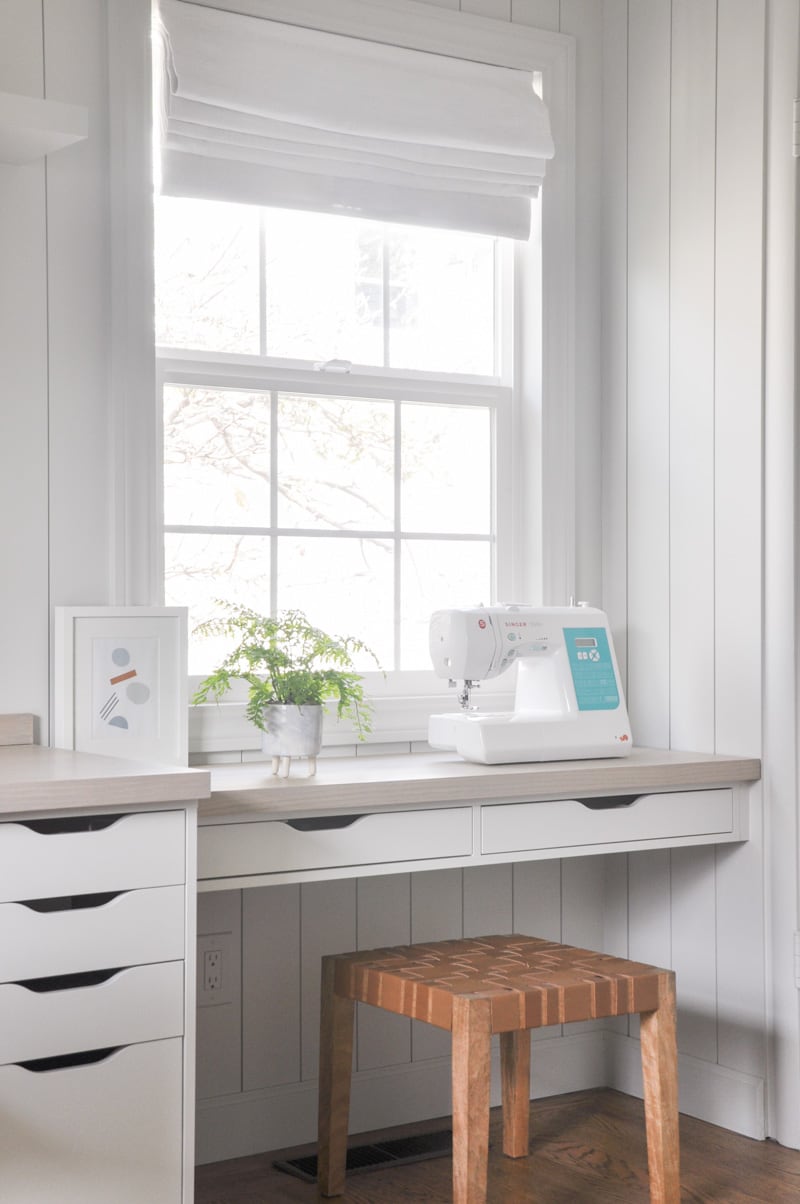
To avoid running into the window, my sewing table is lower than a normal table. So it is a bit challenging to find a chair at the right height.
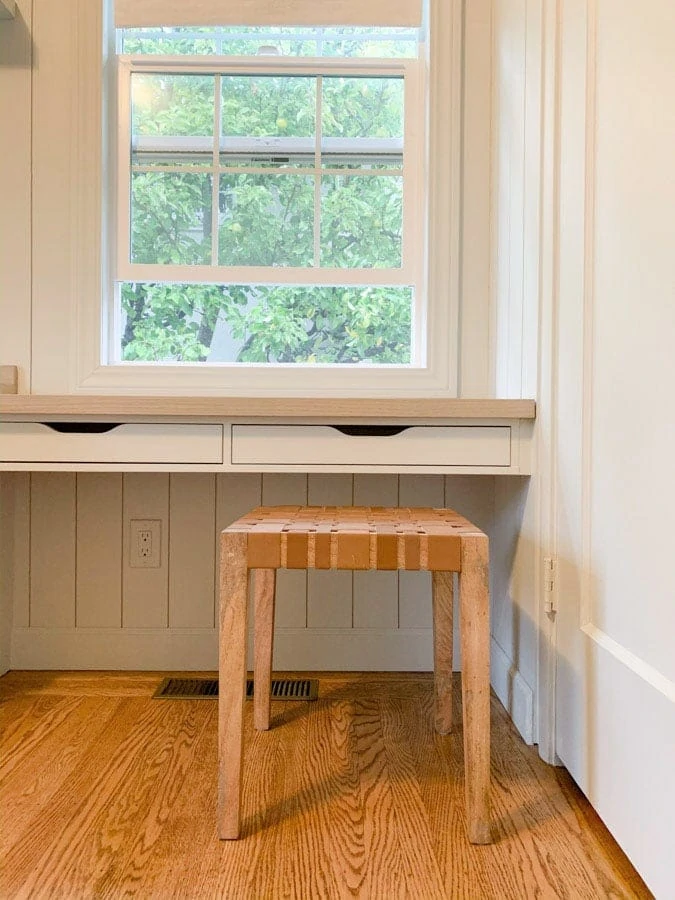
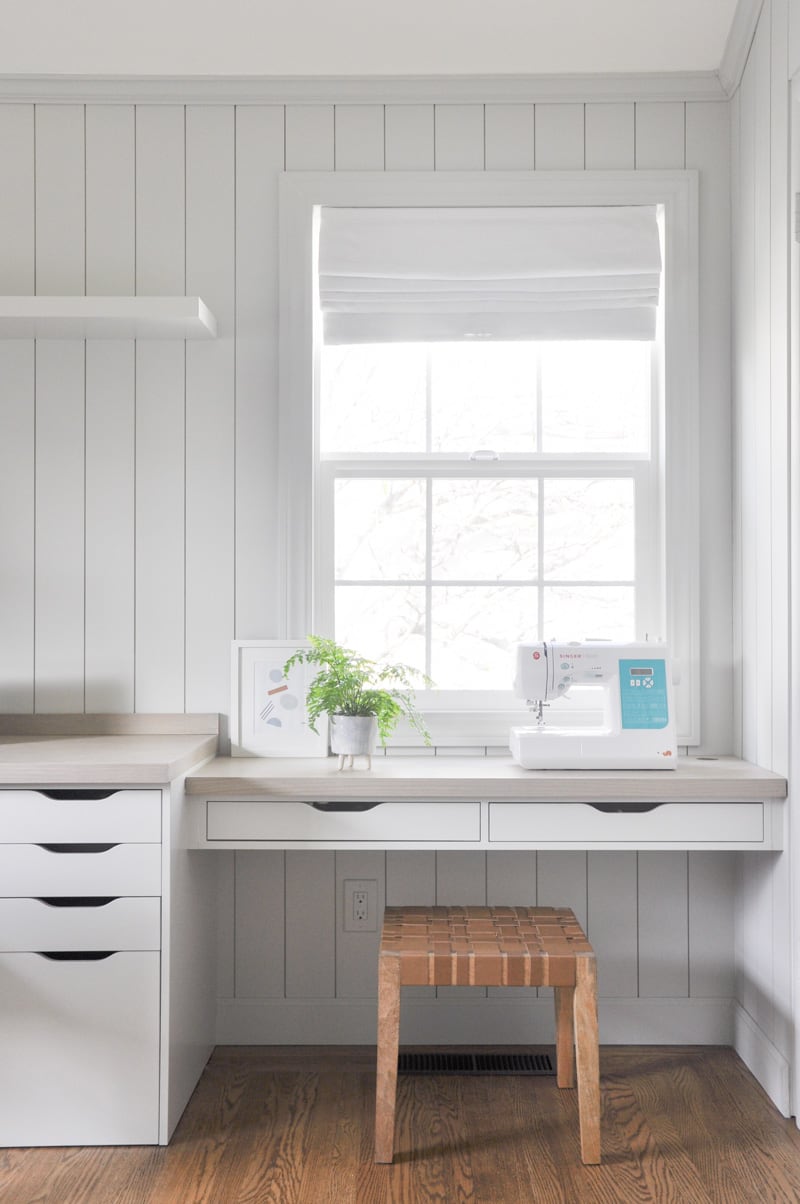
So instead, I made the chair shorter. I hunted down a leather strap stool for only $10 from Facebook Marketplace and cut all four legs 3 inch shorter.
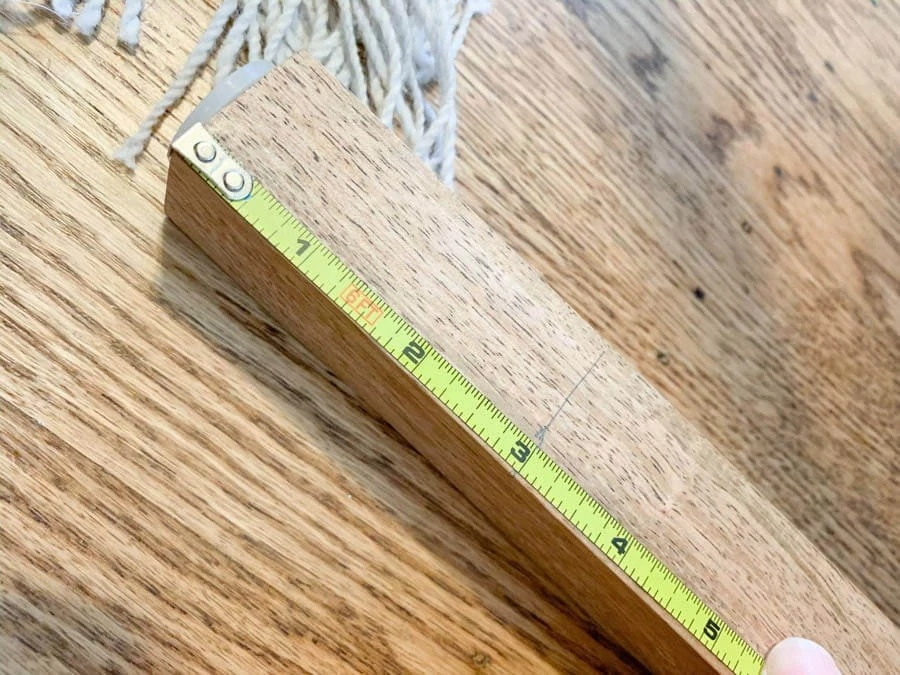
I picked the stool for its streamlined leg shape, so no one can tell I have cut it short.
This is a photo I took before I trimmed the legs that you can see there wasn’t not enough room between the stool and drawers.
And this is after I trimmed the legs and I can sit comfortably in this sewing nook:
Ikea Alex hack summary
IKEA Alex Desk Hack is a creative and budget-friendly way to DIY functional and stylish workspace with tons of storage. By adding a few simple modifications, such as a custom tabletop, a nice paint color, you can elevate the look and feel and make a built-in long desk with drawers.
Additionally, this DIY built-in desk’s clean design make it a popular choice for those who need a versatile and practical workspace. I truly think this IKEA Alex Drawer Hack is an excellent DIY project that can help you create a personalized and unique workspace without breaking the bank.
Thanks for following all the way to the end of the post! I hope you find some ideas and tricks from this Ikea hack! Actually this tutorial was requested multiple times since I posted a sneak peek on my Instagram page so here you go 🙂
More DIY Ikea Hacks
DIY IKEA Banquette Seating Built-in | IKEA Havsta Hack
Home Office Closet Makeover with Ikea Trofast Hack
DIY Window Seat with Ikea Nordli Drawers
Pin it for later
Where did you get the gray chairs?
I’m off to Ikea today to buy the materials to do this very same desk in our basement office. I’ll try to update when we are done! Thanks for the great tutorial!
This is by far the BEST hack tutorial I’ve ever read, and your design is so simple, yet super chic and exactly what I’m trying to achieve myself!!
But I have just one, slightly strange question – How far is it from the bottom of your window to the floor, including the window trim?
I’m so flattered Victoria! The window is probably ~32in from the floor.
HI! Love this tutorial, thank you! For the filler strips you painted, was the moonshine pretty close to the actual Alex color? It looks like it in the photos, but I wanted to double check! Our walls are Chantilly lace in the area I want to replicate this for. Any thoughts would be appreciated!
I absolutely love this idea and attempted to replicate it for our new apartment but we don’t have all the tools so Home Depot cut the pieces for us (and they’re a but crooked haha). That said, ironing the siding made all the difference! I never heard of that before.
My question would be which stain do you recommend that would match yours the closes (without buying 3 different ones and mixing them)?
I thought I would be ok with just the clear sealer but it does feel a bit too raw.
Hi Kelin,
I really enjoyed seeing what you’ve done!
I’ve been planning to do this for a few years and now that we are ready, we are having trouble sourcing the drawers. Seemingly the Alex file drop draw has been discontinued here in Australia.
Do you have any advice on their Micke or Nordli range? It doesn’t appear to have the same file drop option. In lockdown so unable to visit a store to find out. I have written to them to find out options. Just hope you had some knowledge to share. Thanks in advance
Hi Clare, I personally have not tried to use those units for desk(Altho I used Nordli for window seat). I would encourage you to do some calculations with drawer sizes and see if they can work for you before purchasing them. Good luck with your project!
Awesome idea and design..I love your projects. did you use the same veneer to the top of the plywood sheet(table top) as well?
The top of the plywood came with a think layer of wood so no need to do that.
Hi! I also used the same Alex units with an IKEA butcher block table top. I noticed the weight of the table top is making it difficult to open the bottom filing drawers. Do you have the same experience? I’m wondering if I should put something underneath the Alex units to raise it every so slightly so that opening the bottom drawers won’t scrape the floor. Thank you I’m advance!
Hi kaydee! I don’t have experience with that since my file drawer opens pretty smoothly, it has wheels on the bottom. feel free to try out shimming the bottom and see if the situation gets better. good luck!
Any suggestions for my situation. My bedroom office is thickly carpeted. The filing drawer is heavy and digs into the carpet so much that I can barely open it. I don’t want an ugly piece of that hard plastic people put under desk chairs. I also wish the filing drawer was higher up- it’s so hard to read the files when they’re that low. But the tracks are different- so I can’t just switch the drawer locations. Any thoughts?
yeah that is difficult. I might just choose using the other drawer unit that consists of smaller drawers and lay my files flat instead.
Hi Kelin,
I saw your projects and I liked them a lot.
I want to know which app do you use iniqtially for layout in your area? Before planning materials
Hi Shru, I used SketchUp to build this desk built-in design out before I started DIY.
Did you make any holes in the desk top for computer cords? You did a beautiful job!
I love this and we are using your idea and doing it in my daughter’s room now. Quick question, where did you get the gray and wood chairs? I love the clean look to them. Thanks!
Thanks Rochelle! I got those chairs second hand. I believe their were originally from CB2
This is an amazingly detailed tutorial! Thank you so much! It’s nearly exactly what I want to do in my office, and I am going to use these instructions to do it! One question I have is: how did you attach the countertop to the IKEA Alex drawer units? Or does it just sit on top? Thanks!
Hi Samantha, glad you enjoyed this tutorial. I placed countertop on Alex drawer units, then used a few L brackets to attach the countertop to the wall (in my case the horizontal wood board on the wall that is supporting the countertop weight).
Hi Kelin. I love this desk idea. I was thinking about purchasing desks for my two teenagers, now that they are learning online. This gave me some budget-friendly inspiration. I love the counter-top idea especially. I’ve always been nervous about edge banding plywood and haven’t tried it yet. Your tutorial makes it look easy enough and I might give it a go. I also like how you put two pieces of plywood together to give it a thicker look. Thanks for sharing and I love your ideas & blog.
Omg..!! This looks amazing! This is exactly what my husband needs for his home office. The room is small and we are trying to make it functional and simple. This is such a great project!
Thank you for an inspiration ! Totally doing this !
I’m so happy to hear that Jenny 😀
One thing I forgot to add is: My husband is very tall and he find the pencil drawer part is too low for him, but it is perfect for me. I recommend you test whether his legs will be able to fit comfortably before attaching the pencil drawer 🙂