Home renovation is such an exciting and rewarding experience, but it can also be challenging and stressful. It requires a lot of planning, preparation, and management to ensure that everything goes smoothly and that you can successfully turn your vision to life!
Whether you are renovating a single room or the whole house, or adding an extension to your home, you need to have a clear vision, a realistic budget, and a reliable team of contractors, just like a checklist.
In this post, I will share with you some tips and steps on how to plan and manage your home remodel step by step. With this home renovation checklist, you can follow each step and progress forward into a successful home renovation!
Intro to A Step by Step Guide to Plan & Manage Your Home Renovation

Renovating your home can be a great way to improve your living space, increase your property value, and express your personal style(my favorite part!). However, it can also be a daunting task that involves a lot of decisions, coordination, and problem-solving.
It can be extra hard for new homeowners or anyone who’s new to renovating their house. That’s why it’s beneficial to follow a checklist to plan and prepare before you start any work.
Planning and preparation can help you avoid common pitfalls and mistakes that can cost you time, money, and frustration. It can also help you set realistic goals and expectations for your project. Things won’t be perfect, but it will be a 1000% improvement from where you were!
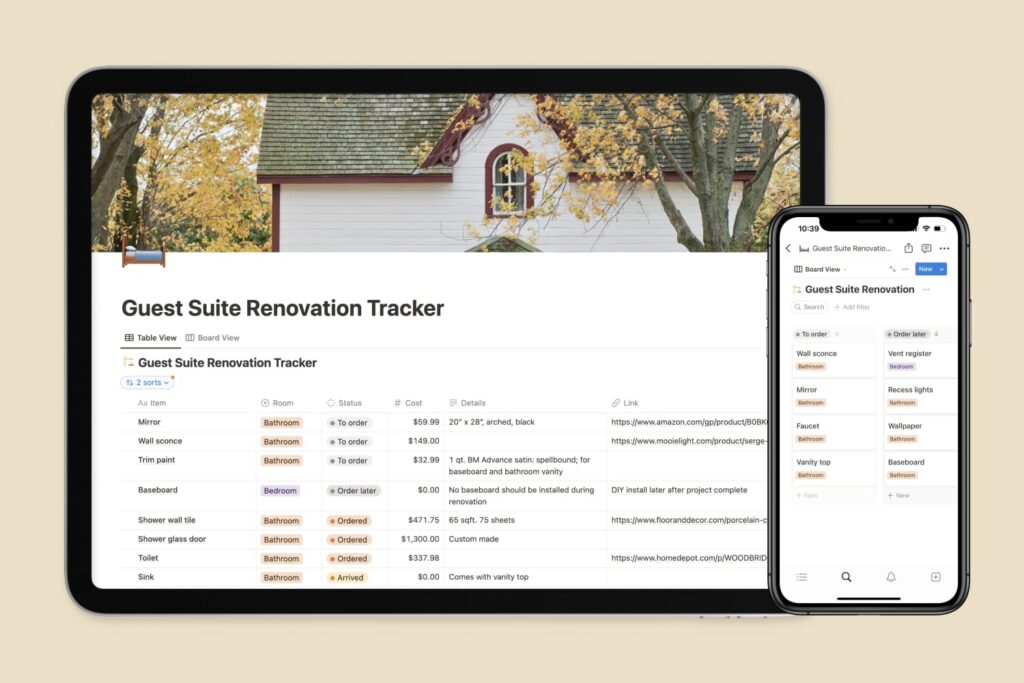
If you need help to manage your renovation, check out my home renovation tracker. It’s a simple and effective tool that can help you organize your tasks, budget, materials, contractors, and schedule in one place. With this home renovation tracker, you can have peace of mind throughout the entire journey.
Now let’s dive into the step-by-step home renovation checklist ordered chronologically.
Assessing your needs and budget
The first step in planning your home renovation project is to assess your needs and budget. You should already know which room or area you are renovating. It can be a single room, the whole house, or adding an addition to your home to extend its footprint.
The first thing to kick start a home renovation is to plan the scope of work for your project. This includes creating a rough floor plan, listing the must-haves and nice-to-haves for each room, and estimating the overall costs.
At this stage everything is a rough idea. Without a detailed design plan and contractor quote, it is impossible to get an accurate estimation of the total cost. However, it is super helpful to have a ballpark budget set aside so you know the scope of the project you can afford which will inform how much change you can make.
For example, since My husband and I moved into our small 1940s house, we always wanted to extend our house to at least three bedrooms. We knew it would at least cost 200k to achieve that, so we waited and saved money along the way.
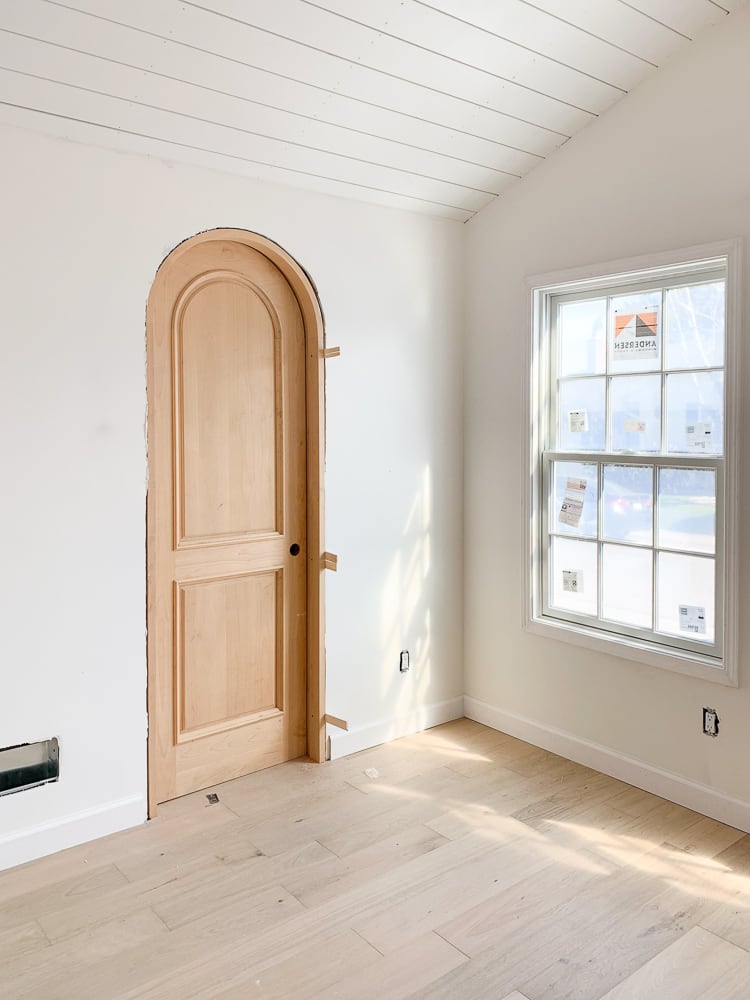
Create a floor plan and list of tasks
At this stage you’ll need a more detailed floor plan and list of tasks for each room. This will help you visualize the layout and functionality of your renovated space and communicate your ideas and expectations to your contractors to get a more accurate estimate in later steps.
First, gather ideas and inspiration for your project. You can browse through home design websites and visual focused social media platforms such Instagram and Pinterest.
Pinterest is my go-to platform for home renovation inspirations. I often curate dedicated Pinterest boards to collect renovation ideas for each specific project plus any potential products to purchase later.
After seeing all the inspirations and getting a more solid idea on what you want to achieve from this renovation, such as layout, furniture placement, and functionalities. Now it’s time to develop a more comprehensive floor plan and scope of work.
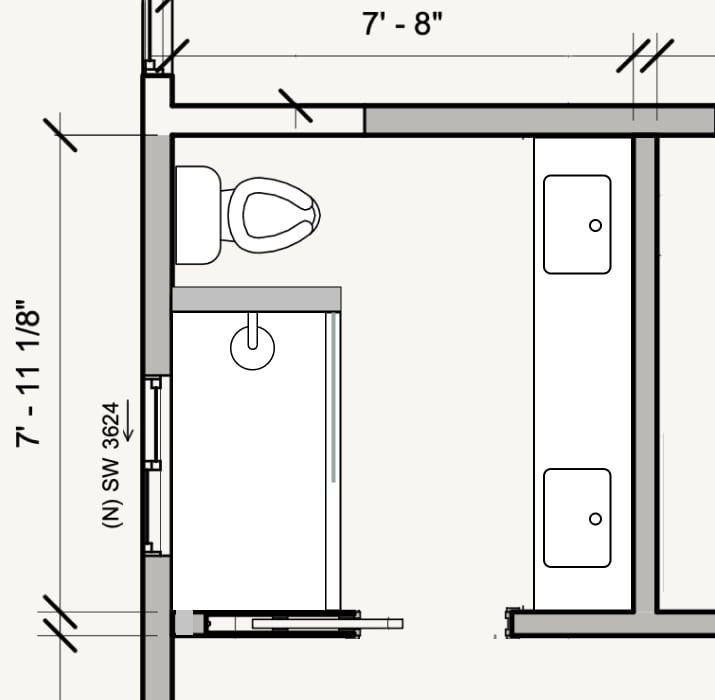
This step is crucial because it allows contractors to provide accurate bids for your project. As you create your scope of work, clearly distinguish between your renovation “must-haves” and the “nice-to-haves”, and even have your contractors bid the nice-to-haves separately.
One helpful tip at this stage is to separate the functional aspects of your project from the visual style. It’s natural to be excited about aesthetics, but you need to make sure that your contractor understands the functional requirements first, as you can always finalize the visual style later right before purchasing materials.
You may want to hire a designer or an architect to help you with this step if you need professional help or if your project involves structural changes or building out a home additions.
I prefer to design my home myself, as it gives me more creative control plus I can iterate a lot more which makes a better design. However if you prefer to hire a designer but are on a tighter budget, there are also virtual design services that tend to be more affordable, such as Havenly.
Download the FREE home renovation checklist
Interior design/detailed Plan

This step is all about the visual design and finishes. The timing of this step in the entire renovation checklist is quite flexible. You can do it after having a floor plan, or after hiring your contractor team and before buying those finishing materials.
Once you have set out a budget, created a floor plan, have have a list of tasks to accomplish in this home renovation, it is time to move to the fun part – finalize the interior design!
This is where you decide on the specific details such as colors palette, wallpapers, tiles, light fixtures, appliances, furniture etc.
As you are designing, visit home improvement stores and showrooms to experience materials in person. If you see something you like, snap photos with your phone so you can refer back to it later easily, or save it to your dedicated Pinterest boards!
You should also finalize the floor plan for each room and create elevation plans if needed. Elevation plans show the vertical dimensions of walls such as height, widths etc. It is something super helpful if you are designing a kitchen so you can show both upper and lower cabinets.

I also like to create an electrical plan to map out where I want my lights, power outlets, and light switches to groove. This is an optional step, and if you don’t have anything, your builders will just go with the default location, which might not align with what you’ve got in mind.
Take my situation for example: I’m planning to add a Murphy bed in my guest room, so I want to make sure that wall space stays outlet-free. Also I specified a power outlet right under where I plan to place a desk.
Select your renovation team
Now it’s time to build your renovation dream team! For tasks beyond your DIY comfort zone, hiring seasoned contractors is the name of the game. But first, decide what you’ll tackle solo and what you’ll delegate and be clear on that with who you’ll hire.
Btw, instead of hiring a general contractor, you could take on the role of general contractor, hiring specialized trades to save around 10-15%. For large projects, I don’t choose this option as it requires doing a ton of coordination with different teams myself.

In terms of finding the right contractors. I often use Yelp and word of mouth for leads. Once you’ve got a list, it’s time to interview. Ask about experience, licenses, insurance, references, timelines, and payment schedule.
This is also the time you share the floor plan and scope of work with the contractors, and they will get back to you with an estimation. I personally really like builders who provide a detailed list of all the work included and how much each item costs!
There’s a huge range of bids depending on the team you hire. For example, a fancy contractor company once bid 50k for my kitchen renovation, whereas another smaller company bid 20k.
If you are interested in moving forward with someone, make sure to verify those references and credentials. If they are licensed contractors, look out for their license number – you can give it a quick check online.
Ask to see pictures of their past work and visit their job site, where you can examine their work in detail and pay attention to the finer aspects. This step is really important in evaluating the builders’ skill and knowledge.
I’ve also hired unlicensed contractors myself as it tends to be cheaper and there are some skilled builders who don’t have a license because they are not native speakers. But make sure to take extra precaution when hiring unlicensed builders.
When you’ve made your choice, finalize the contract and start date. Keep in mind that some contractors include raw materials in their bid, while others only include labor cost and will bill for raw materials separately. It’s a helpful tidbit for comparing costs.
Pulling the permit
When you’re ready to kickstart your renovation project, you may need to apply for a building permit. You can ask your contractor or check with your local authorities to learn which permits are essential for your project.
You’ll come across what’s often known as a “homeowner’s permit,” which plays an important role in ensuring your contractor adheres to city regulations, guaranteeing the structural integrity, waterproofing, and overall safety of your endeavor.
While some contractors might handle the permit process on your behalf – commonly referred to as a “contractor’s permit” – it’s a smart move to verify this beforehand.
For smaller-scale renovations, a permit might not be mandatory. If you need to get a clear understanding of the rules, consider visiting your city’s building department website or consult your builders.
Gathering supplies and materials

For this step, you’ll want to compile a list of required materials and supplies. Focus on items you need to purchase, such as finishes and furniture, while your contractor will estimate and buy any necessary raw materials during the construction phase.
In the case of large orders, your contractor might ask you to compare prices and quality from different suppliers. For instance, when I purchased roughly $4000 worth of wood for a home addition, I took the time to evaluate various stores and opted for the more budget-friendly option which saved me over $1000. Don’t hesitate to ask for discounts for larger orders, as this can lead to a big saving!
To prevent project delays, I recommend placing orders for materials in advance. This is crucial for items like windows, doors, and cabinets, which may have longer lead times. During our home addition project, we had to wait for new windows for over three months, which blocked the project from moving forward.
Preparing for the renovation
Now we are coming to the preparation step of a home renovation.
Start by clearing out any furniture, appliances, decorations, or personal belongings that might be in the way or at risk of getting damaged during the renovation.
For larger projects that involve outdoor work, you might want to consider renting a fence. This provides a designated construction area, enhancing safety and minimizing disruption. Note this is often used in construction that is in the front yard.
Another important decision to make is whether you’ll stay in the house during the renovation or temporarily move out. Renting a place to live while you are updating your house will definitely be more costly, however if you are redoing the entire floor there are no other options.
If you choose to live in the house during the renovation, take steps to protect your living areas. Cover surfaces that are vulnerable to dust, debris, paint splatters, or scratches with plastic sheets or drop cloths. Your builder will likely add plastic tarps to separate the construction zone and minimize the spread of mess.
Managing your renovation
At this phase, you need to keep track of the progress and communicate with your contractors regularly to ensure that everything is going according to your expectations.
Try to visit the site often to inspect the quality of the work and make sure everything is going according to plan. You can also take photos or videos of the site to document the changes and compare them with the original design.
Give them feedback whenever you have any questions or concerns. Make sure to do it timely, otherwise they will move on to the next step and things become harder to change later. You can also use a home renovation planner & tracker to keep track of the tasks, deadlines, costs, and materials involved in your project, which helps you manage your home remodel with ease.

Be flexible and prepared for any delays or changes that might occur due to weather conditions, material availability, or other factors. Sometimes things don’t go as planned, and you need to adjust your schedule or budget accordingly. But don’t panic or get frustrated, you’ll find solutions and alternatives. And believe me, this happens to everyone.
It’s also super helpful to understand the order of renovation, that way you know what to expect and will have a smooth communication with your builders. I recommend the book <How to Build a House> by Habitat for Humanity, which provides step-by-step instructions on how to build a house from scratch.
Compared to a few other renovation books I’ve read, this book is easier to read and has tons of diagrams and pictures. Great for homeowners to gain a basic understanding of home renovation!
Btw, depends on the size of the renovation, you might need to request for several individual inspections before the final, e.g. electrical inspection during framing, insulation inspection before drywall, etc. Communicate with the contractor and see what they recommend.
In what order should you renovate a house?
It is super helpful to understand the order of home renovation, so you can manage your builder more effectively. Although each project is different, the order of renovating a house typically follows these steps:
- Demo: Remove the old and damaged parts of your home.
- Framing: Build the structure and shape of your new home.
- Windows and Doors: Install windows and doors
- Plumbing and electrical: Install or upgrade the water and power systems in your home.
- Insulation: Add insulation to sound and heat proof the walls
- Flooring: Lay down the material that covers your floor.
- Drywall: Cover the framing with smooth and flat surfaces.
- Cabinets and countertops: Install the storage and work areas in your kitchen and bathroom
- Hardware: Install all the hardwares such as shower head, faucet, etc.
- Trim work: Install window and door trims, crown molding and baseboards.
- Painting and finishing: Adding all the finishing details to your home and clean up the site.
Download the FREE home renovation checklist
Final walk-through and completion
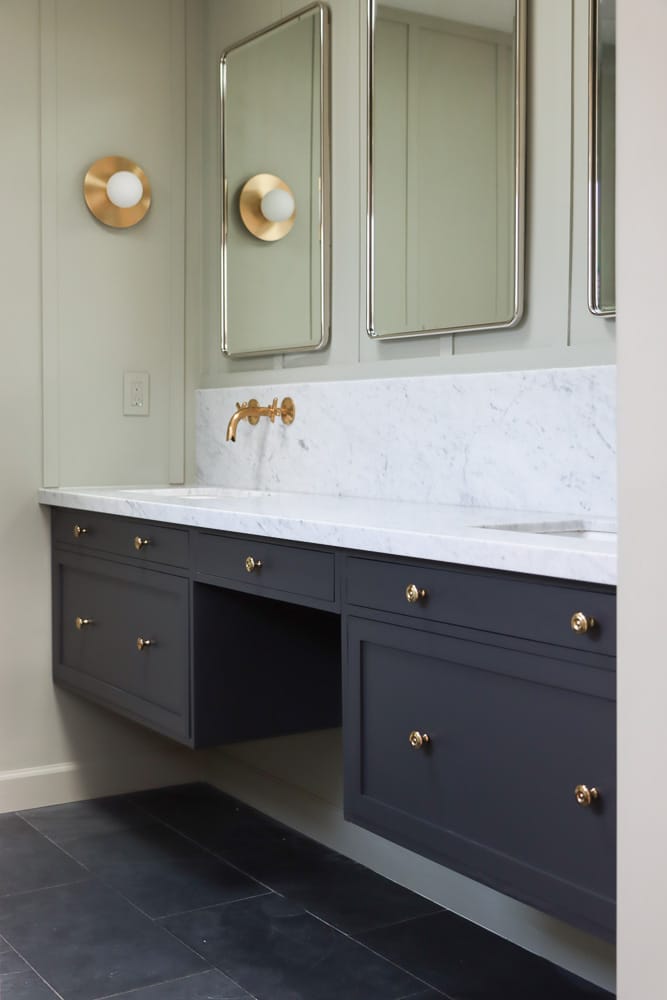
As your home renovation project nears its finish line, take these essential steps for a smooth conclusion:
Conduct a thorough final inspection to ensure that all the work has been completed to your satisfaction and meets the agreed-upon standards and specifications. Bring your renovation plan with you to double check.
Alongside the final inspection, it’s time to finalize payments and paperwork. Coordinate with your contractors and trades to settle all outstanding payments. Keep in mind that for larger projects, payment may be divided into phases throughout the renovation process rather than in one lump sum at the end.
Gather all necessary paperwork, warranties, and receipts from contractors and suppliers. These documents will serve as valuable references for the future, helping you keep track of the work that was done and any guarantees provided for materials or labor.
As the last step before fully enjoying your newly renovated space, make sure to address any remaining mess left behind by the builders. A clean and tidy environment really signifies the completion of the project!
Settling into your renovated home
Now the time has come and you are finally ready to move in.
First of all, I highly recommend you to start ventilating the area to allow any lingering odors to dissipate and give paint or varnish time to cure. I usually wait for at least a week.
You may install any additional fixtures or appliances that are not included in the renovation work or simply arrived too late. For example, I prefer to take my time when selecting light fixtures, and they are quite easy to install myself.
The completion of the renovation also means you can start to decorate! Enhance your rooms with furniture, rugs, curtains, pillows, artwork, plants, or other accessories that reflect your style and personality.
It’s also a great opportunity to father your family and friends for a housewarming party or a cozy dinner to proudly showcase your newly updated home. This could be the most clean and tiny day of your home, so seize the opportunity to showcase!
Home renovation step by step summary
So here you have it, a step-by-step checklist to help you understand all the stages throughout the entire journey of renovating a house. Here’s a quick summary of each steps:
- Assess your needs, budget, and plan your scope of work.
- Gather inspiration and create a detailed plan for your room.
- Hire a reliable team, and secure permits if needed.
- Order materials, prep your space, and manage your renovation progress, maybe using a home renovation tracker to make it easier.
- Homeowner’s inspections and schedule for city inspection if pulling a permit.
I hope this comprehensive home renovation checklist will help you have a seamless and stress-free renovation from start to finish!
More home renovation ideas
Home office renovation floor plan
Pin it for later

Leave a Reply