A drastic transformation with within 2 hours! Follow this simple and easy dresser makeover tutorial to learn how to transform a drab looking furniture to an Anthropologie inspired piece.
The ultimate solution to “no entryway” problem
Thrifting an antique dresser
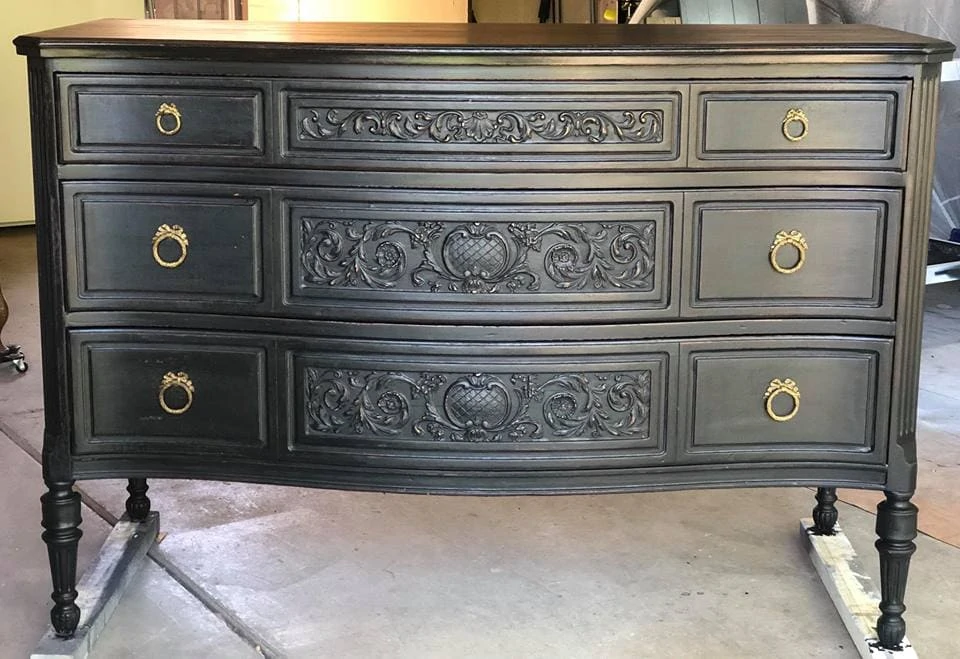
Finding a console table should be pretty straight forward, except I got side tracked and fell in love with an antique dresser on Facebook Marketplace, which btw is my go-to source for thrifting. It was a very decorative wood carved dresser recently painted black by the seller. I was particularly in love with the brass ring pulls. Somehow this pice of furniture reminds me of Anthropologie.
It was not cheap by my standard – $350 after some bargaining. I think the high price is because it was recently refinished by the seller. I would prefer it was left alone so I could get it at a cheaper price. But when you are in love, you are in love. I persuaded my husband and we drove two hour one way to load this baby on our car.
Since then, we have had this dresser as our console table for quite several months. However, I have always been questioning the paint color. Well, solid black furniture is quite a cool and I love to incorporate black into my room, but a big slab of black in my under 1000 sqft house? Not so much.
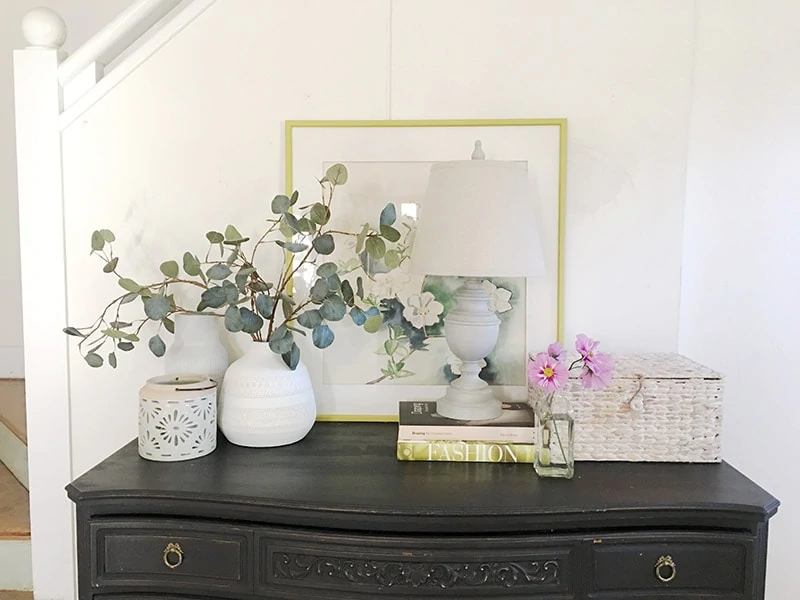
You can see that this dresser looks very heavy and is hard to style with my existing decors.
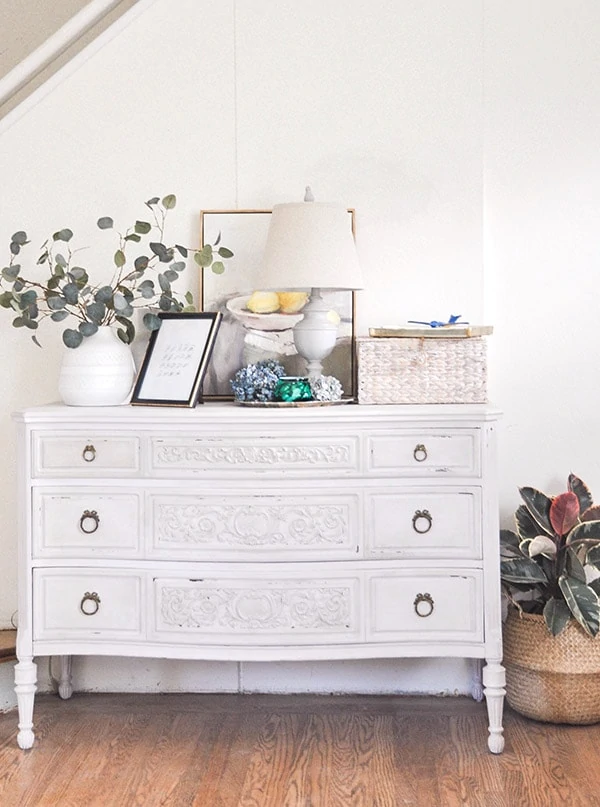
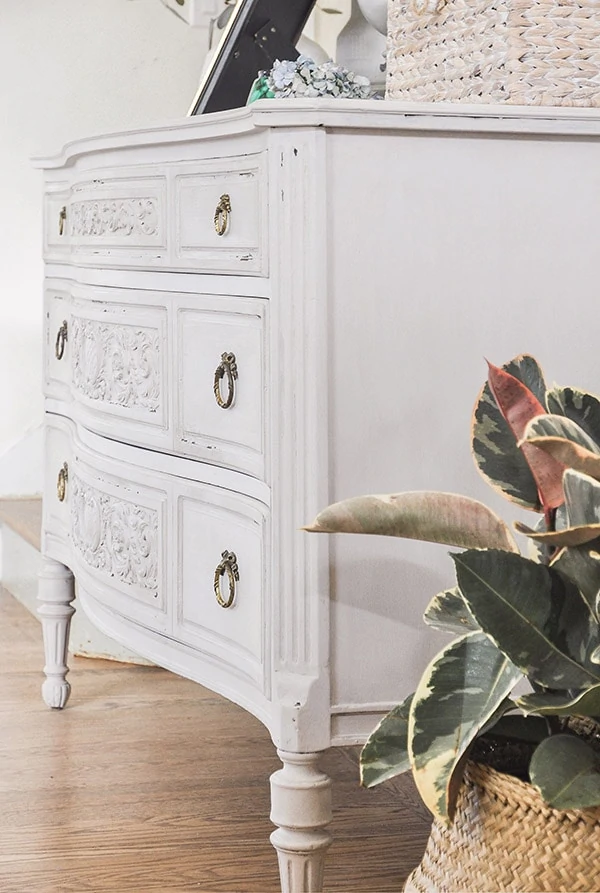
If you have ever refinished any new furniture or already-refinished furniture, you know that guilt you would feel… I felt I would ruin the pervious refinisher’s master piece and felt indecisive throughout those months. After secretly imagining painting it white for a long time, I finally took the leap! And I am so glad I did. Everybody who sees the new color was so impressed by the transformation. I know it sounds very cliche, but a lot of times, a can of paint is the magic wand to any problem. So next time when you argue with your husband, try brush a coat of paint on him!
The importance of testing your paint and wax
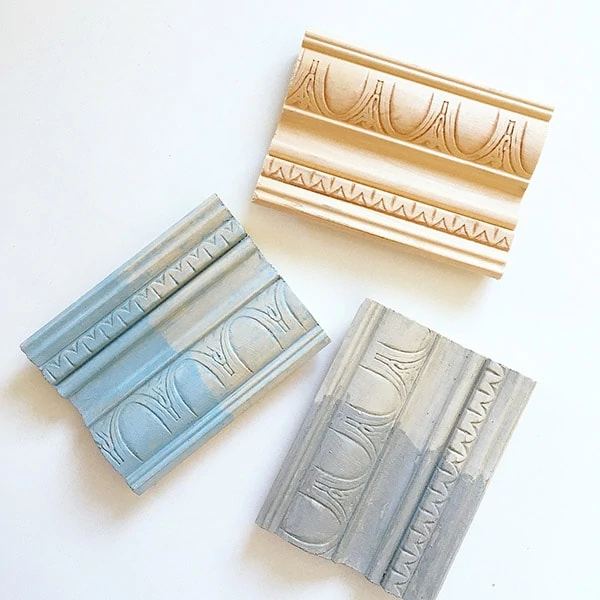
If you are not sure what the paint will look like when applied (for example, it is your first time buying this color of paint), it is a good idea to test them on some sample pieces. I usually buy a few feet long decorative crown molding from my local Home Depot and cut them into 4″ wide pieces to serve as samples. It is great for future projects too as you can reference what certain paint looks like.
Not only I am able to see the paint color when applied, but also I can test out color combinations – it is pretty cool to apply 2 layers of paint with different colors and distress to show some color beneath. On top of that, I also like to test out dark and white wax to see how it shows on the crevices.
Tools you’ll need for antique dresser makeover
- Chalk paint.
- Paint Brush. I didn’t use a roller as there’s a lot of crevices on this furniture, plus I always appreciate the brush stroke on my vintage furnitures.
- Light Antique wax
- Waxing brush
- (optional) Dust of Ages by Amy Howard at Home
- Rags or paper towel to wipe off excess paint or wax
- Some sort of drop cloth to protect your floor surface
Antique dresser makeover steps
- Cleaning. Wipe off dust and grease on the surface. Remove the hardwares (drawer pulls)
- Paint two coats with the paint of your choice. I used Artminds chalk paint in oyster color. Honestly any paint would do. I chose chalk paint because it’s a lot more affordable for small projects and is VOC free
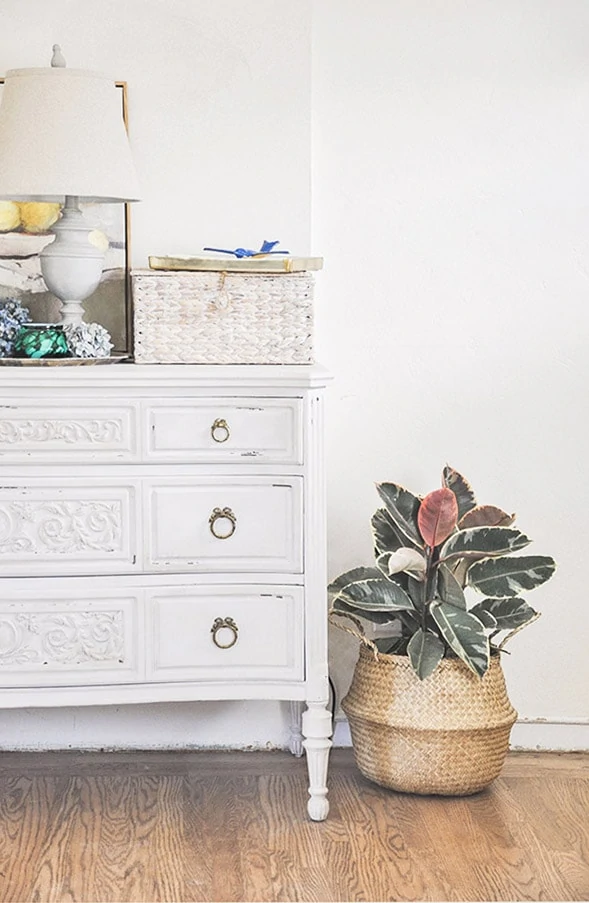
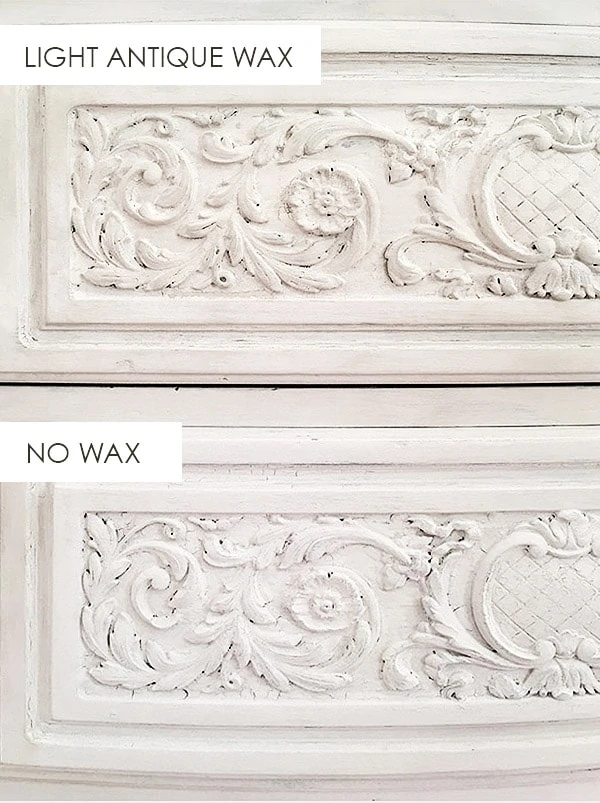
- Once the paint drys, apply light antique wax to all the surface. I used a circular motion with my wax brush to get into all the corners, a rounded brush works better than a flat brush in this case. Once you are done applying the light antique wax, you’ll see an immediate difference as the carvings pops a lot more. (see photo below)
- This is optional, but I love to use Dust of Ages to emphasize the carvings. Let it sit and use a flat brush to press it in a little bit, then dust it off and polish it with a rag. What it does is to add dark gray to all the crevices you have applied on. I didn’t add too much, just a little bit on the drawer fonts to bring out the details.
- You are essentially done! How easy it is! Without the waiting time for the paint to dry, this project took me less than two hours of labor. But the transformation is so impactful.
Other furniture makeover projects
Nightstand Makeover | How to Update an Old-looking Furniture
How To Line Drawer With Contact Paper (Video) | Nightstand Drawer Update Part 1

Leave a Reply