Nightstand Makeover | How to Update an Old-looking Furniture
It doesn’t have to be a nightstand: with less than $10 and two hours, you can transfer any old-looking furniture into something pinterest worthy!
Finding a pair of affordable nightstands to refinish
Makeover a pair of nightstands can be very easy. All you need is some old nightstand you’ve found in a thrift store and a can of chalk paint! The whole refinishing process took me less than 2 hours.
As a designer by trade, our not-matching nightstand in our past rental place was driving me crazy. After we bought our first house, I know I want to have a nice bedroom with matching nightstands. But then the problem came: all the nightstands I found at online marketplaces are very expensive. Most of them are around $500 each, some are even $1000 each. Ouch! As much as I love pretty and functional nightstand, I don’t want to spend over a thousand dollars on them. My bed is only $700 from Pottery Barn (I scored it at half of the price as floor sample and with an additional 20% off). You can read the story here.
I have watched tons of old furniture refinishing tutorials on youtube and has been eager to try it for quite a long time. So after scoring a pair of matching nightstand on Facebook marketplace, I was ready to give them a makeover!
Using chalk paint to transform old looking nightstand
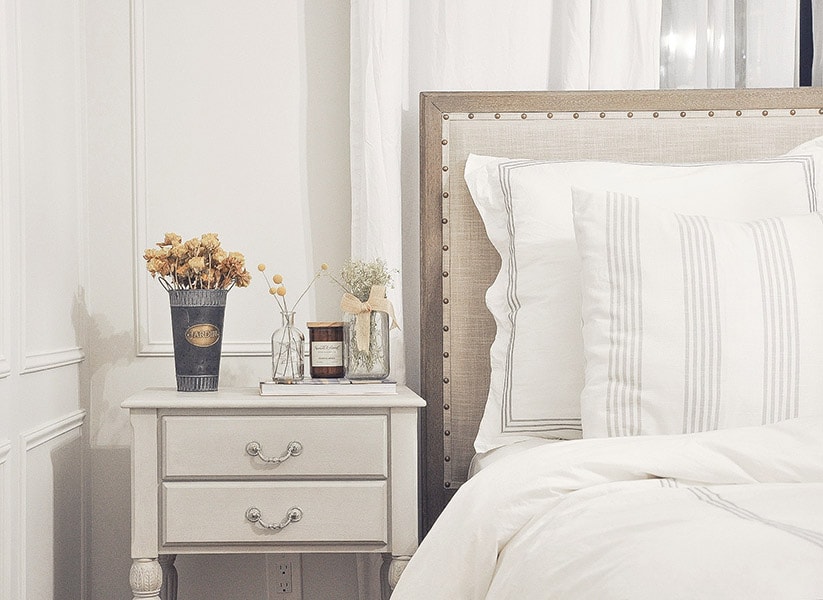
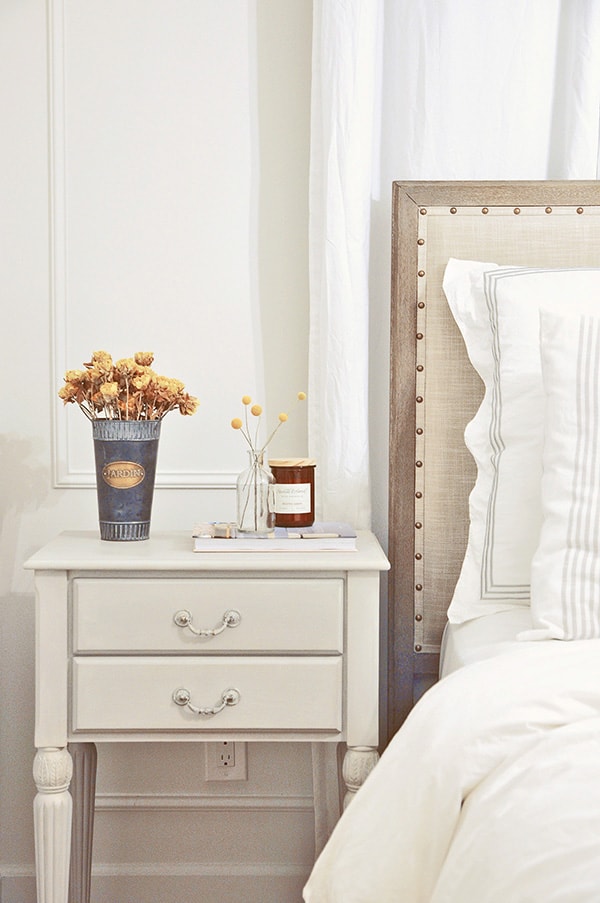
Based on my master bedroom moodboard, I had already planned to paint the nightstands a light gray color. Back then I wasn’t not sure how the bedroom color palette will be coming together, but a light neutral color is always a very safe choice. Besides, most of the nightstands I’m interested online are in a similar tone.
I picked up this chalk paint from my local Michaels store in color Parisian Gray. I ended up using 2 cans in total. With the 40% coupon, I got them around $10 – such a steal!
The before of this nightstand makeover
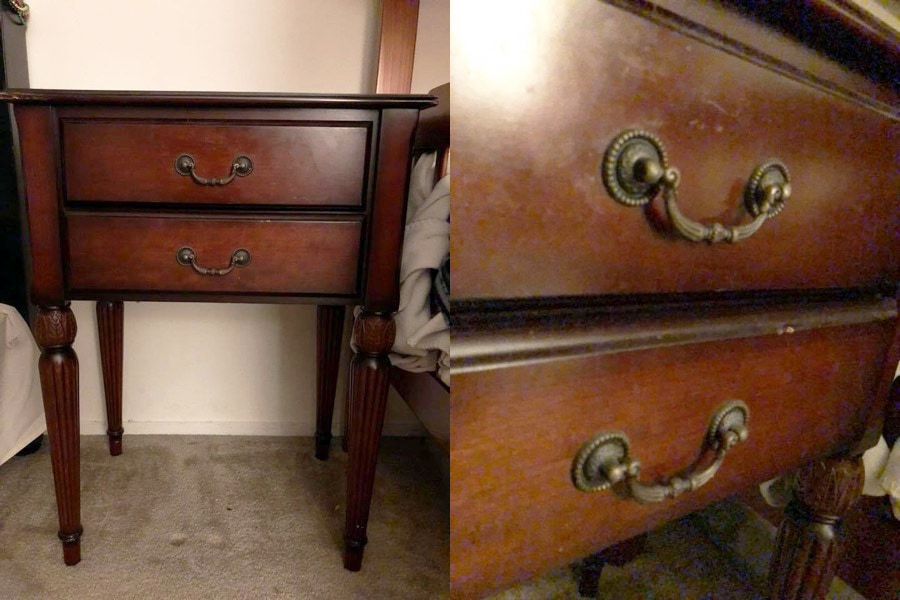
To be honest, the before is pretty old looking: high gloss orange red wood tone – not my favorite. I didn’t remember to take a photo before the makeover, so here’s the photo from the seller.
Nightstand makeover Instructions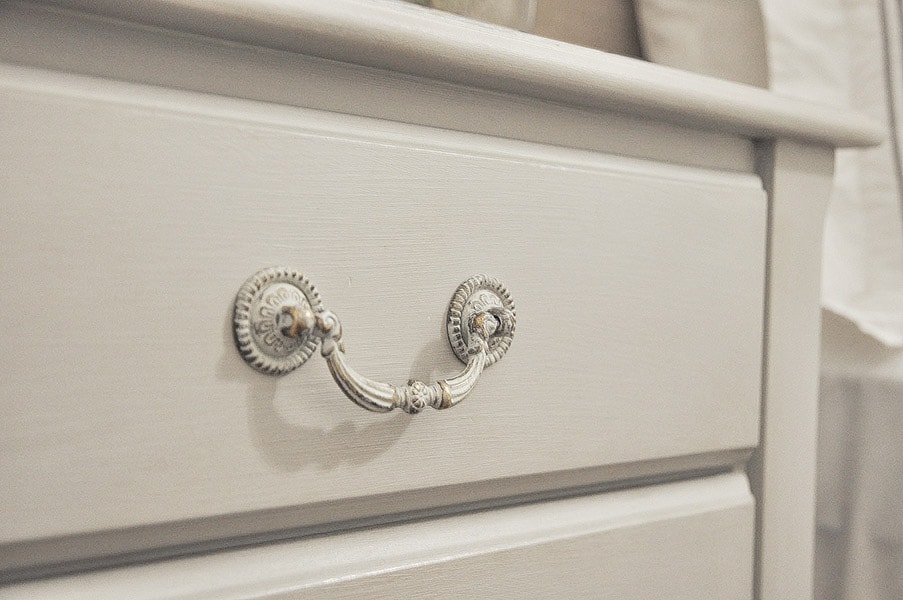
- Wipe them clean and sand slightly on the surface. The ones I got had a very glossy poly on top of the wood. So sanding it slightly gives me peace in mind in terms making sure paint would stick on top. Be sure to remove the hardware, it will make your painting job a lot easier.
- Paint the nightstand and its drawers using chalk paint. I painted 2 coats in total. This step is pretty straight forward. I used a 2-inch brush.
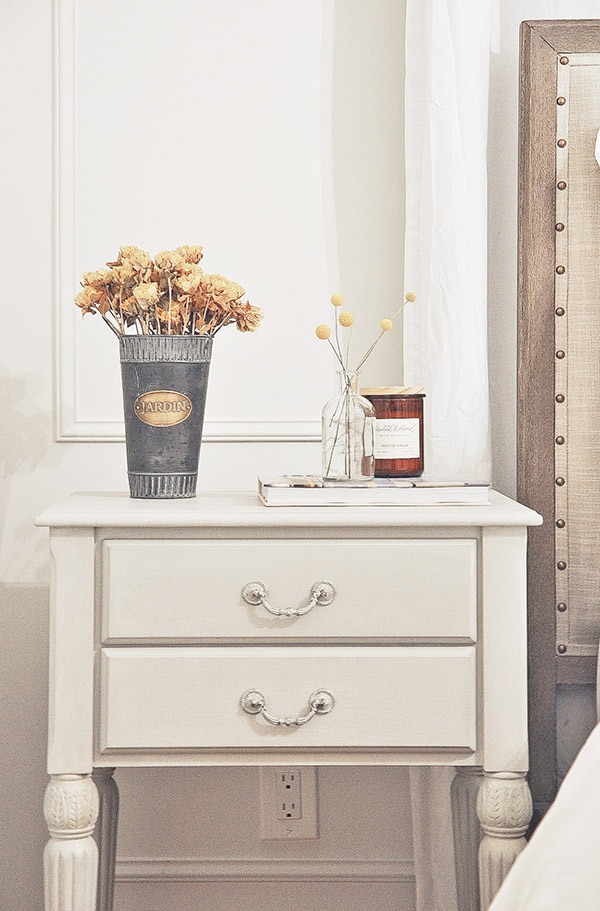
- After the paint drys (it drys within 1 hour!), apply antique wax to give it a slight patina look. The antique wax I used is from Amy Howard At Home. It is almost a clear wax with a tint of yellow. With a coat of antique wax, the nightstand looks more dimensional. Wax is a more natural way to add a protective layer to the furniture. They will dry and cure to form a hardened top layer.
- (optional) After antique wax layer, I applied a layer of white wax in the crevices to bring out the furniture details as well as brush strokes.
- (optional) Once the wax dried, I pained the drawer pulls with the same paint, and using sandpaper to sand the surface slightly to reveal the metal texture underneath, then attach them back to the drawer.

Additional steps you can take to add function and beauty to your nightstand
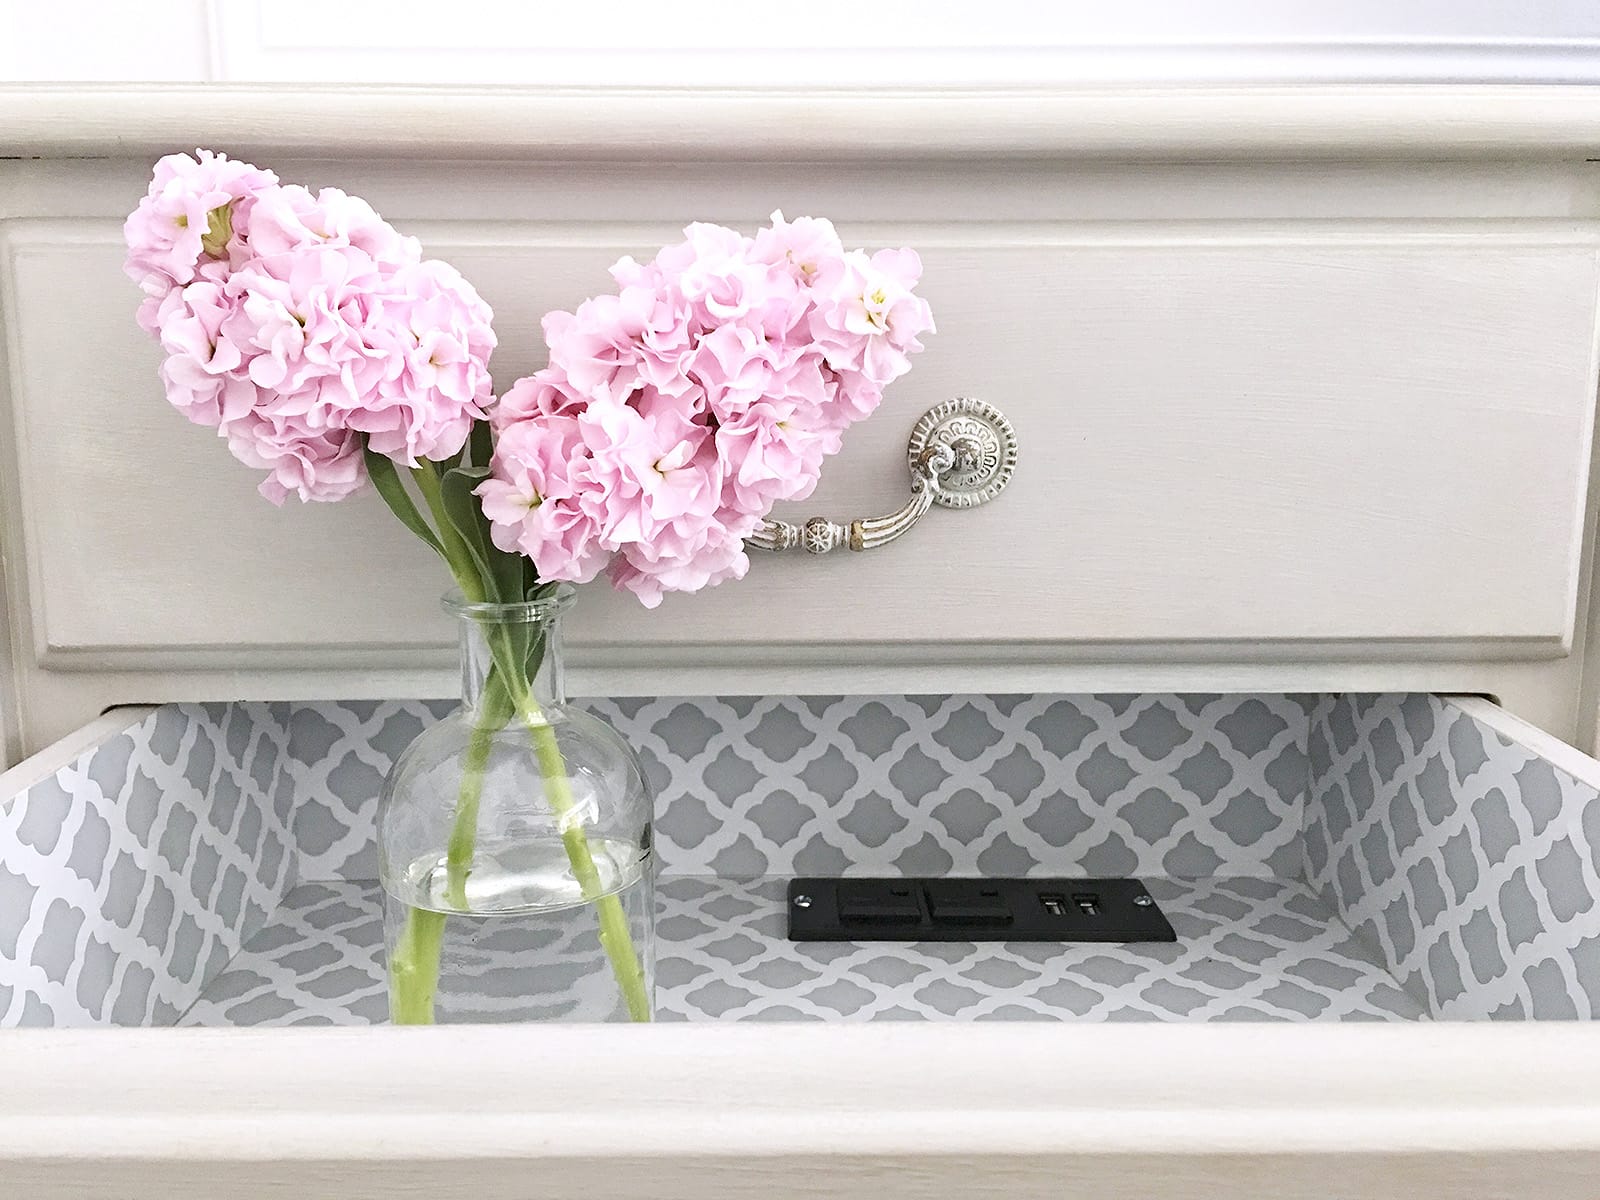
Idea 1: line drawer with pretty wallpaper
You can line each drawer with pretty wallpapers. I used contact paper I got from the pharmacy store to add interest to my drawer. Tutorial can be found here.
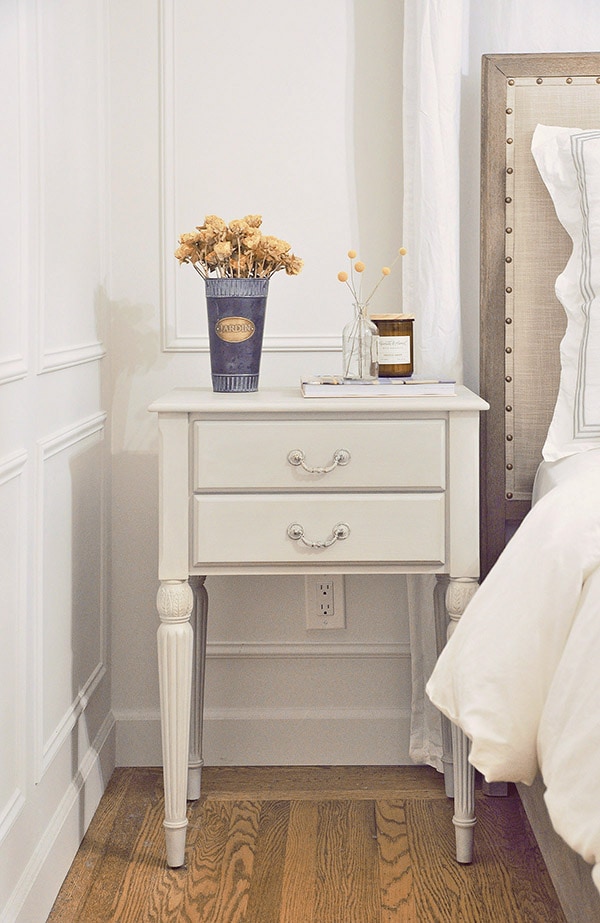
Idea #2: a charging station inside drawer
You can add an in-drawer power outlet to convert the drawer into a charging station for your phone and tablet. Tutorial can be found here.
I hope you enjoy this nightstand makeover tutorial. It is truly a low effort high result kind of project. Spare a couple hours and give an old looking furniture a new look!
How To Line Drawer With Contact Paper (Video) | Nightstand Drawer Update Part 1
Master Bedroom Space Planning and Mood Board
Large Wall Art is Up! Master Bedroom “Half” Tour
Pin it for later

I absolutely loved this makeover! The color choice and technique are inspiring—definitely makes me want to tackle my own old furniture pieces. Thanks for sharing such detailed steps!
I absolutely love this nightstand makeover! The tips you shared are so helpful, and I never thought about using paint in such a creative way. Can’t wait to try this on my own old furniture! Thank you for the inspiration! 🌼
I absolutely love this nightstand makeover! The step-by-step process was really easy to follow, and the final look is just stunning. I never would have thought to use that color, but it adds such a fresh touch. Can’t wait to try this on my own furniture! Thanks for the inspiration!
I absolutely loved this nightstand makeover! The tips you shared are super helpful, and I can’t wait to try the paint technique on my own furniture. The before and after photos are so inspiring! Thanks for the motivation to give my old pieces a fresh new look!
I absolutely love this nightstand makeover! The color choice is perfect, and the tips on sanding and painting were really helpful. I’m inspired to tackle my own old furniture now. Thanks for sharing such a thorough guide!
I absolutely love the transformation you did on the nightstand! The color choice and the hardware update make such a big difference. I’ll definitely be trying this technique on my old furniture. Thanks for the inspiration!
I absolutely love the transformation you did with the nightstand! The color choice is so refreshing and really brings new life to the piece. I can’t wait to try this project myself – thanks for the great tips!
I absolutely loved this nightstand makeover! The colors you chose are so refreshing and really bring the piece back to life. Your step-by-step instructions were super helpful, and I can’t wait to try this on an old piece of furniture I have at home. Thanks for the inspiration!
I absolutely love this nightstand makeover! The tips you shared are so practical and inspiring. I’ve been looking to refresh some of my old furniture, and your step-by-step approach makes it feel doable. The color choice is perfect, and I especially appreciate the idea of adding new hardware for a quick update. Can’t wait to try this out—thank you for the great inspiration!
I absolutely love the transformation you showcased in this post! The color choice and new hardware make such a huge difference. I’m feeling inspired to give my own nightstand a makeover now. Thanks for the fantastic tips!
I absolutely loved this nightstand makeover! The tips on choosing the right paint color and adding new hardware really transformed the piece. Your step-by-step instructions are so easy to follow. I can’t wait to try this on my own furniture! Thank you for the inspiration!