Building a set of double floating vanities with a makeup vanity is a great way to add both function and storage to your bathroom while maintaining a stylish look. Plus it features drawers under the sink vanity and a tip-out tray for maximum storage!
This formula is very customizable for building bathroom vanities when you have a long wall or want to create a more luxe master bedroom experience.
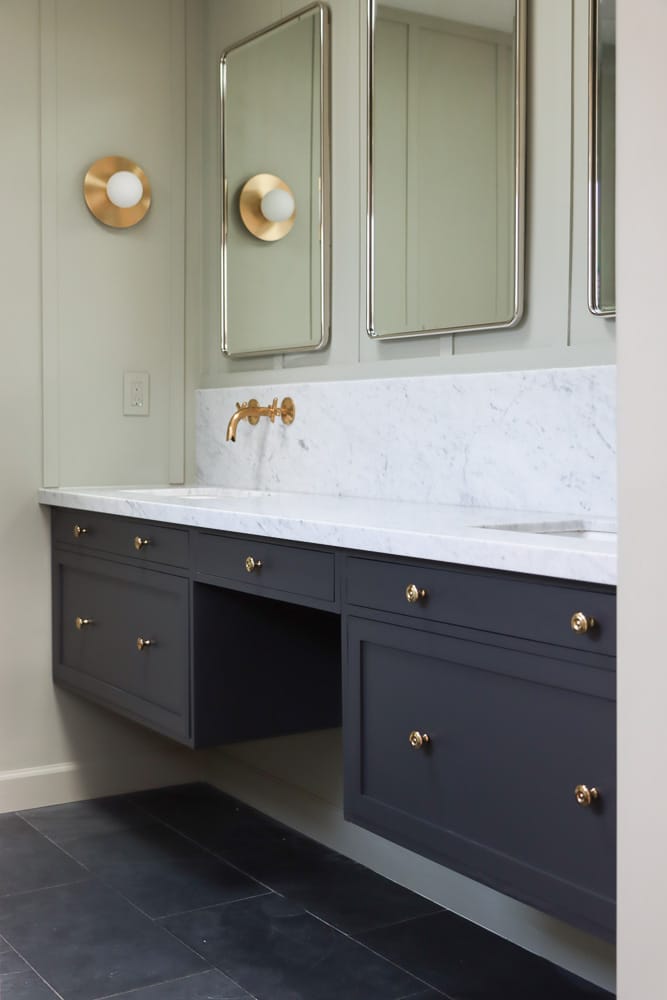
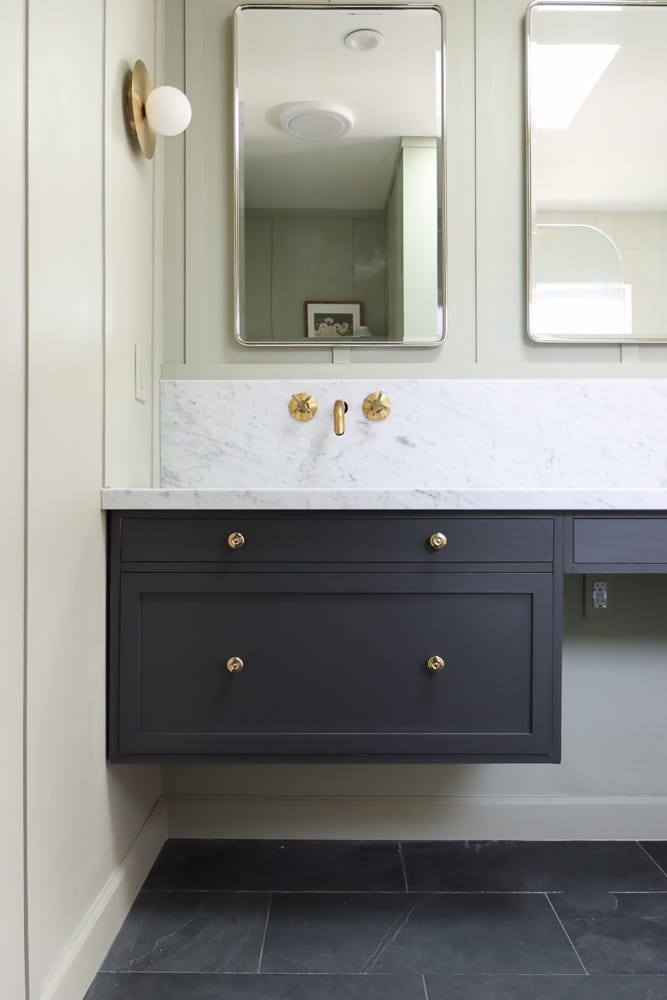
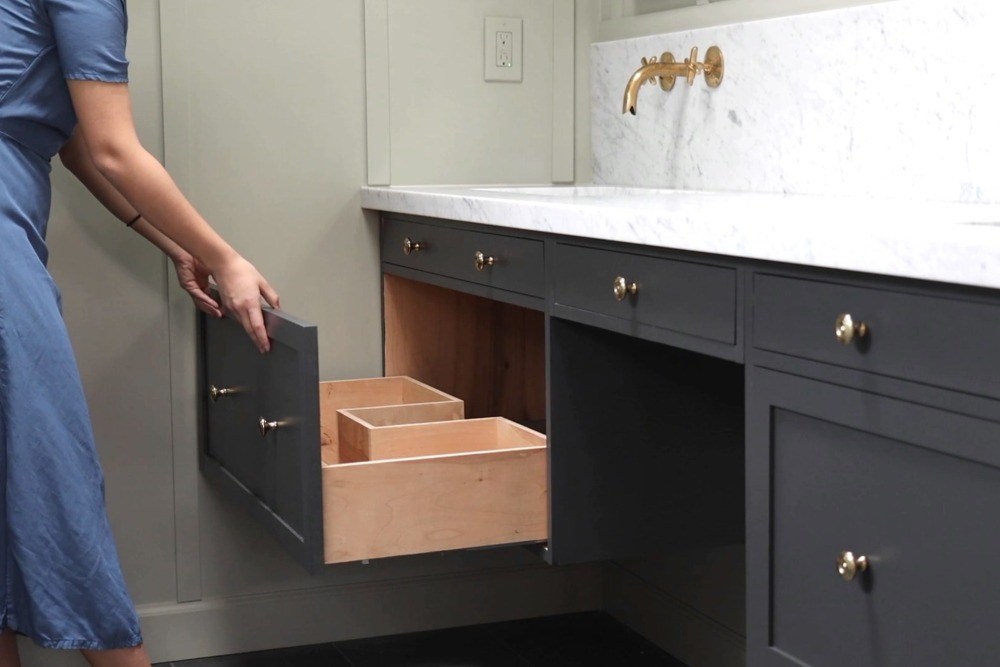
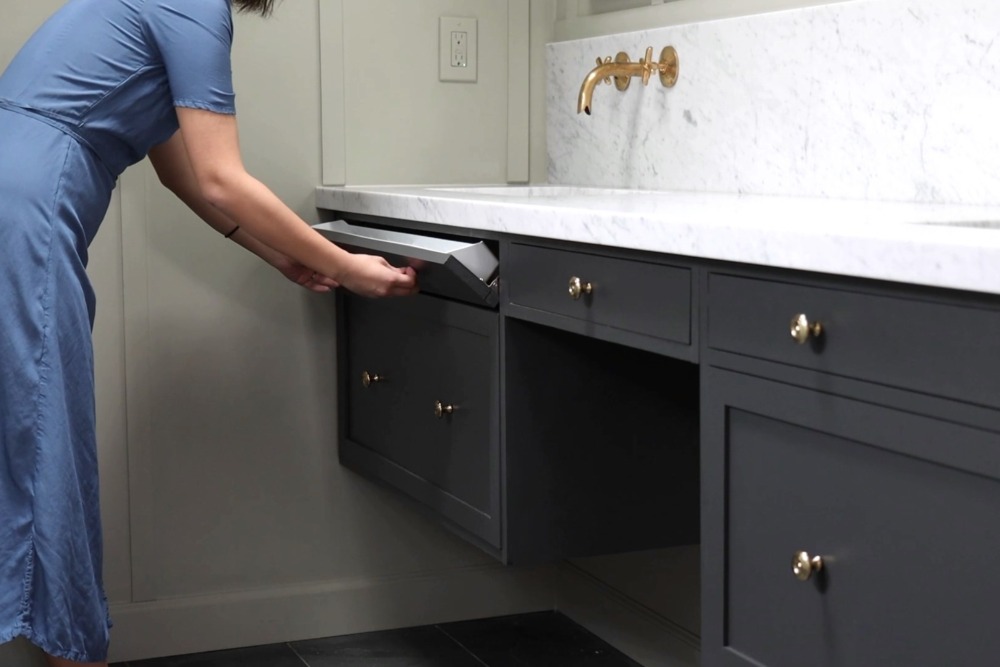
In this DIY project, I’ll be showing you the step-by-step process on how to build a beautiful and functional DIY floating vanity for your bathroom. It features 3 drawers to provide easy access to things, and a pair of tip-out trays on the top for additional storage space for things like toothpaste, makeup brush, etc.
The great thing about this project is that you can customize the size and even opt for doors instead of drawers. I built it to size so it fits wall to wall, and that’s almost impossible to achieve if you are buying premade cabinets.
I’ll be listing all the tools and materials I used so you don’t have to waste your time looking everything up. But you don’t have to use the exact same things I did – use what you already have on hand, or invest in ones you’ll be able to use again in the future!
Sounds good? Let’s get started!
DIY Floating Bathroom Vanity Tools and Materials:
Materials:
Here are all the materials and tools I used for this double vanity build. Note that you don’t need to own everything listed here to complete this project. I recommend you to go through this tutorial before deciding which one you actually need for this DIY floating vanity, and buy quality tools that you’ll be able to use again in the future..
- 1/4″ Purebond plywood
- 1/2″ Purebond plywood
- 3/4″ Purebond birch plywood
- 3/4″ poplar board
- 1/4″ MDF board
- Blum TANDEM under-mount drawer slide kit, side adjustable
- Birch wood veneer
- Wood glue
- Wood putty
- Pocket screws, 1 1/4″
- Brad nails, 3/4″ – 1 1/4″
- Metal plates
- All-purpose primer
- Paint: Benjamin Moore Advance Line in Graphite
Tools:
- Table saw
- Miter saw
- Jigsaw
- Edge banding trimmer
- Miter corner clamp
- Pocket Hole clamp
- 90 degree squares
- Picture frame clamp
- Self-centering drill bit
DIY Floating Double Vanity Design
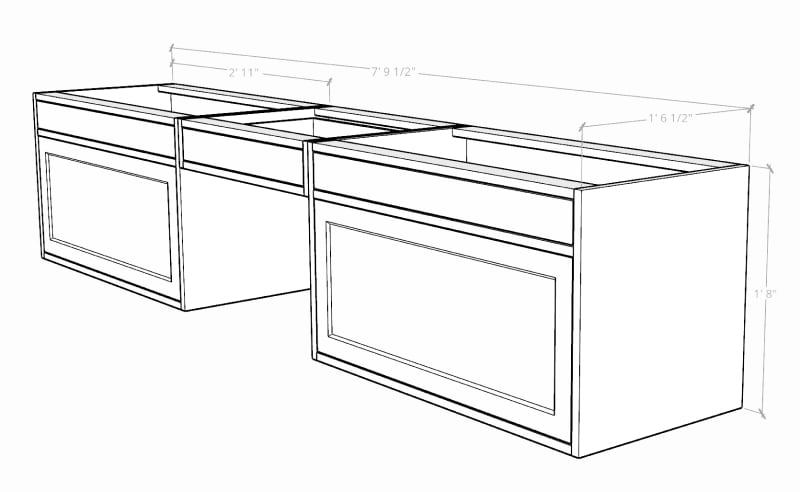
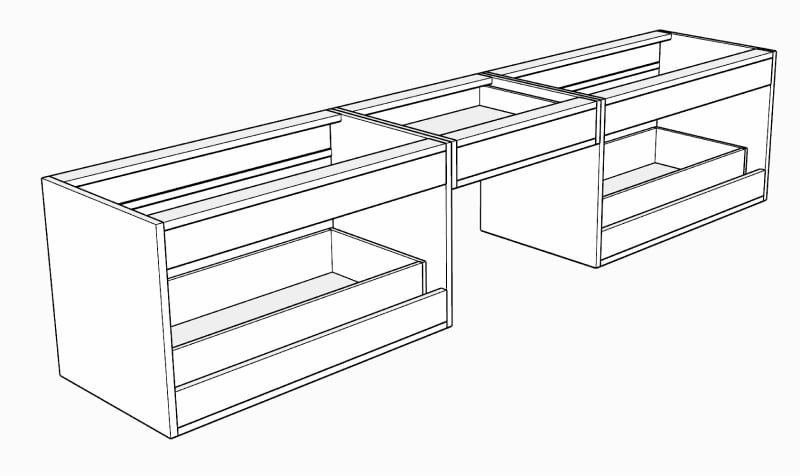
Here’s a 3D render of this bathroom floating vanity build. It has three drawers in total, and two tip-out trays to maximize storage. The two floating vanity cabinets for the sinks are both 35”W, 20”H, and 18.5”D, and the third drawer is a smaller one in between for a makeup vanity, with some space for a seat under that.
I chose a shallower depth for this vanity because I often find it hard to look into the mirror when the vanity is too deep, plus space considerations for my master bathroom. That’s why this vanity is only 18.5 inch deep compared to a 20-inch deep standard vanity.
Video of DIY Floating Bathroom Vanity with Drawers and Tip Out Trays
DIY Floating Bathroom Vanity Step-by-step Instructions
Step 1. Cut plywood to size for vanity frame
For building the vanity box, I mostly used ¾ plywood. I prefer to buy high quality plywood, which is smooth to the touch and is low in VOC (Volatile Organic Compounds).
My go-to plywood is 4’x8’ Birch plywood at ¾” thickness from Columbia Forest company.
Before the cutting step, it is always more efficient if you have a cut list ready with all the pieces planned out. That way you know exactly how much plywood to buy.
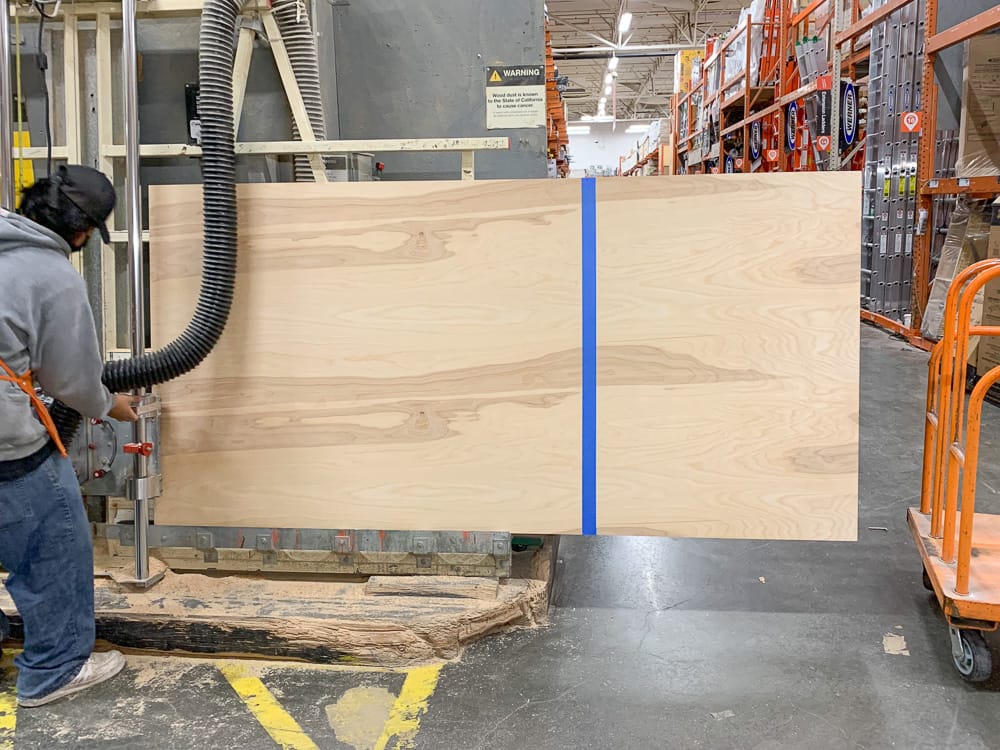
Having a planned out cutlist is especially helpful if you don’t have a pickup truck. When I bought a large sheet of plywood, I asked the sales assistant to do a cross cut for me so I could fit it inside my SUV.
When you do that, I recommend that you apply painter’s tape on the cut line. This makes the cut edge smooth and minimizes wood splinters. This way, I don’t have to trim the damaged edge when I get home, which also saves waste.
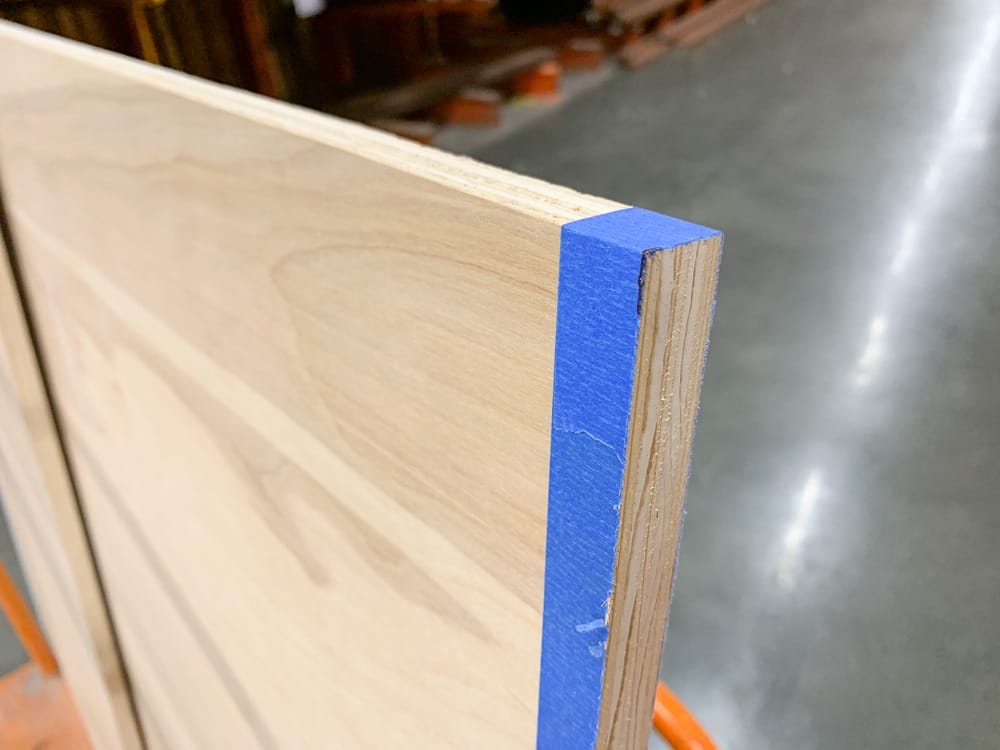
Because we’ll be building three cabinets and joining them together, there are quite a few pieces of wood, so it’s a good idea to mark them as you start cutting.
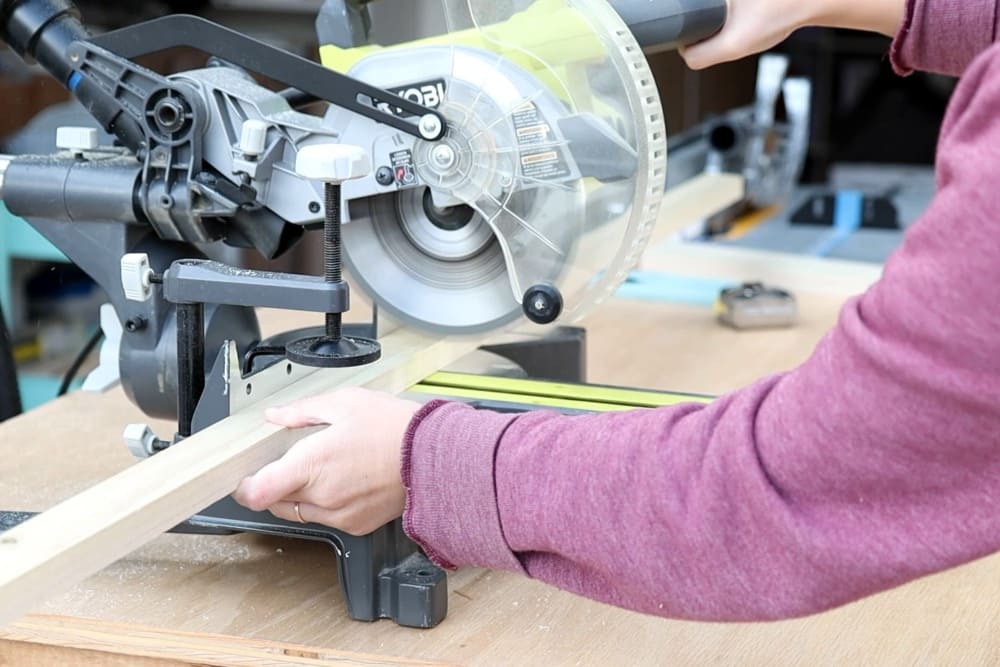
For most of the pieces, I used a table saw to rip the plywood to the right width, and did a cross cut with my miter saw.
For the center makeup vanity between 2 bathroom sink vanities, I left a couple inches of wiggle room when I did the cutting, so later I can position my finished sink vanities in place and cut the makeup vanity to size, given I’m building it wall to wall.
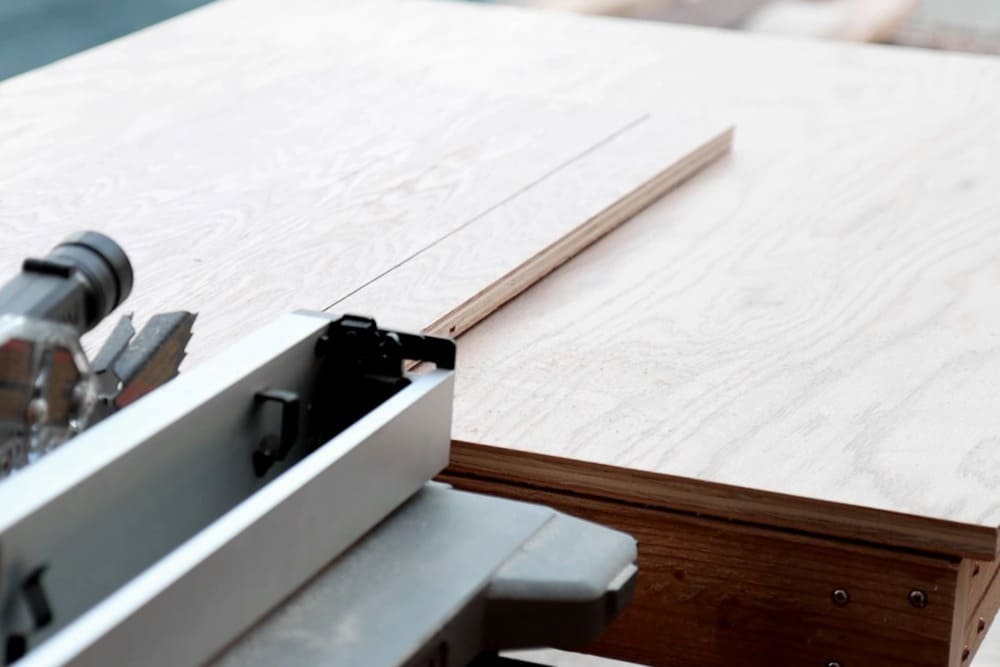
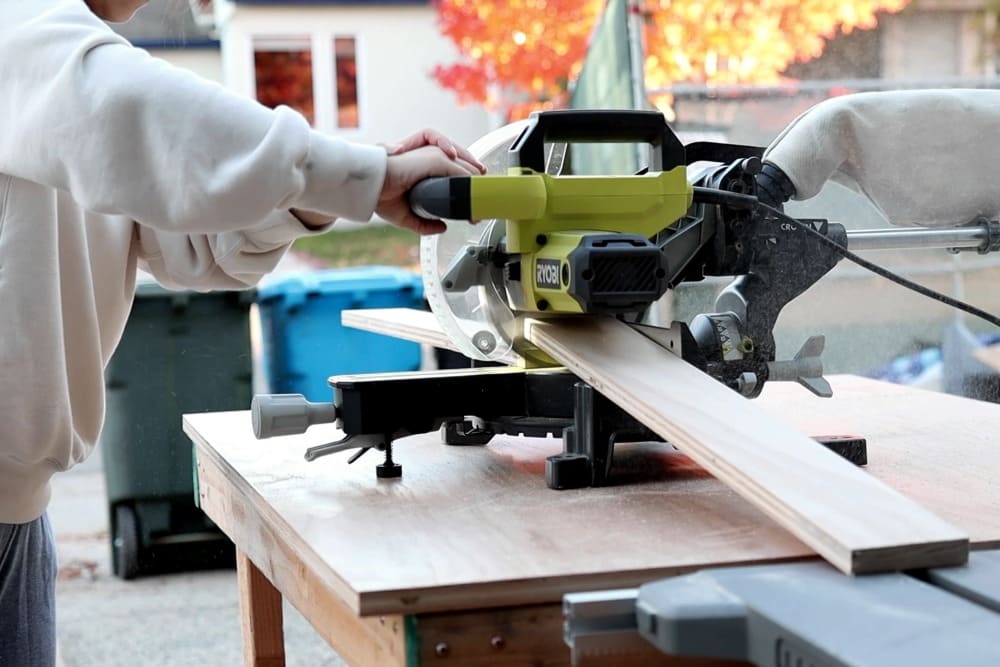
Then for the cabinet edges that will be exposed after installation, I applied wood veneer using an iron to hide the rough edges of the plywood, so it looks like real solid wood, whether you end up staining or painting the vanity.
Also make sure to buy a high quality veneer. I couldn’t find the one I like to use in the hardware store, but I didn’t want to wait for shipping, so I grabbed what they already had. I ended up regretting this later as the veneer was hard to apply, and bubbled up weeks after painting.
After the glue on the back of veneer had dried, I used a Veneer Edge Trimmer which is a device specifically used to trim wood veneer. This device really makes my life easier.
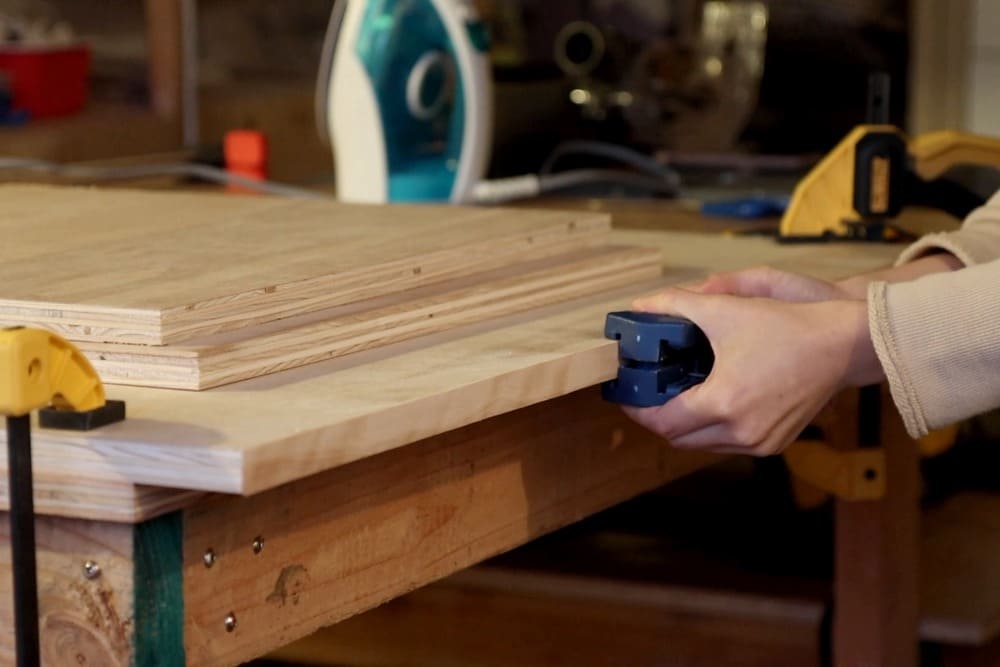
Then I just gave it a light sand on the edges using a sander block.
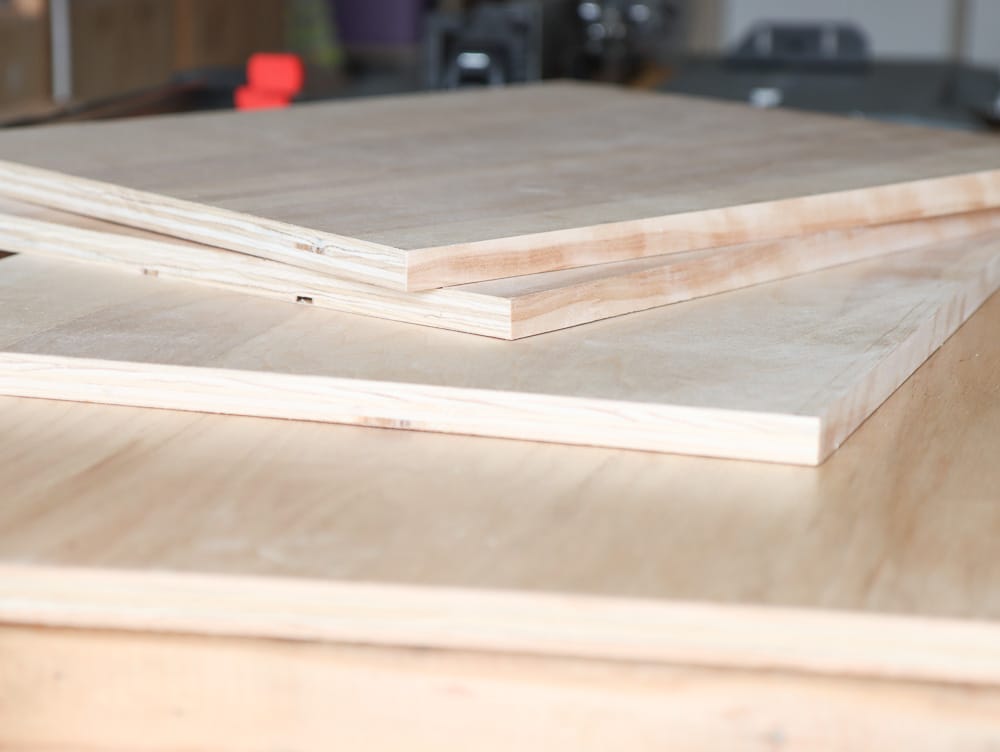
If you’re like me and you forget to apply wood veneer on some parts, don’t panic! You can still apply it to the plywood after building the cabinet, and then just use a utility knife to trim it.
Step 2: Build the vanity box
After preparing all your board pieces, the next step is to build the vanity box, which was joined by pocket screws.
First, I created pocket holes for attaching the cabinet pieces together with Kreg pocket hole jig. I prefer to create the holes on the bottom piece or side of the board that will not be visible.
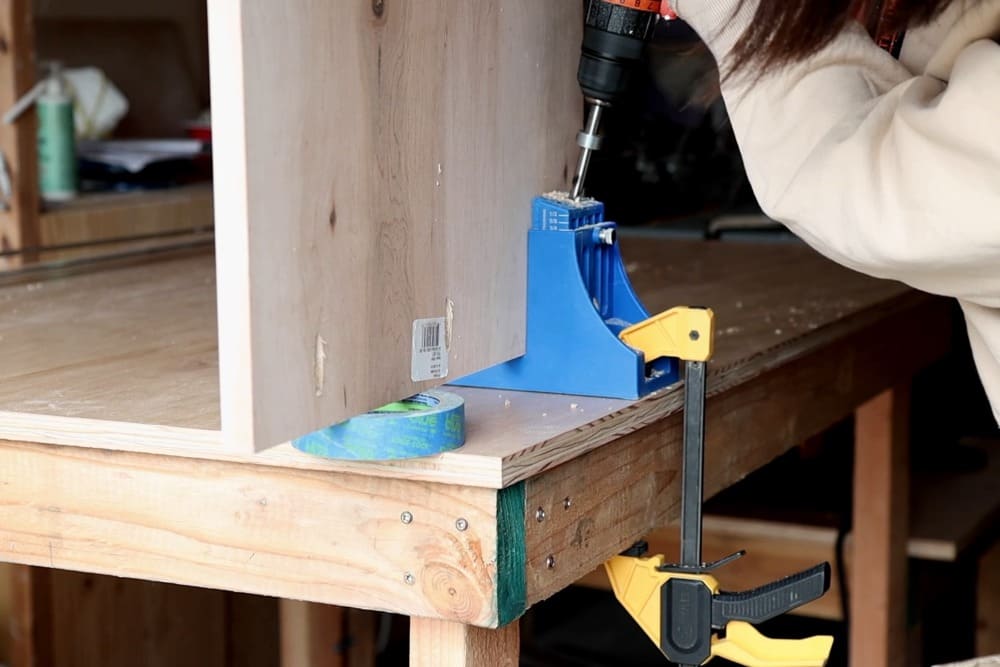
I placed the two side pieces and the bottom piece together first, and used clamps to hold it in place while I drove pocket screws.
I just used what I already had on hand to hold it together, since I don’t have multiples of the same set of tools. I used a mitre corner clamp (which is generally used for making picture frames) and a handy pocket hole clamp. 36” bar clamps will also come in handy here.
I wanted the joints to be tight and relatively square. To increase the durability, I used wood glue between the joints, and then just drove the pocket screws in.
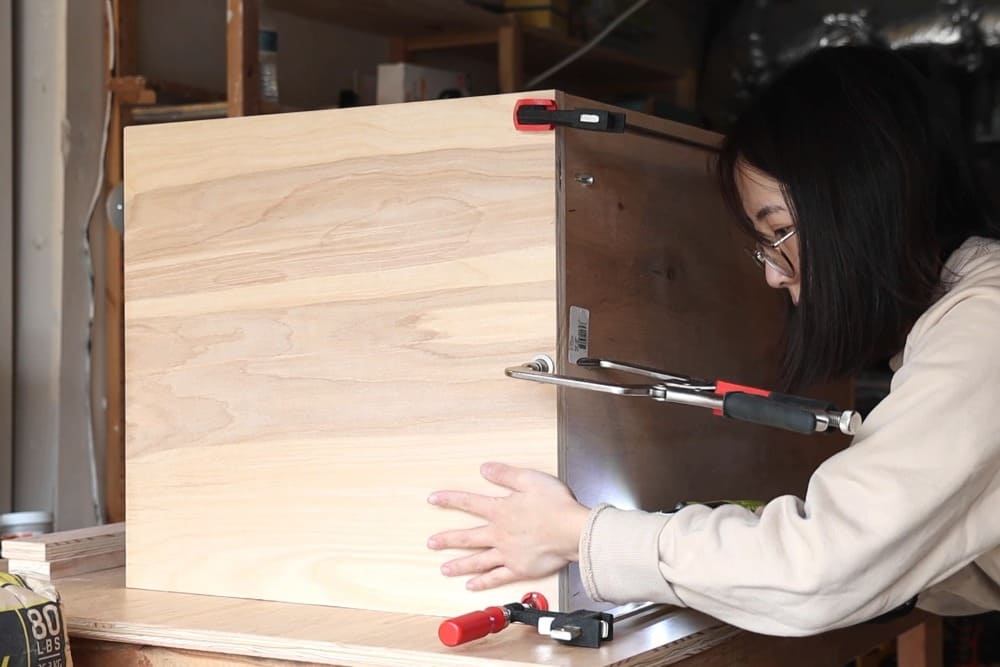
After that, I added two pieces on the top of the vanity box: one on the top and the other on the bottom, with the space in between them for the sink.
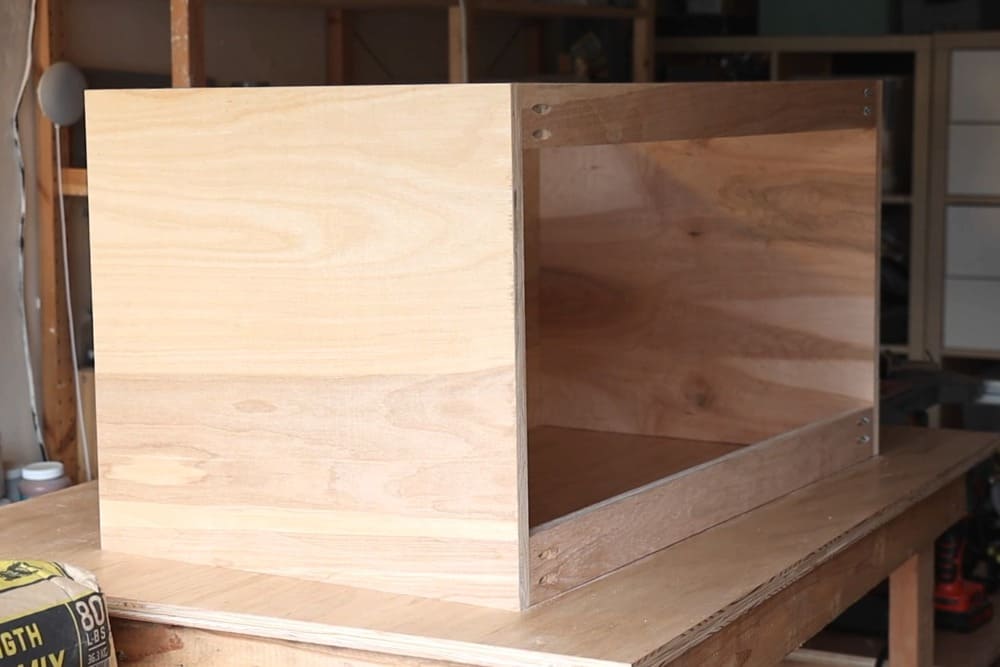
What’s remaining is the two back pieces. For vanity cabinets, you’ll want to leave the center back open for plumbing work. The top piece will allow you to install it to the wall by driving screws to the stud.
For the piece that goes on top, I cut it at a 45 degree angle. This angle is totally optional, but what it does is that the 45 degree angle enables a french cleat installation.
What you would do is install another board to the wall with a 45 degree angle on the top facing up, and then you can hang your cabinet on top of that.
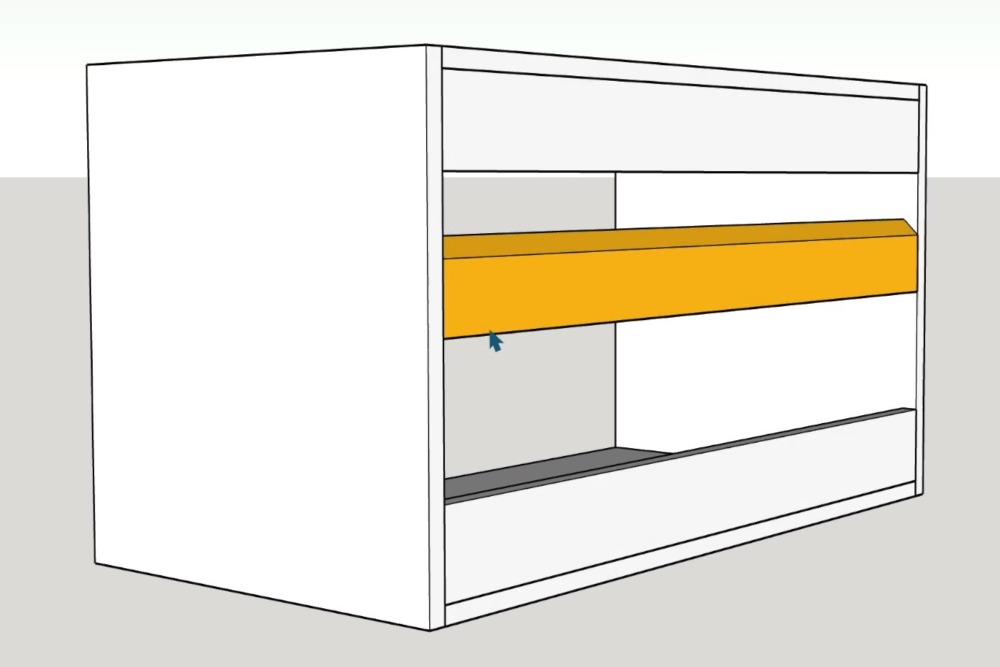
But sadly in my case, when it came to do the installation months after I finished this vanity, I couldn’t find the board that goes to the wall, so I ended up having it installed the traditional way without french cleats.
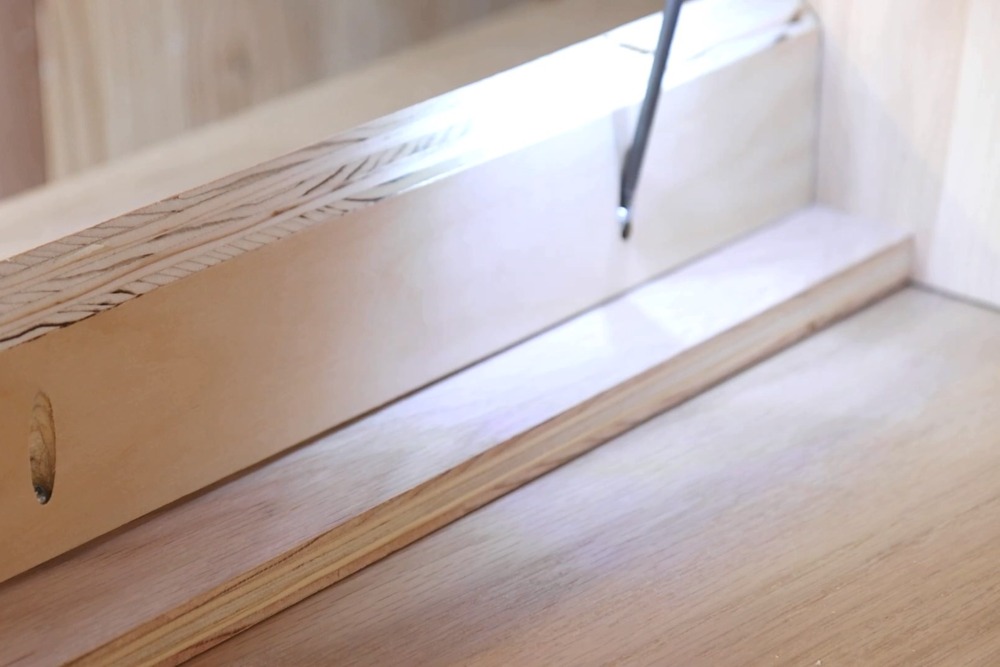
Then I just connected these two boards together and moved to the bottom back piece.
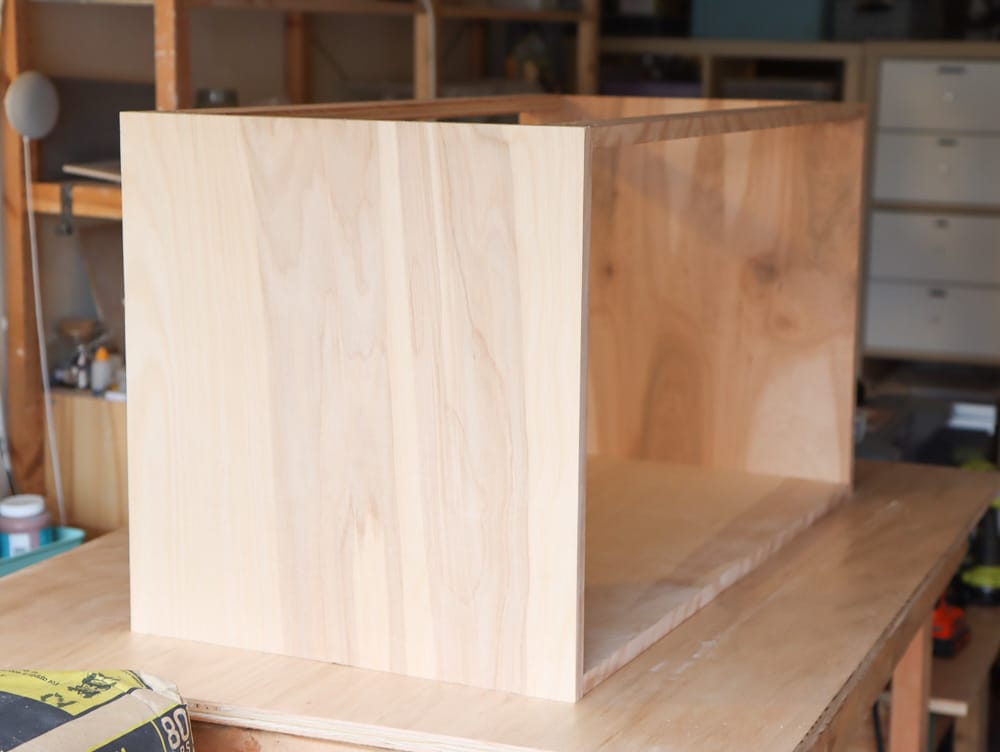
Once that is screwed securely, the cabinet box is done!
For this DIY Floating Bathroom Vanity, you’ll need to make two identical pieces of this cabinet or vanity box. Later, you’d also need to create a smaller drawer box to go in between them, which I’ll be explaining as well.
Step 3: Prime and Paint the Cabinets
After the box was built, I primed the surface with an All-Purpose Primer. It’s also a good idea to sand after the primer has dried and before painting, because any paint and primer can make the wood surface rough.
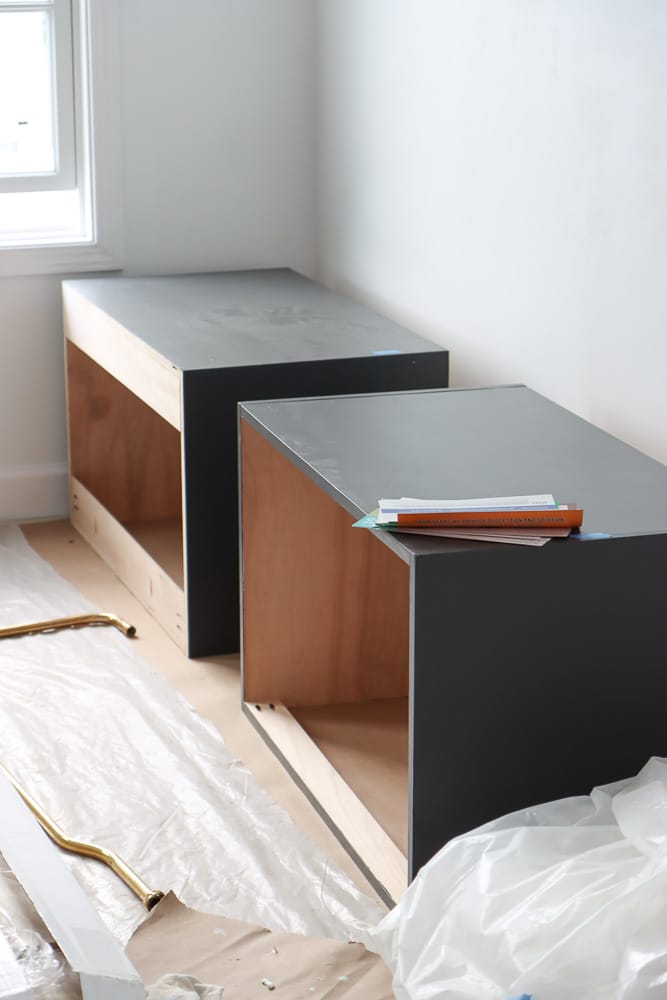
Then I coated the cabinets with paint from the Benjamin Moore Advance line in the color Graphite. I wanted to achieve a dark, almost black color for the vanity, so this color was perfect.
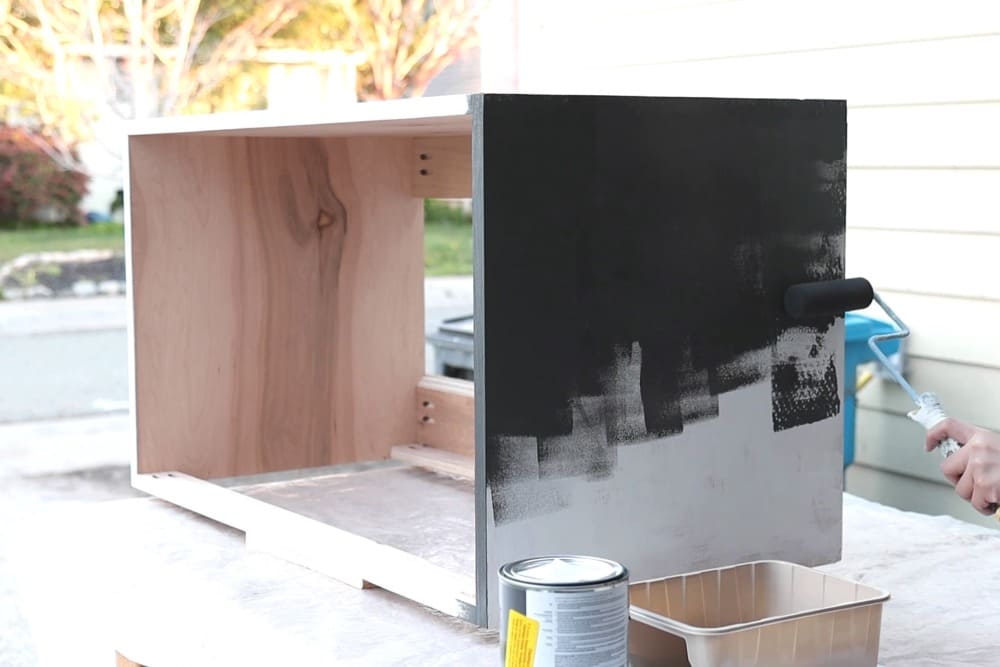
After the first layer of paint, I did another round of sanding because it’s always nice to have a very smooth surface for your cabinet, and it will also make your vanity look more professional.
I didn’t bother painting the inside because I kind of like the wood finish, and I just added poly to the inside later on to finish it off.
Step 4: Build small makeup vanity
As I mentioned earlier in the post, I cut the makeup vanity width a bit longer than needed, so I can cut it later to size when I put everything in place. So I built two small handy tools to prop the vanity boxes to the correct height.
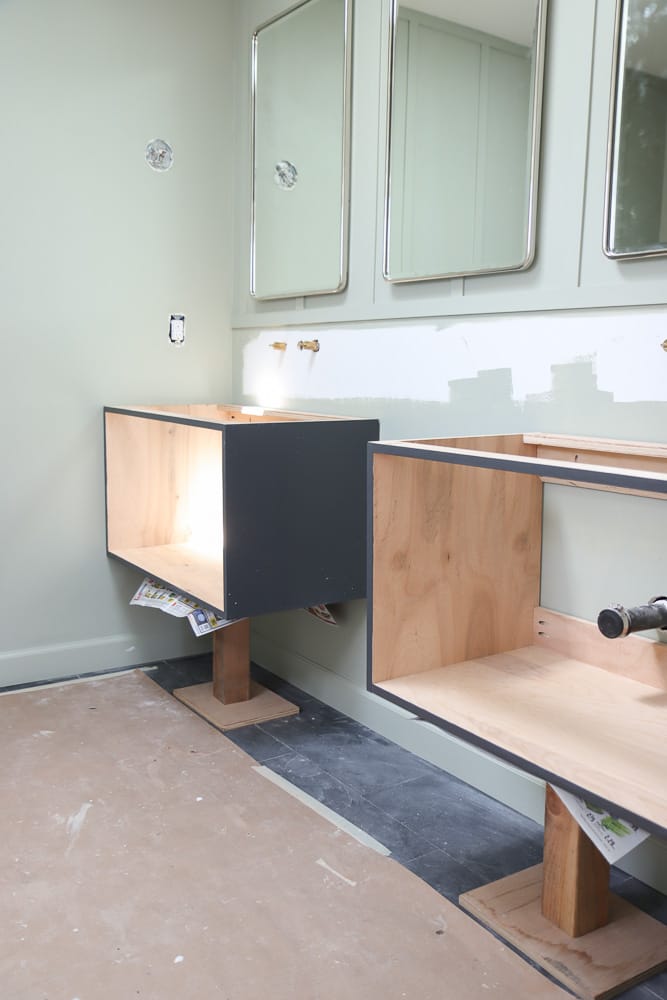
Although this is optional, this setup can be really useful for installation and it can help you visualize the height and width of your vanity.
Using these small handy tools really helped me measure the distance between the two cabinets so I could create my makeup drawer to fit the exact size to allow for a wall to wall installation.
Then I built the makeup vanity box almost the exact same way. With the only exception that the board on the back is just one piece instead of two, given it is only 5” tall.
Step 5: Build the Drawers
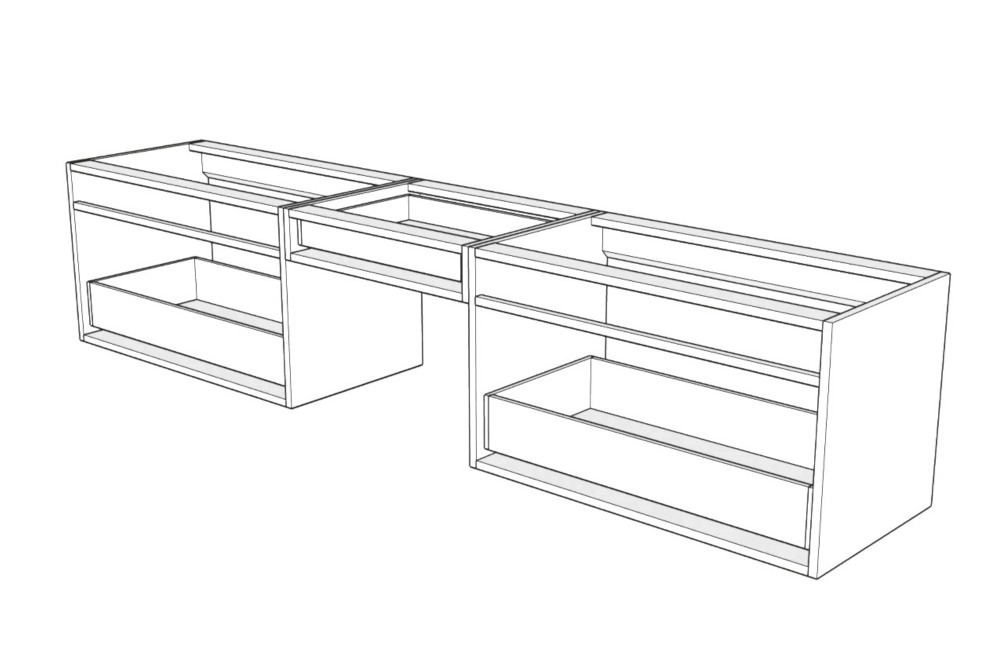
1. Two Drawers for the Two Sink vanities
Now that you’ve built your two sink cabinets, it’s time to make drawers for them, and for the small makeup vanity.
Let’s first talk about the drawer that goes under the sink, because this one has to avoid the plumbing.
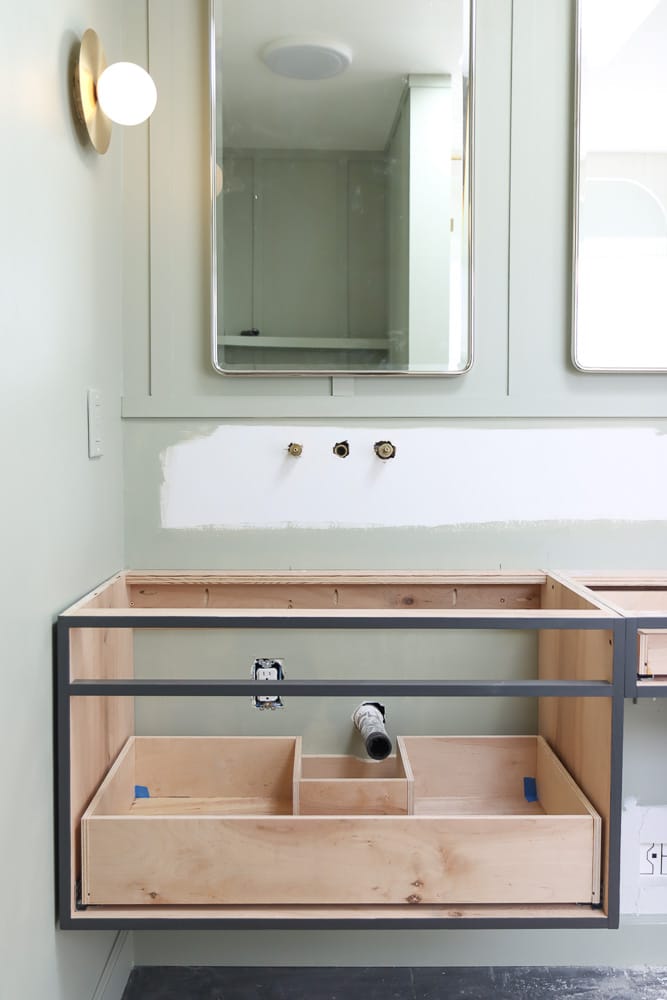
I first measured where the plumbing is and did a sketch for each side, because the plumbing positions aren’t exactly the same.
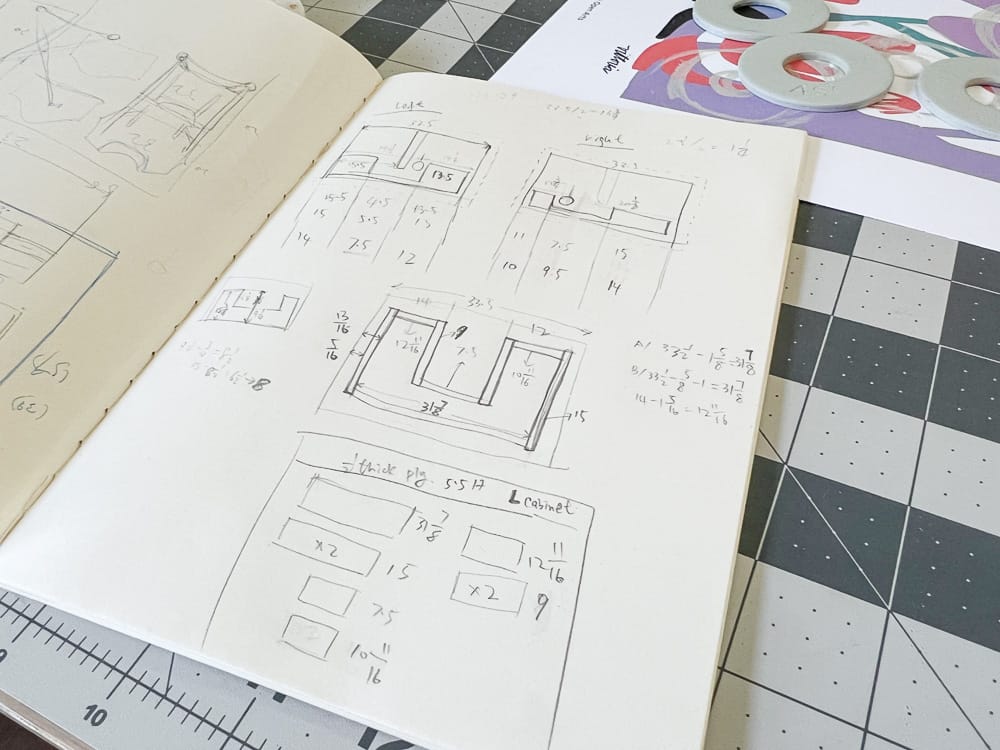
Then I did a bunch of calculations based on that info, plus the drawer sliders I’m using, and planned out all the pieces and how they fit together.
For the material, I used ½ inch plywood. I ripped it to 5½ inch width boards, which will be the height of my drawers, and then cut each piece to length.
For the bottom of the drawers, I used ¼ inch plywood.
Next, I created a groove on the side panels so the drawer box’s bottom panel can slide it in.
This is also because I used undermount drawer slides which require a ½ inch gap on the bottom of the drawer, so that the slides can fit inside. So I cut a notch during the cutting step. If you are not using a side mount slide, don’t worry about it.
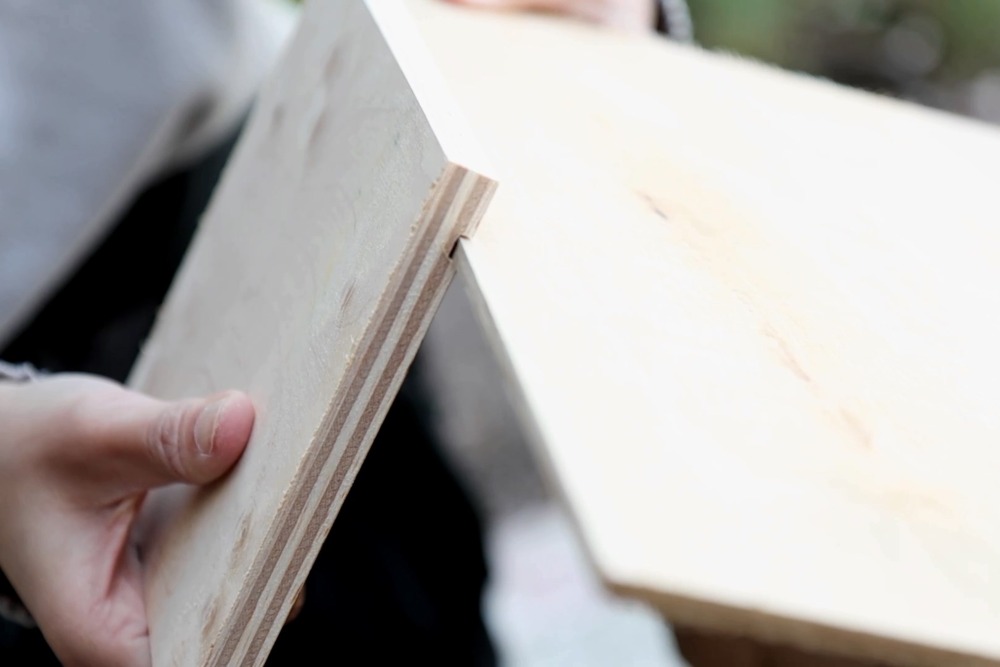
I lowered my table saw blade and adjusted the ruler to account for the saw blade width as well.
I don’t have a dado blade on my table saw to create a wide cut line, so I just ran it through a few times to create a ¼ inch wide groove, which was totally ok with me.
For efficiency, I like to cut all the pieces at the same time before moving to assembly.
Because each drawer has so many pieces, I make sure to write the length of each piece on one side to make my life a little bit easier for later steps. These are the pieces for the two drawer boxes, with the cutout for plumbing.
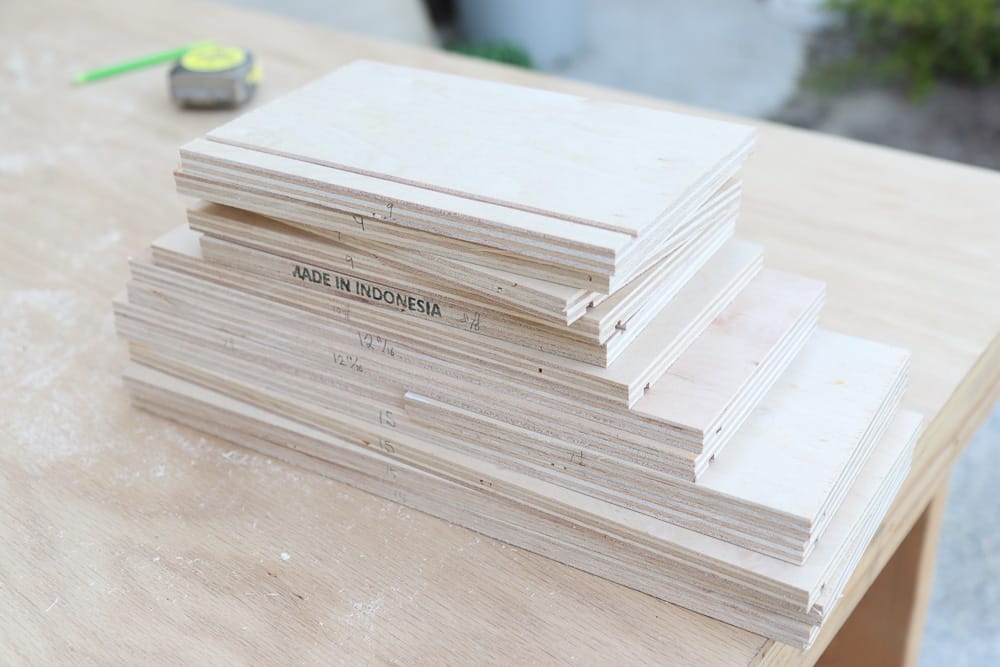
Once you have all the pieces ready, it is time to assemble!
Before attaching the pieces together, I find it helpful to do a dry run first, which is where I arrange them next to each other in the same form that I want to achieve, just so I can visualize how it’s going to look later.
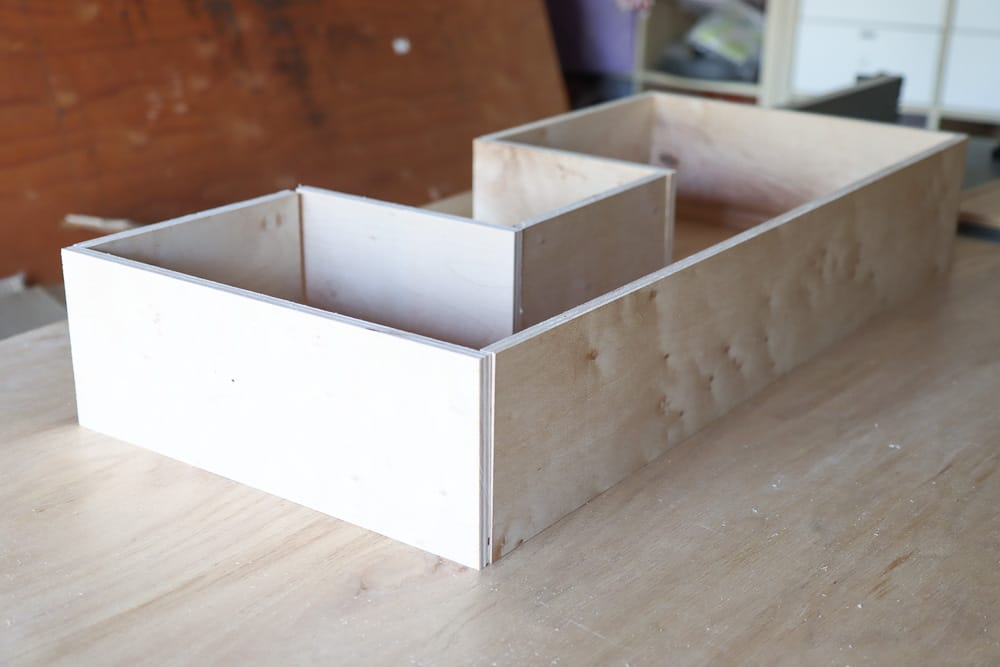
Once I’m happy with it and everything looks good, that’s when I can start to apply wood glue and brad nail them together. So I did that, and used a clamp, which is a very helpful tool at this step to keep the pieces together.
When I put the long horizontal piece in, I realized I actually had to create two notches on the side for the ¼ inch drawer bottom to sit.
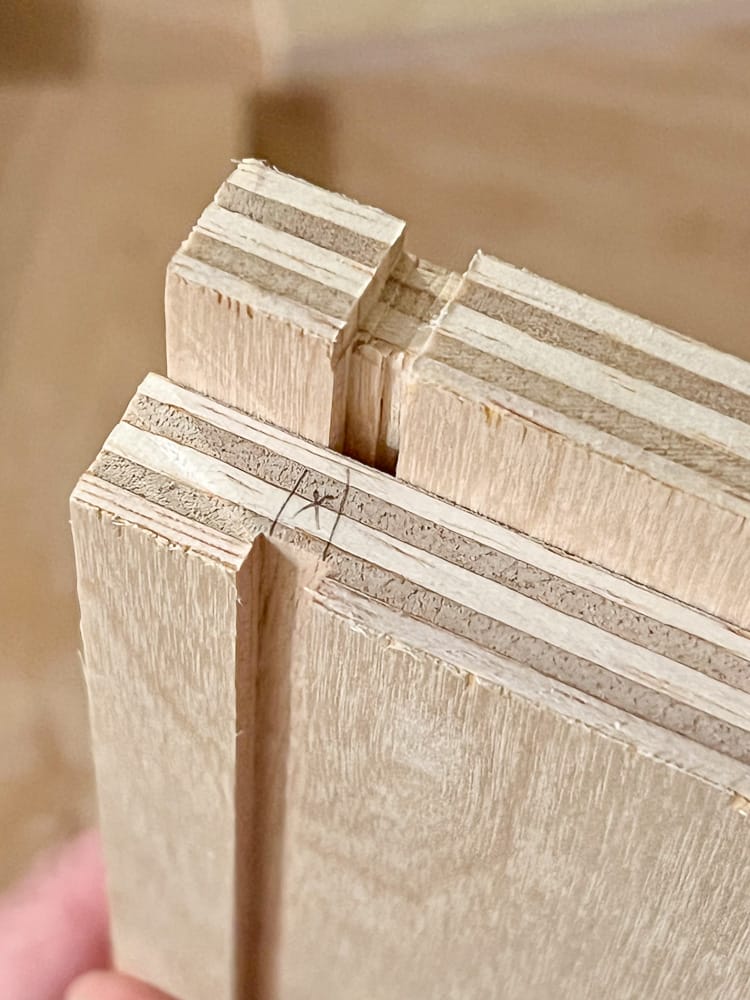
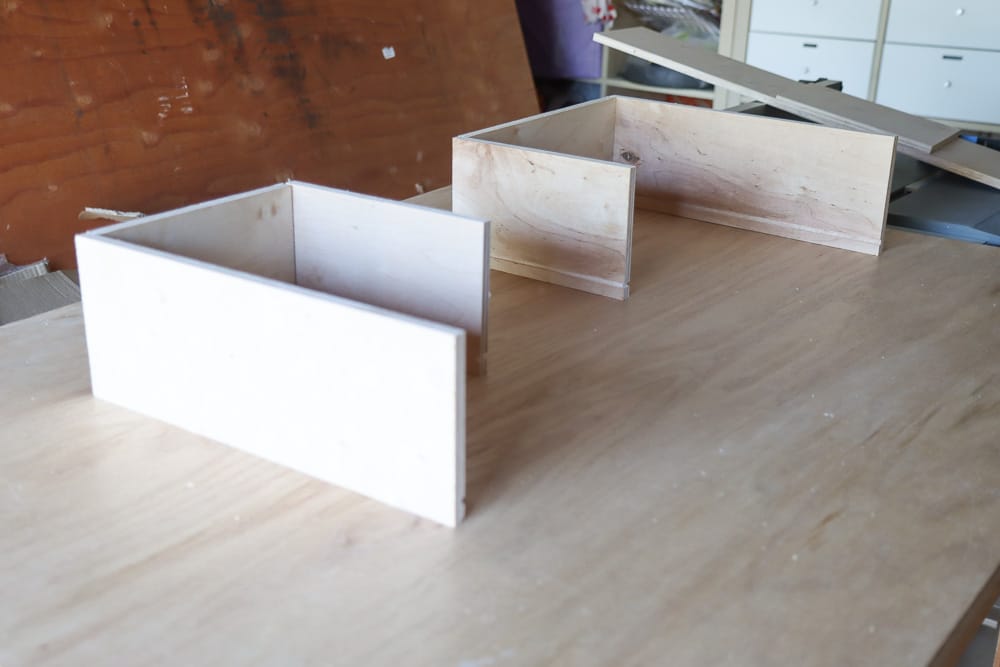
I wanted to make sure that the cut-out part is square, so I used some right angle tools to help out.
And then I added the front piece back in without really attaching them together, and used a picture frame tool to hold everything together while the glue dries. Made sure to support the back cut-out part so it doesn’t bunch together due to the pressure.
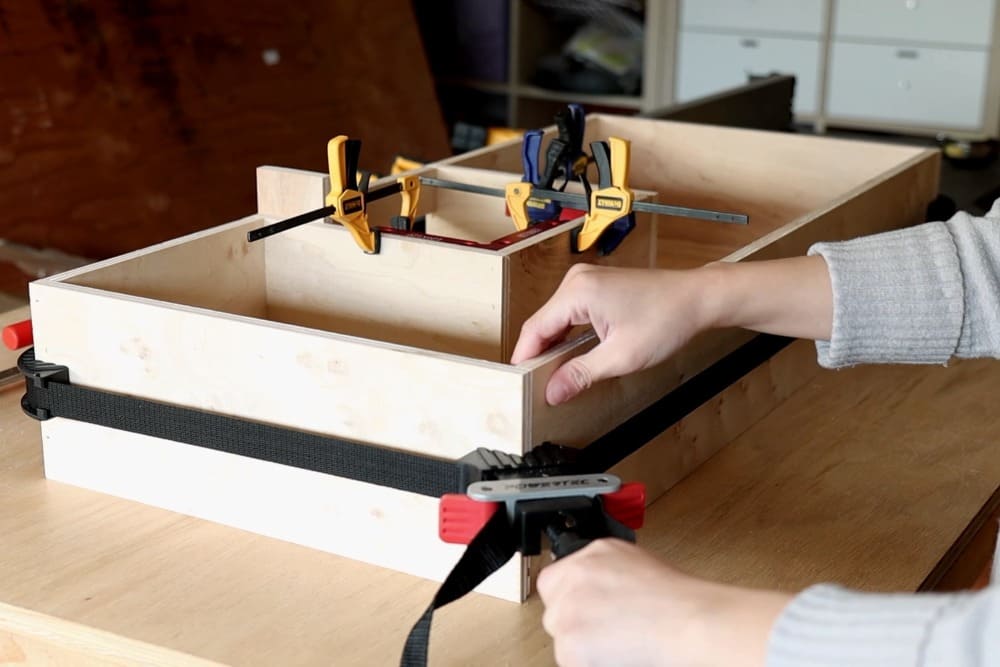
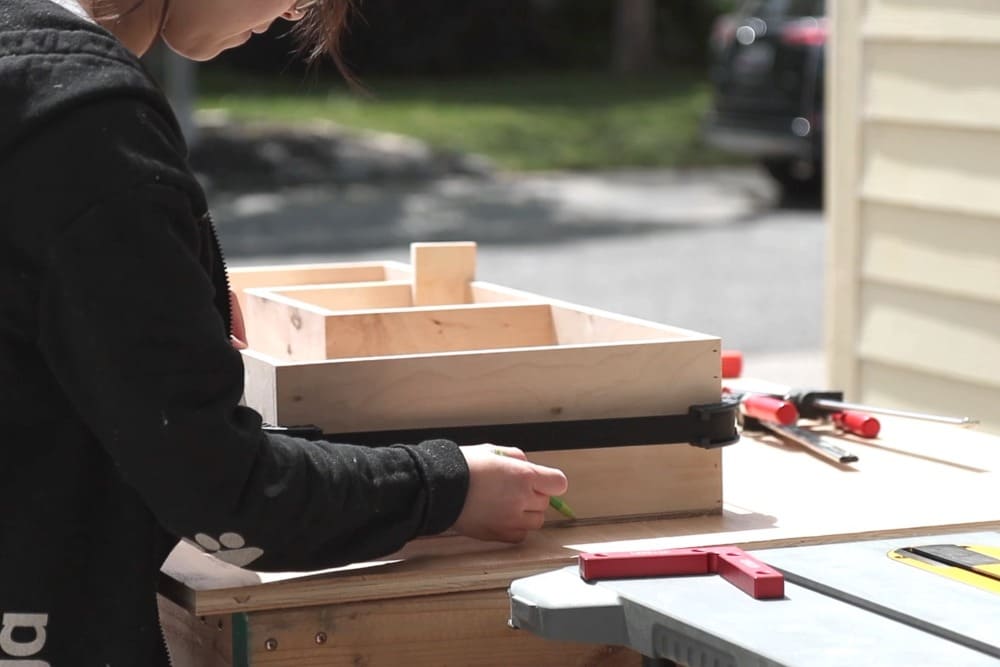
After the glue dried, I put the whole thing on top of a ¼ inch plywood board to trace the shape for the bottom piece.
First, I traced the shape from the inside, and then I traced the outside – to make two lines that show the depth of the groove.
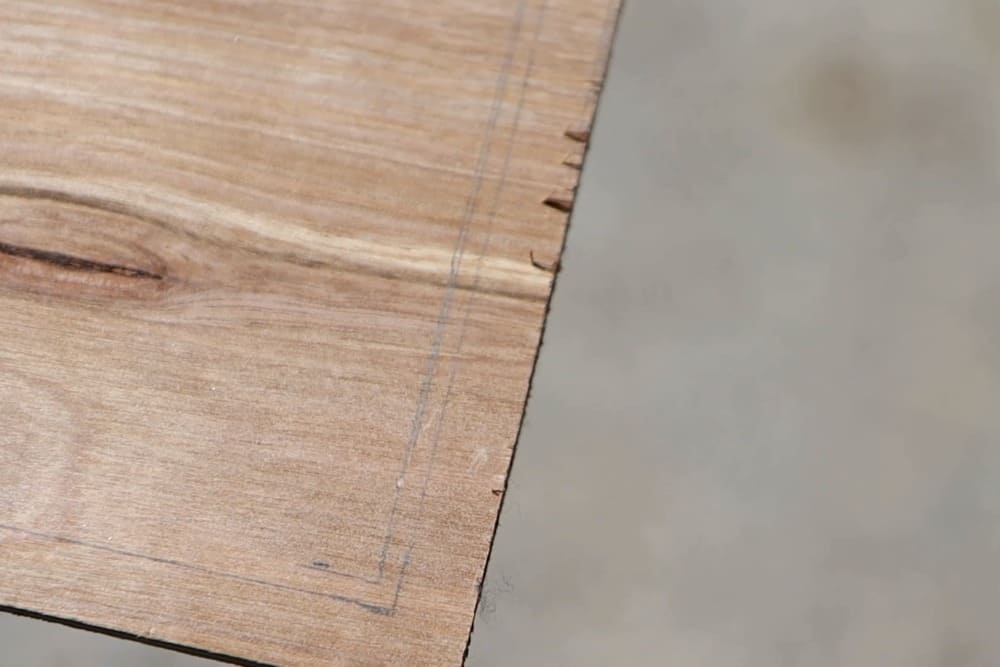
Then I cut the outer shape to size, and I used my jigsaw to cut the square-shaped cut out.
Now that the bottom piece had been cut, I just slid it into the frame I already made earlier. It was a little tight, probably because of its non-regular shape, so I used a mallet to carefully knock the piece inside.
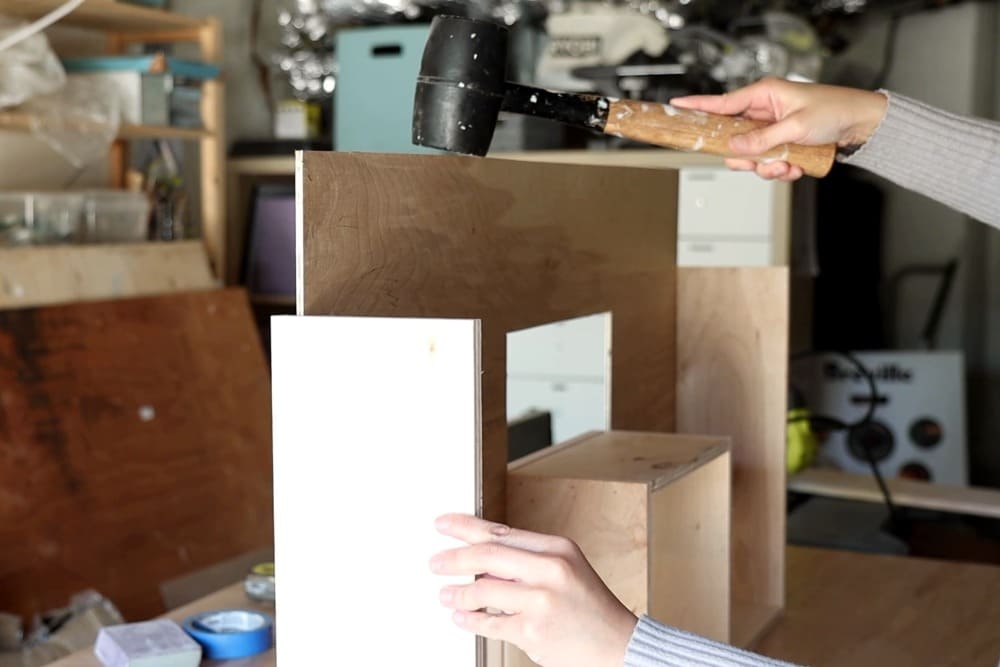
Once the bottom piece was snugly in its place, I was finally able to close the drawer box by attaching the front piece, again using wood glue and brad nails.
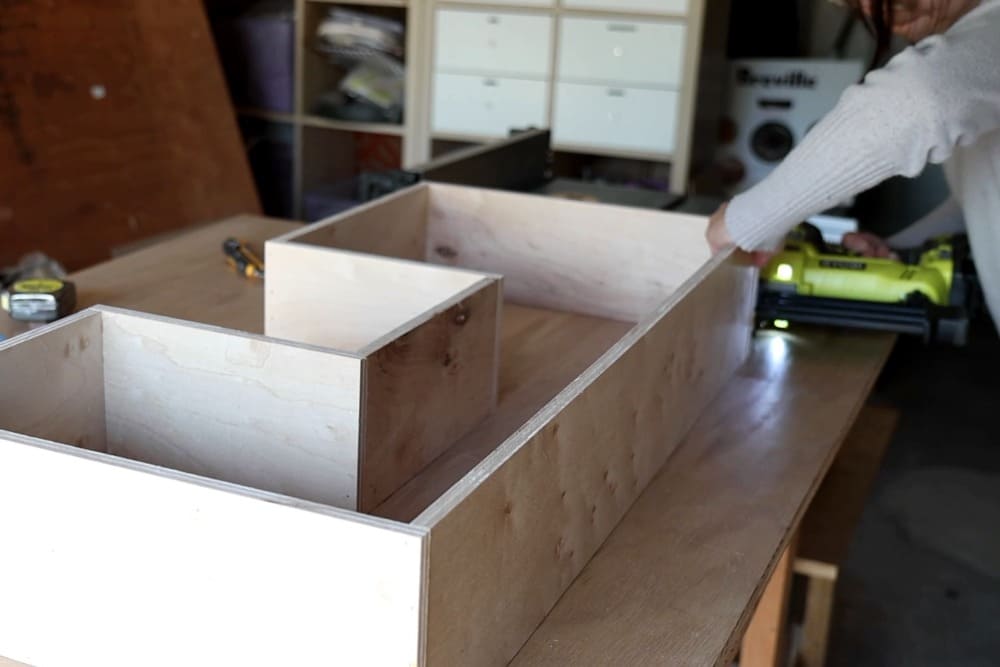
If you’re worrying that a ¼ inch drawer bottom is too thin, you can always support the bottom by adding additional ½ inch plywood strips. Just make sure the strips don’t get in the way of the drawer slides.
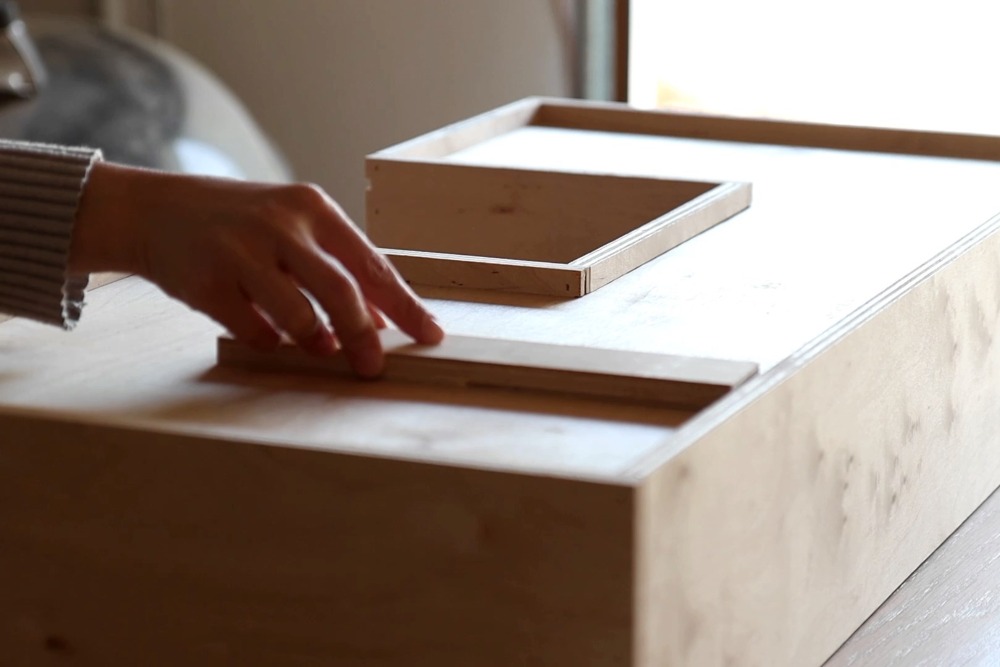
2. Drawer for Makeup Vanity
The next drawer to build is for the makeup vanity.
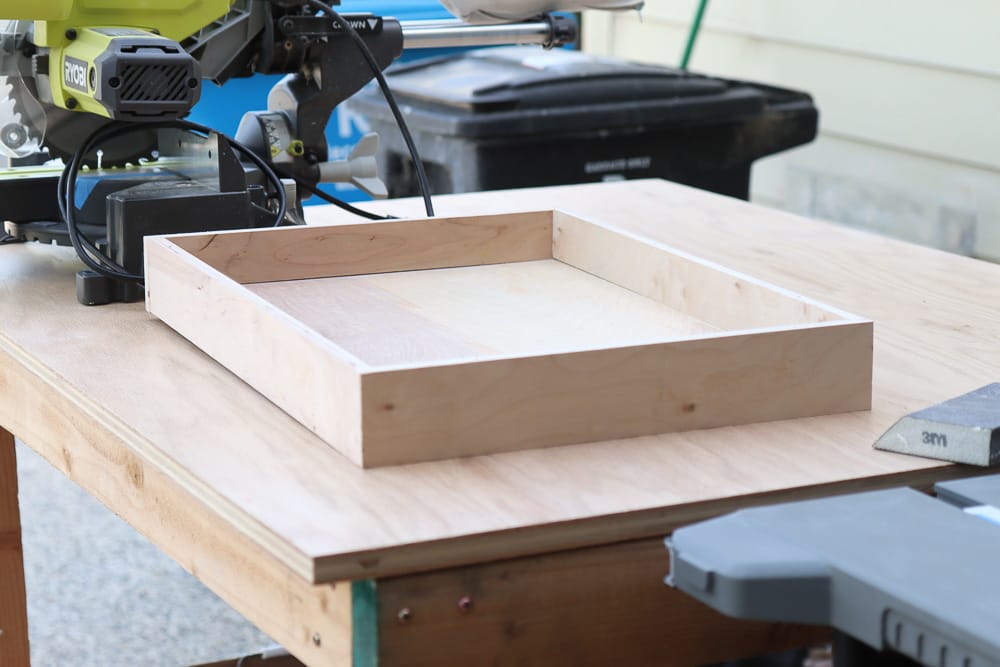
This is very straightforward – you just have to use the exact same method I introduced with the two cabinet drawers, but this is going to be way simpler because there’s no plumbing cut-out to consider.
And once I was done with all three drawers, I filled all the nail holes for each drawer box.
Step 6: Drawer Slides Installation
Now it’s finally time to install the drawer to the cabinet frame. In this step, I’ll demonstrate how to install undermount drawer slides.
The advantage of undermount drawer slides is that they are hidden from view. They also offer a smoother and quieter operation compared to side-mounted slides. In terms of storage space, undermount provides more space on the side, whereas side mount offers more space vertically.
Because the drawer slides I used are undermount, I positioned the track to the bottom corners. I also left a ¾ inch gap for the drawer front that I’ll install later, since I’m doing the inset cabinet style.
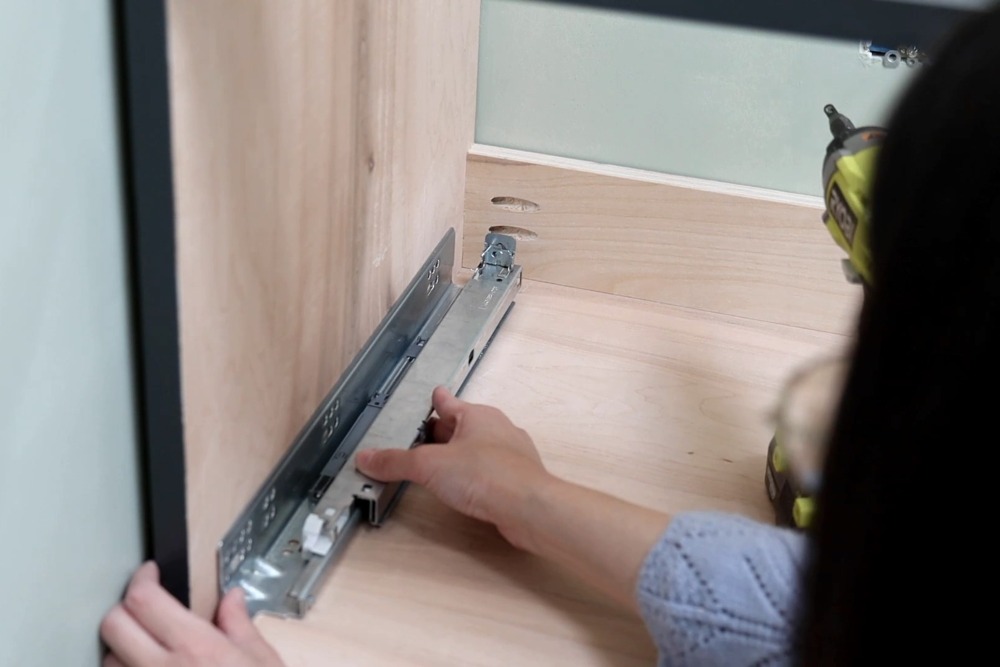
Then I just secured the track with 2 screws on each side.
I also created some cut-outs on the back of the drawer, to mark where the track is going to sit on. This step was done before assembling the drawers. Then I need to create two small holes above the cutout, where the hook on the drawer slide can attach.
I first placed the drawer on the track and pushed it all the way in to figure out where the hook was attached. Then I drilled a hole at the indentation.
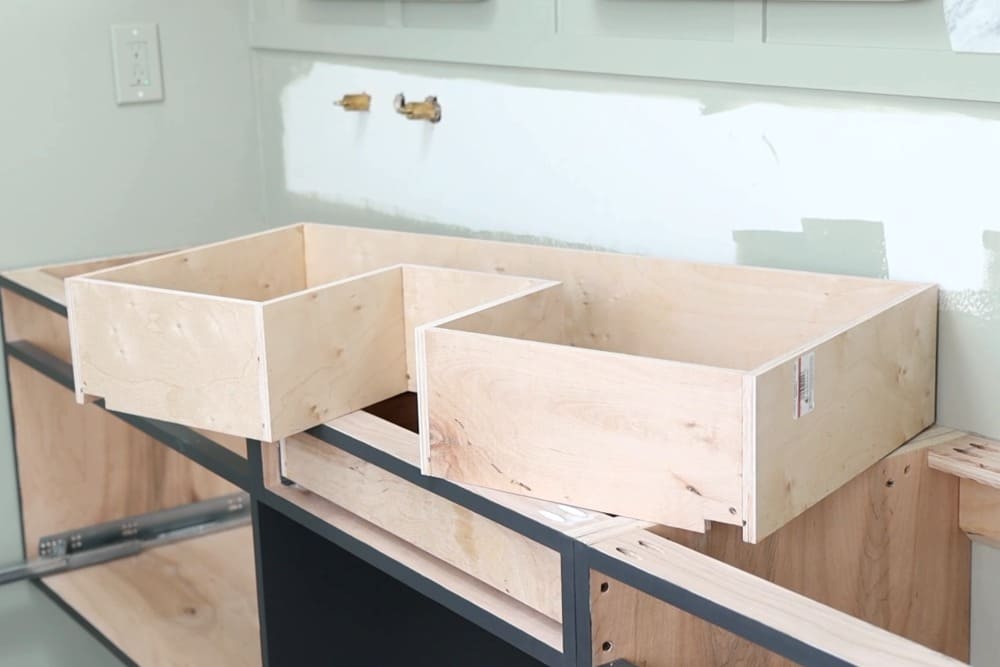
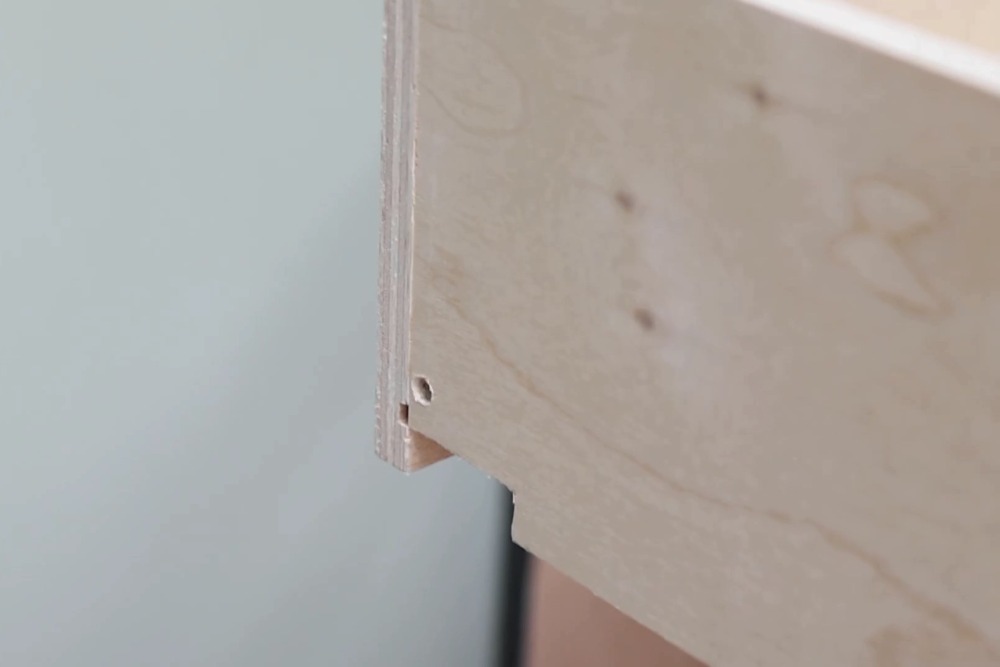
Note: These steps are specific to my drawer slide instructions. If you’re using a different drawer slide, follow the instructions on yours. I just thought this could be helpful in case you want to use something similar.
I personally really like this undermount slides because of how adjustable it is, especially with inset style cabinets. You can adjust side to side, up and down, in and out, and also the tilt.
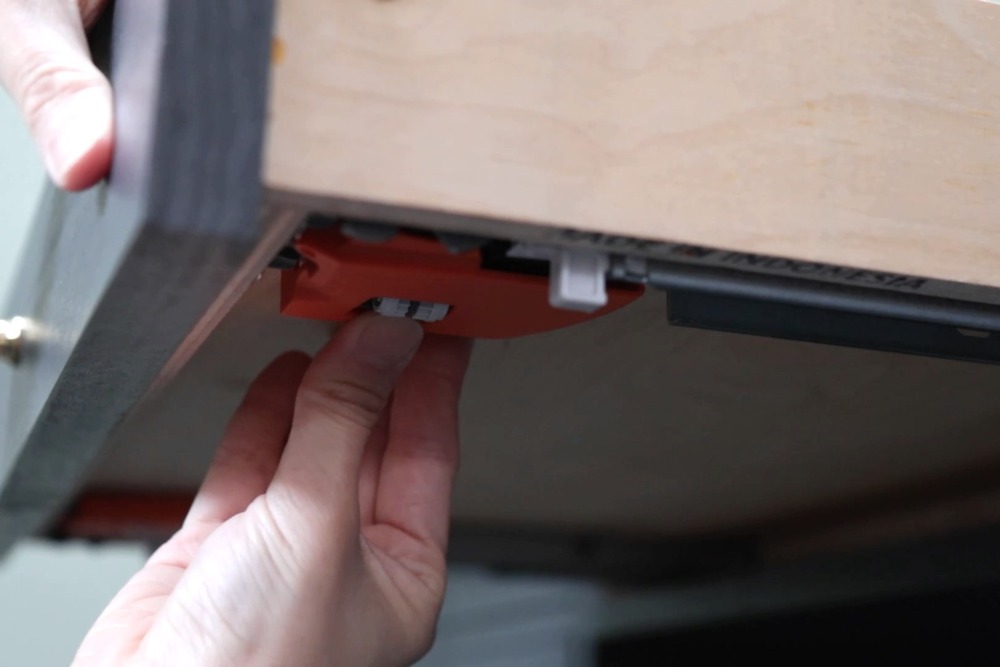
Another attachment point for this slide is on the front, where I used side to side adjustable locking devices. I positioned them at the front corners, and I also used a self-centering drill bit for this step, which was super helpful.
Then I just used the smaller screws to secure them.
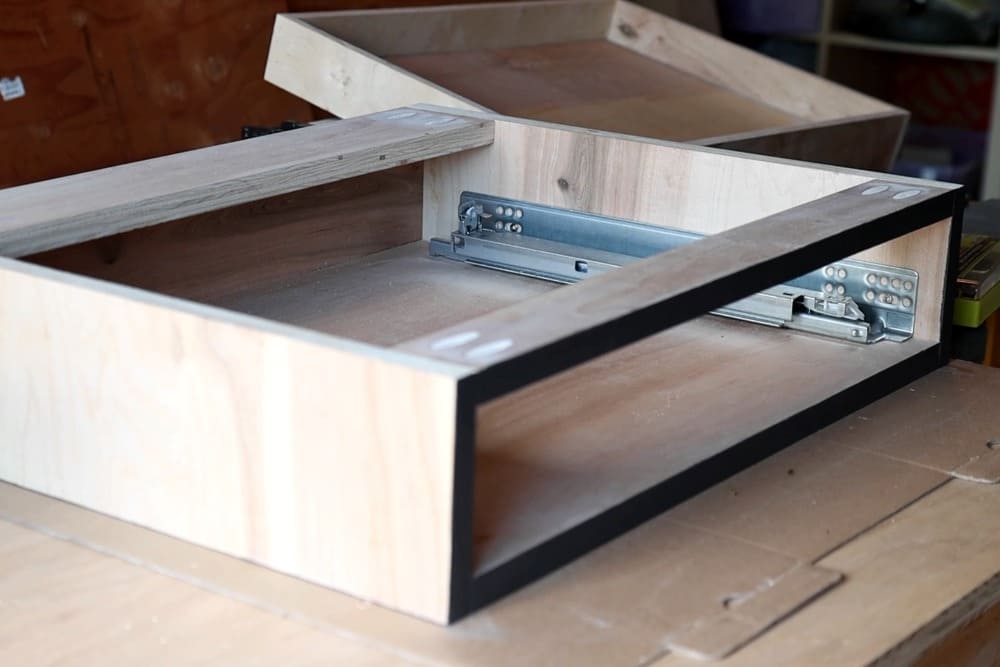
For undermount slides, it’s really simple to attach the drawer to the track – all I did was place the drawer on the track and push it in. And now you can open and close it smoothly.
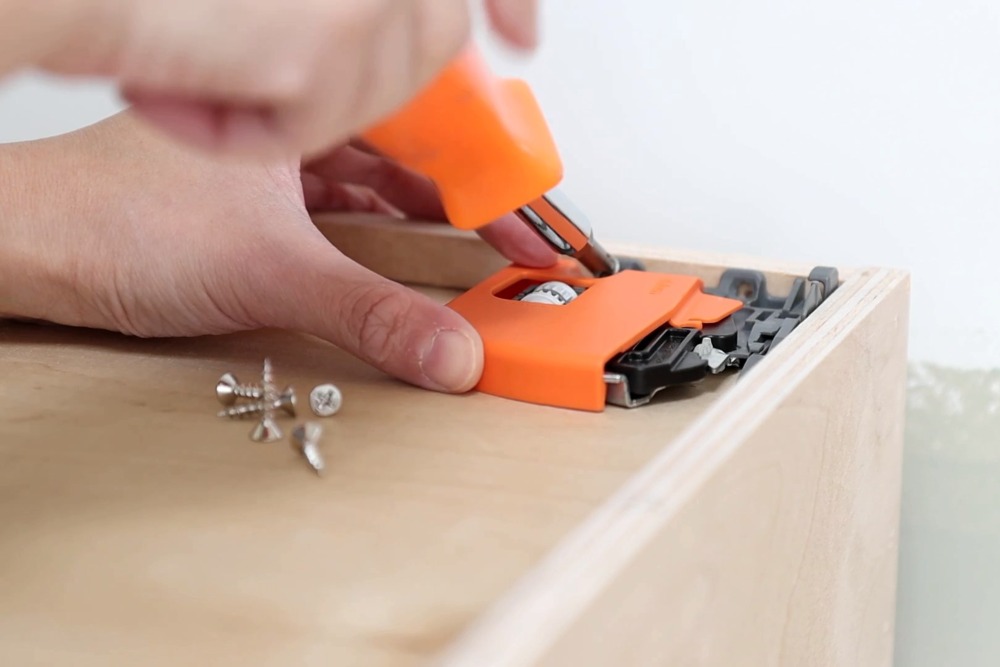
It’s also the same process for the makeup drawer.
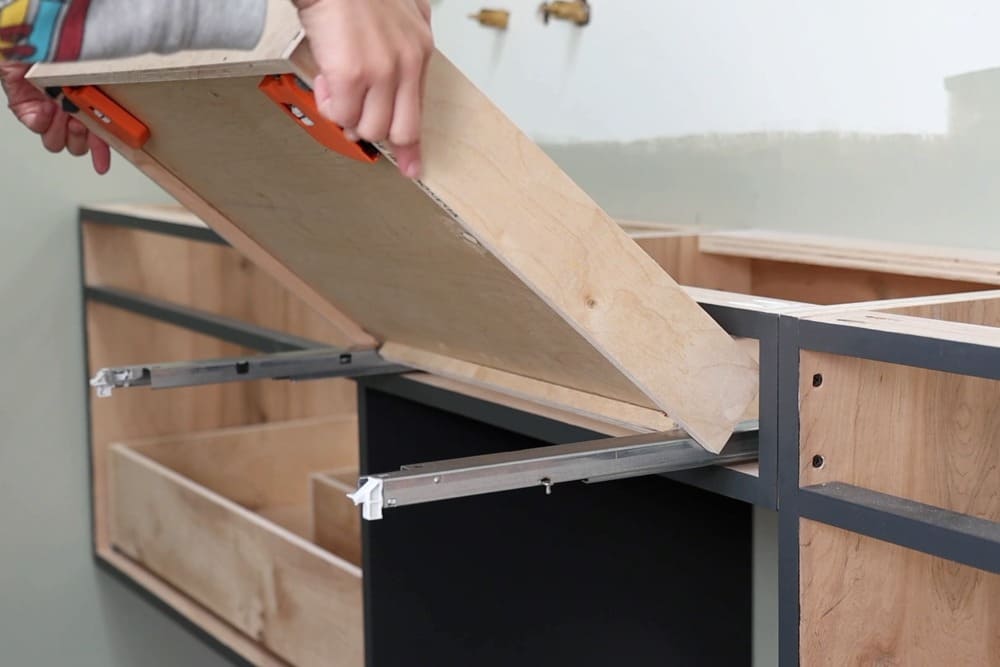
To remove the drawer, open it all the way, press the locking device to the side away from the center, and then lift it up.
Although it was a little complicated to install for the first time, I got better after doing a few. I would definitely be using them in the future.
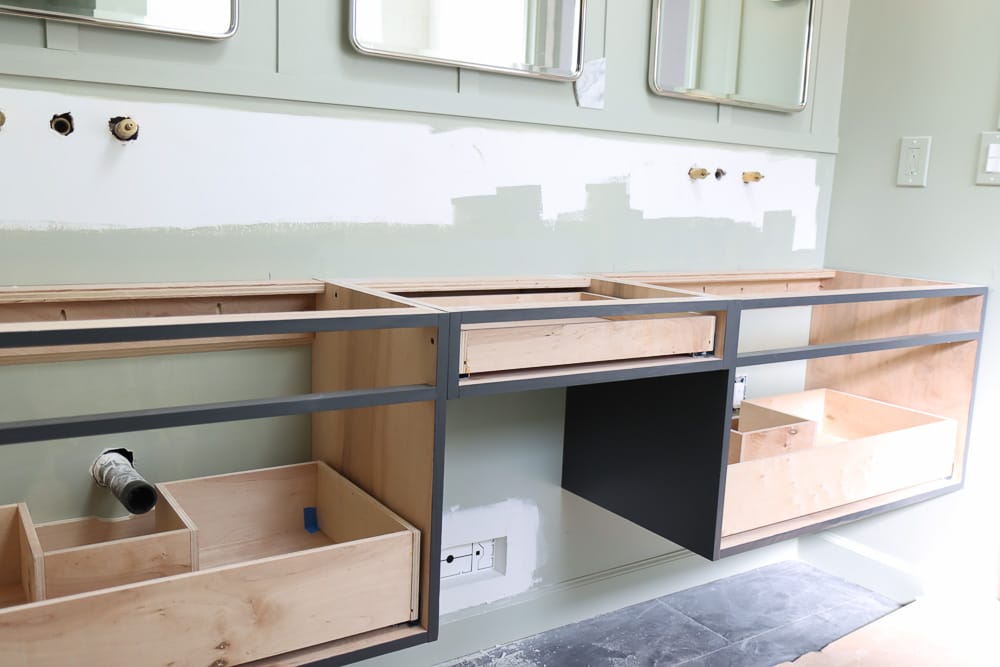
So far, this is what the vanity should look like. There aren’t any drawer fronts yet, so that’s what we’ll be making next.
Step 7: Drawer Fronts
1. Top Narrow Drawer Fronts
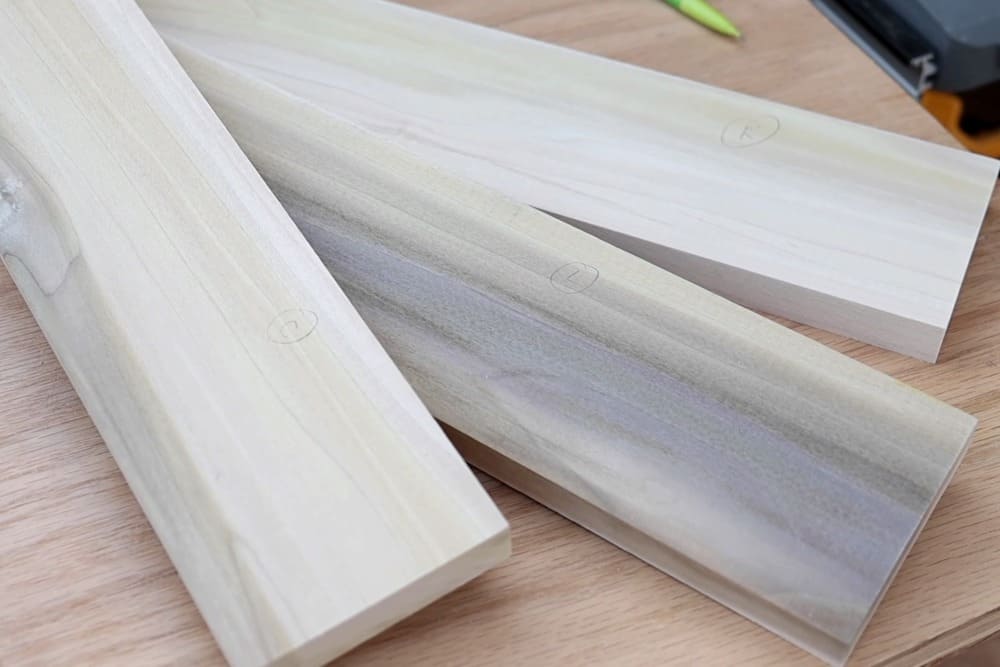
For the three drawer fronts on the top, I used a ¾ inch poplar board, which I initially bought from Home Depot as 3½ inch wide boards.
The drawer opening is 3 ½”, but with the gaps on four sides, the actual drawer front will be less than that – I left a 1/16 inch gap on all four sides.
So the first thing I did is using my table saw to trim them to the right width, and then use miter saw to do cross cut.
I labeled each piece with a pencil so I knew which one would go where.
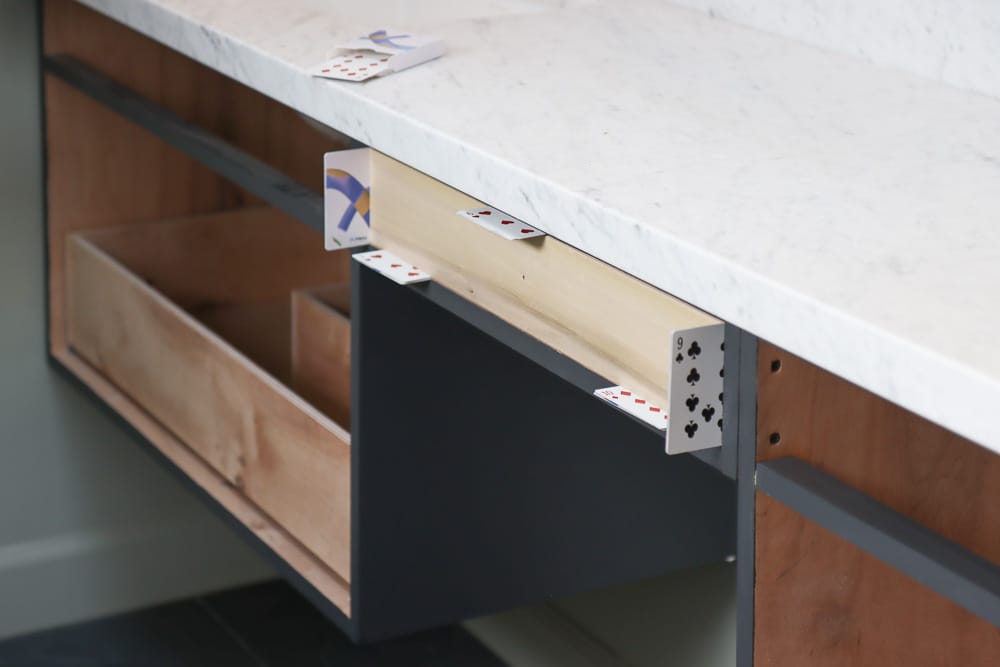
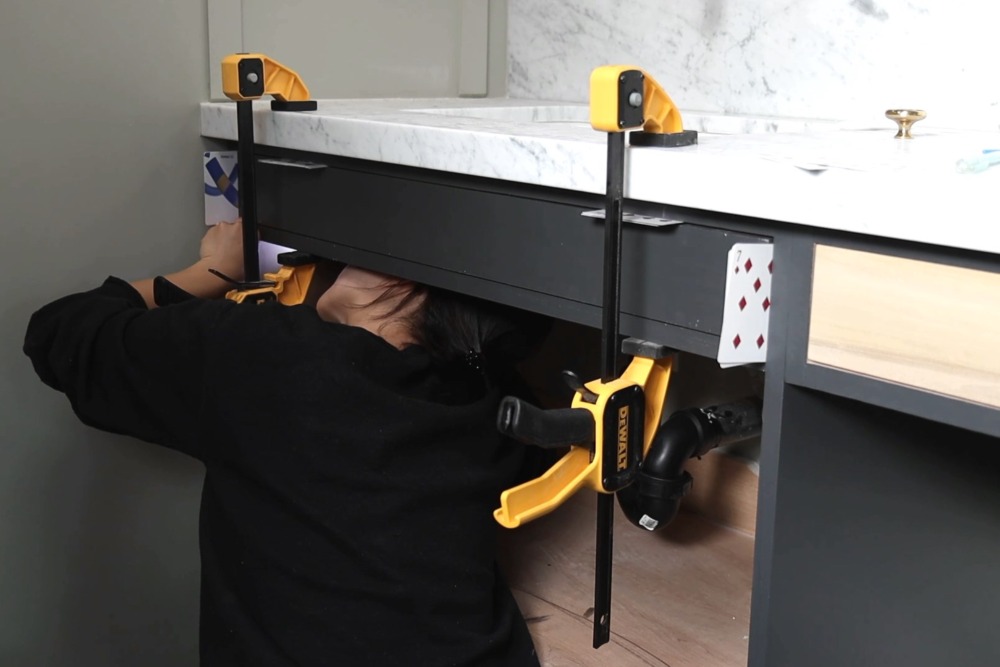
To install the drawer front, I positioned them, then used poker cards to leave an even gap on all four sides. Doing this also helps to hold the drawer front snuggly and make sure that it’s not moving anywhere.
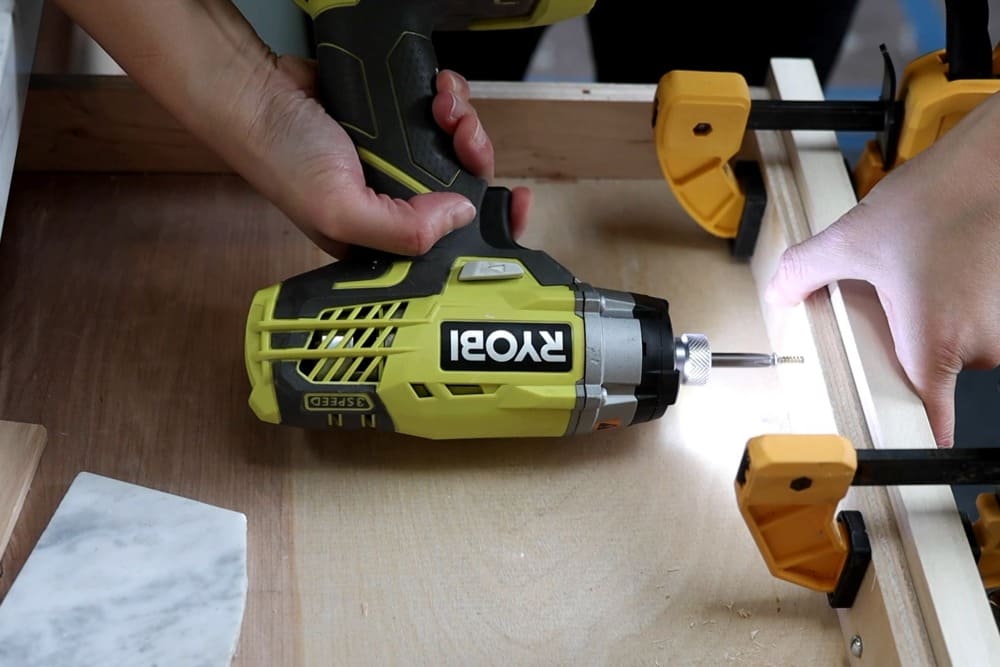
Next, I drilled a pilot hole where I wanted the knob to be, but with a smaller size drill bit. Then you can drive a long screw in that pilot hole so you can attach the drawer front and the inside box together.
Alternatively, you can use a double sided tape, but make sure to use a sticky one.
Once I pull the drawer out, I can then secure these two layers together by a couple of screws from the inside.
Then I added the knob. Btw, the process will be easier if you don’t have the vanity top installed, as you can easily access inside the vanity to attach the drawer front.
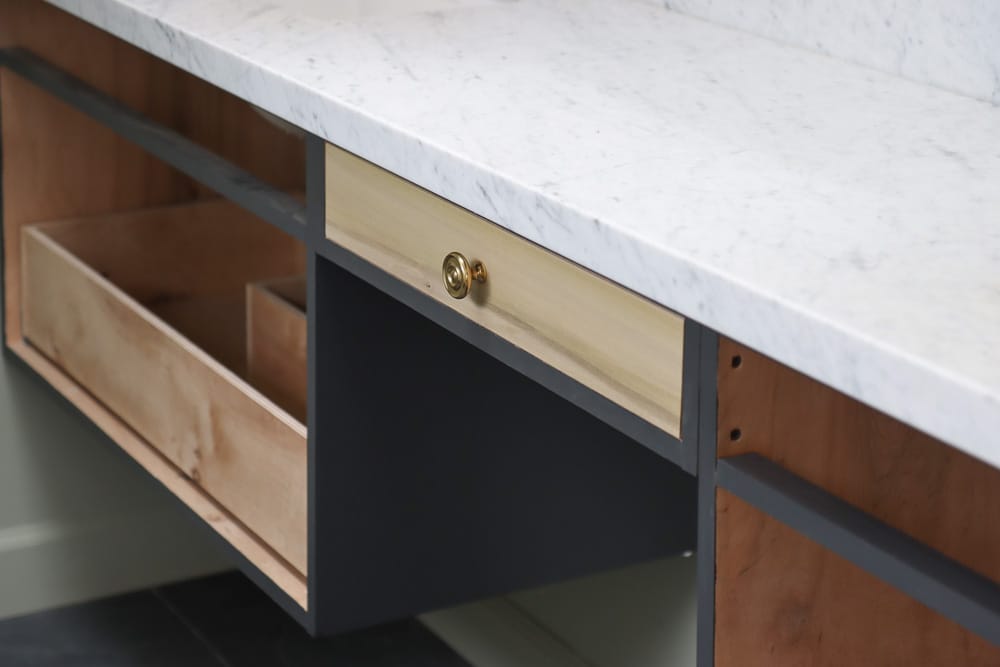
After the drawer front was in and secured, I was able to do some final adjustments with these amazing undermount slide locking devices. I used the dial to adjust it left to right, and used the other switch to adjust it up and down.
2. Tip-out Trays
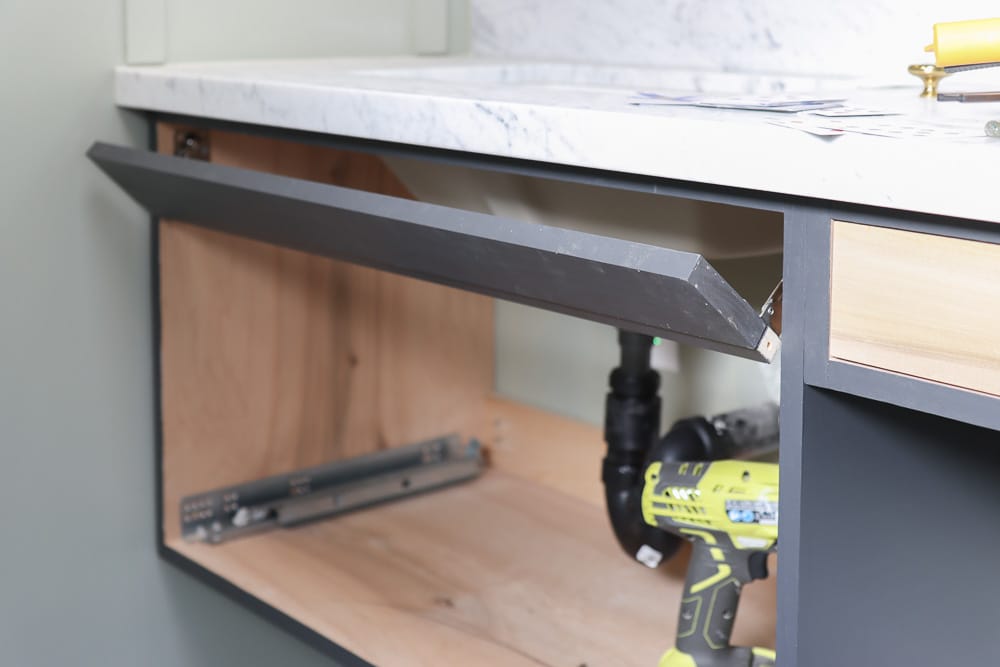
After installing the narrow drawer fronts, I installed the tip-out tray right in front of the sink. This is a great way to add additional storage to a commonly not-so-utilized space.
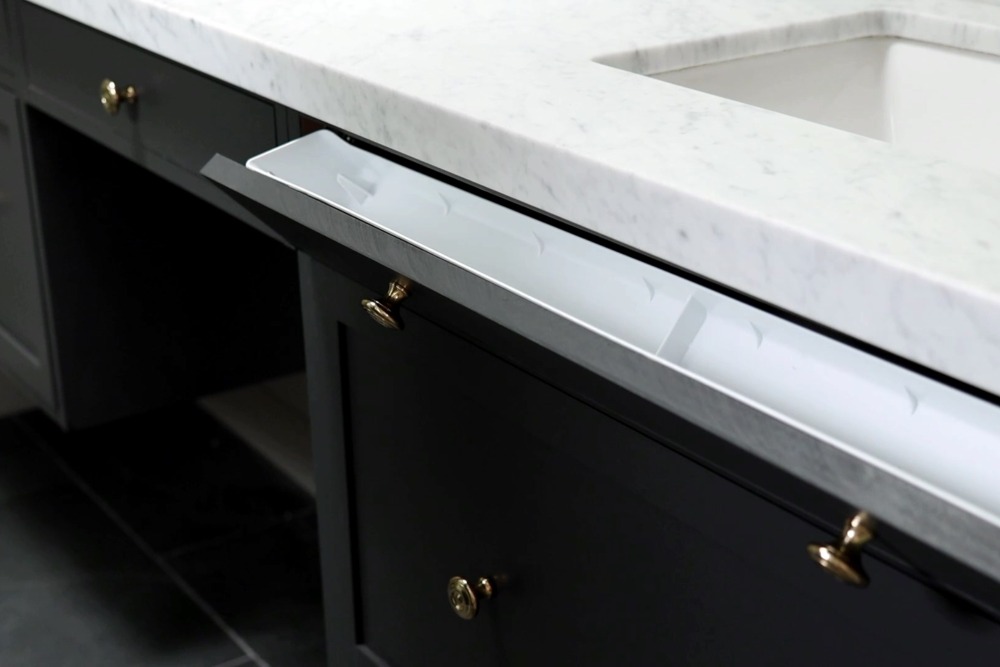
So I bought a tip out tray kit which comes with a pair of hardware and a long tray.
When I was dry fitting the hardware into the opening, I realized I didn’t have enough vertical space. To solve this, I could either remove the horizontal board here, or I can attach the board with the drawer front to form a new piece.
Since I wanted the top drawers from all three vanity boxes to have the same look, I decided to go with the latter option, and attach the board with the drawer front and make then into one pice.
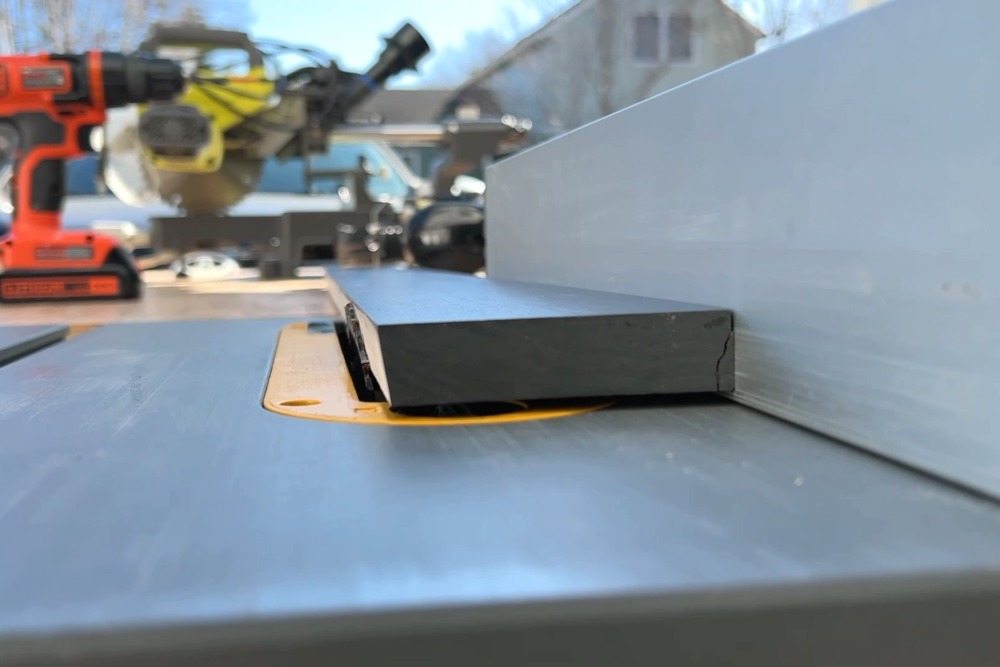
By the way, tip-out trays are typically designed for an overlay style cabinet. Because I went with an inset cabinet style, I had to trim the top edge with a 7 degree angle to make sure that the front won’t be stuck in the frame when open and closed. I’ve found this to be very helpful based on my own experience.
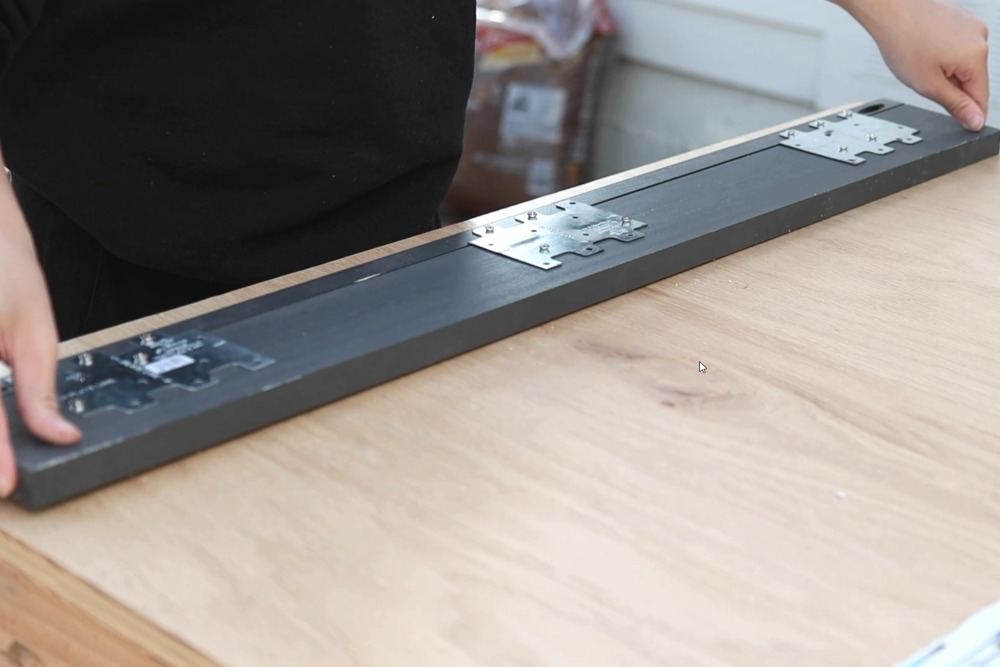
I used some metal plates I bought from Home Depot to attach these two pieces together so I can leave a gap between them to mimic the natural gap between the drawer and frame.
I used the poker cards again, and attached these two pieces together with screws on the back.
At this point, I also marked where the tray will go so I can add the screws in. This step will be much easier to do now than later.
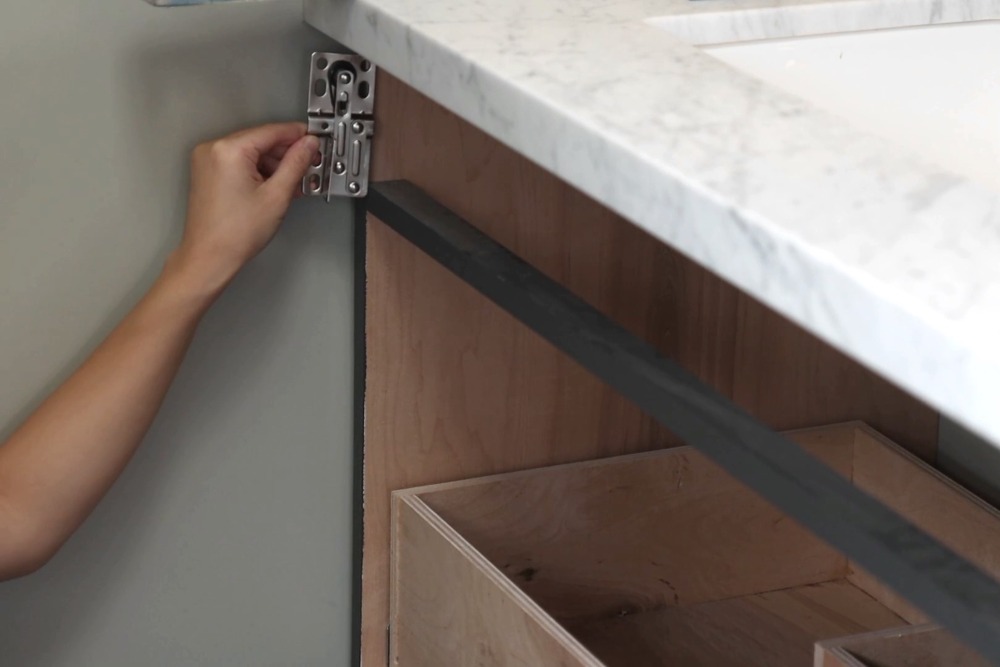
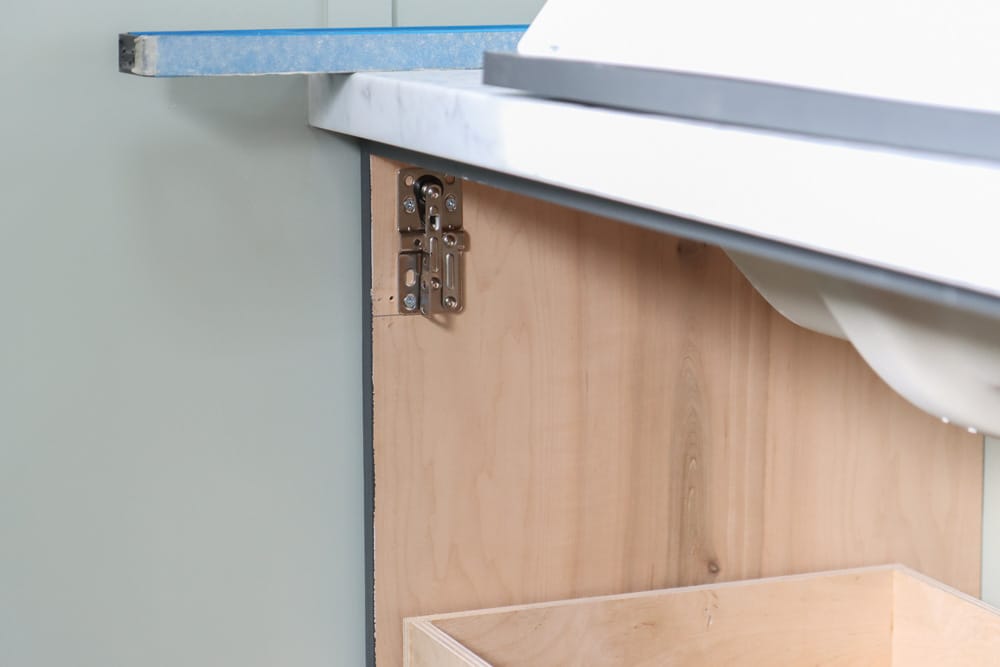
Back at the vanity box, I placed the metal hardware in place, marked where they’re supposed to go based on the instructions, and attached them to the side of the cabinet frame.
Then I clamped the front in place, with poker cards in between, and attached the hardware to the front.
At this point, you can add the long plastic tray in and hook them onto the screws you added earlier.
3. Bottom Drawer Fronts in Shaker Style
So when all the top drawer fronts were done, I moved to the bottom drawer fronts!
They’re quite large, so I didn’t want to do a flat style. I always liked the shaker drawer style, so that’s what I decided to create.
I went with a slightly narrower width of 1½ inch as the outer frame, because I think it looks more delicate. I used a ¼ inch MDF board for the center panel, and a 1½ inch wide poplar wood board so I didn’t have to rip it to the right width, saving a step. Then I just cut them to length.
Next, I needed to create a groove in the middle so I could slide the ¼ MDF inside. Because the board is ¾ inch thick, I set the blade to cut at ¼ inch on each side.
Then readjusted the blade position to remove the middle piece.
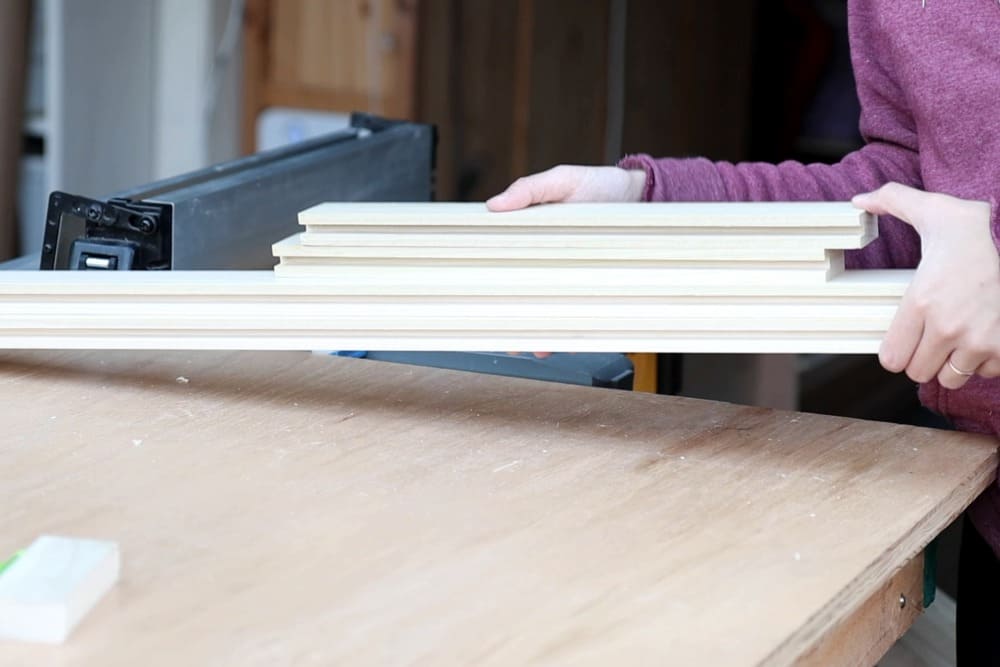
In a shaker style front, rail is the horizontal trim piece and it needs to be slotted into the stile, which is the vertical piece – just like tongue and groove.
So I removed ¼ inch extra bits on the top and bottom sides.
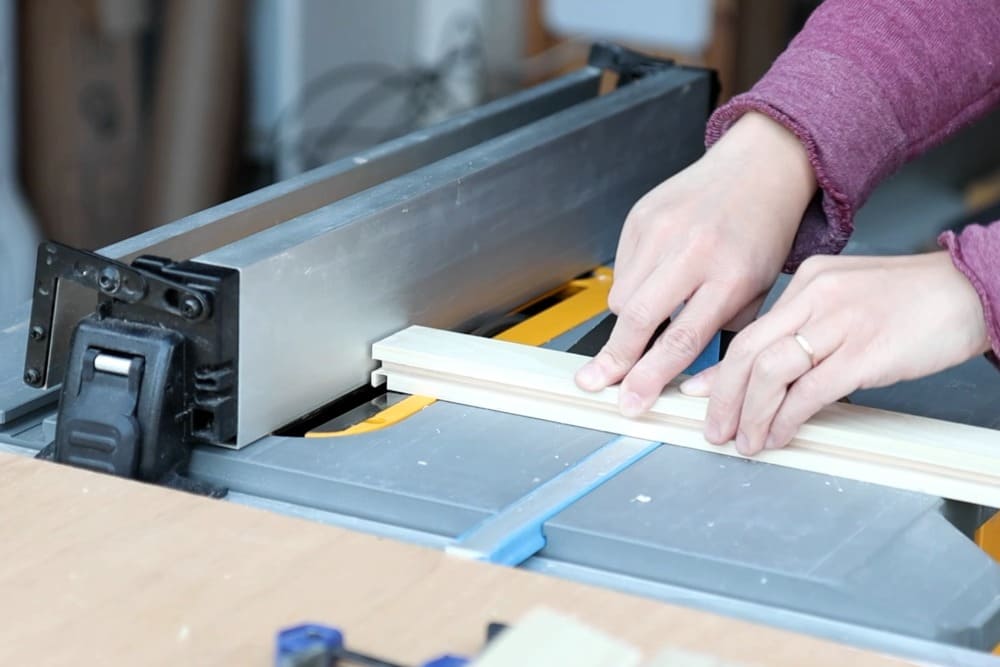
When you cut the rails for a shaker door, be sure to account for the extra width for the tongue and groove connection. In my case, I added ⅜ inch on each side.
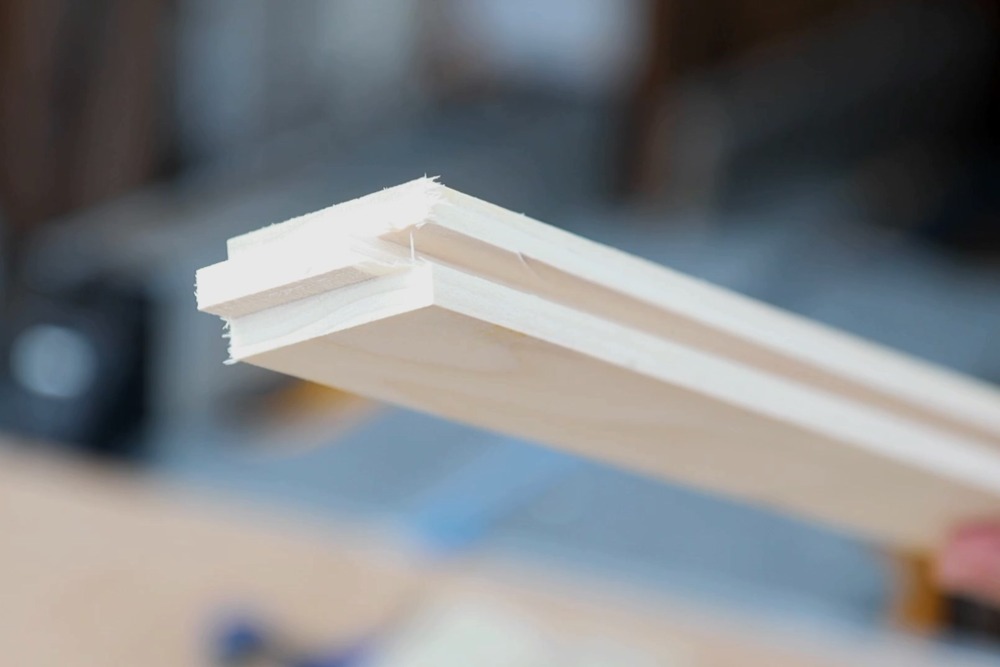
If you’re looking for a very detailed shaker door tutorial, here’s a video that I found really helpful.
Once I cut all the pieces, I did a dry fit with them.
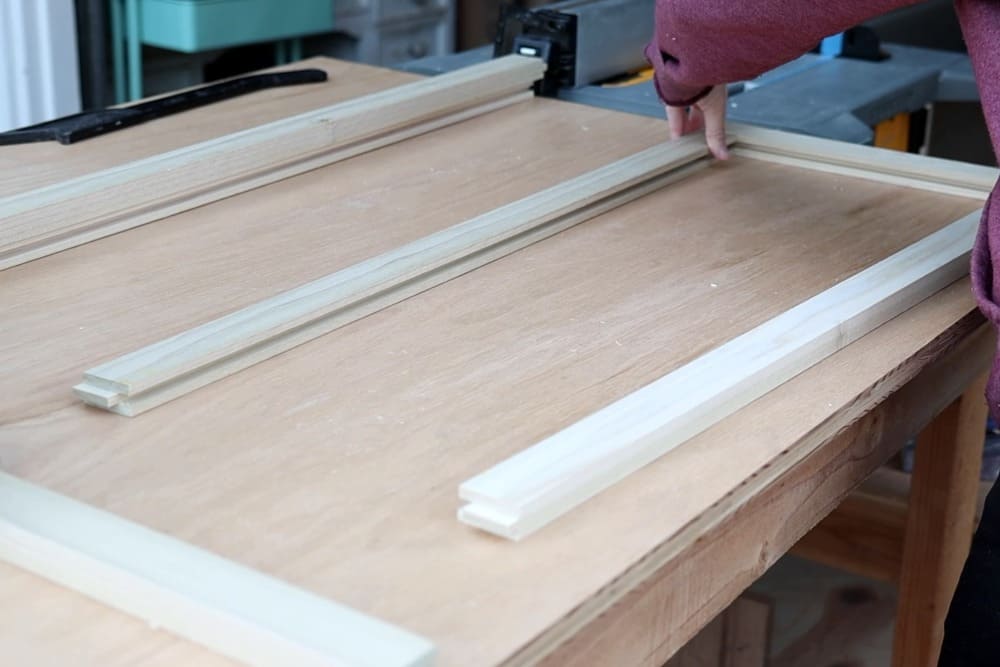
Then I used purely wood glue for the construction, so that I don’t have to patch any nail holes afterwards.
I just clamped them together with 3’ bar clamps and let it sit overnight for the glue to cure.
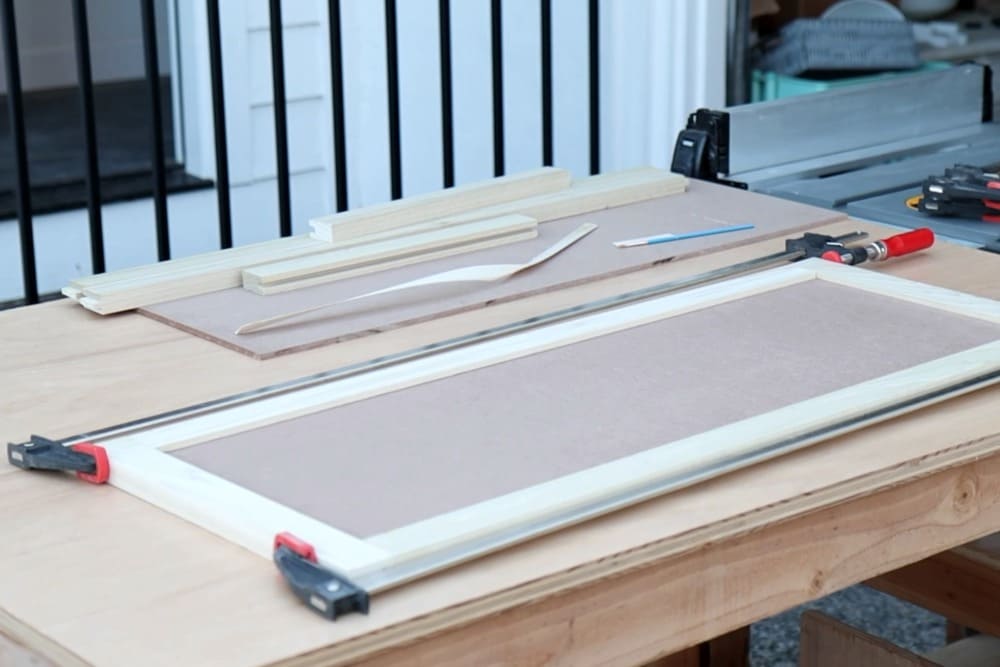
Because I only have one pair of long bar clamps, I used the picture frame tool for the other cabinet front.
The next day, I used wood putty to smooth any joints and my sander block to sand them smooth.
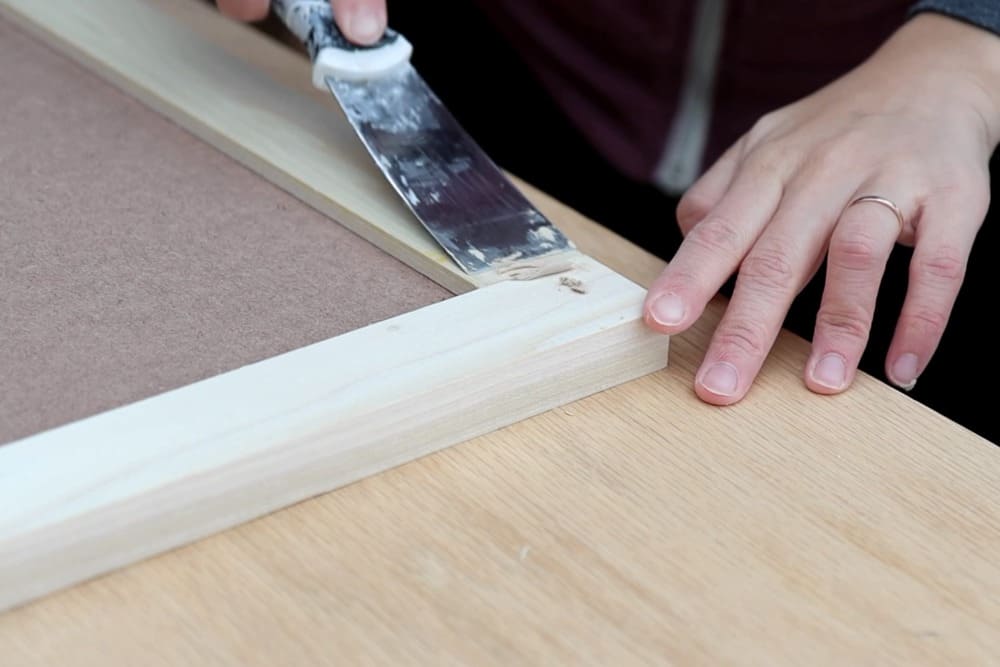
Now they are ready to be painted!
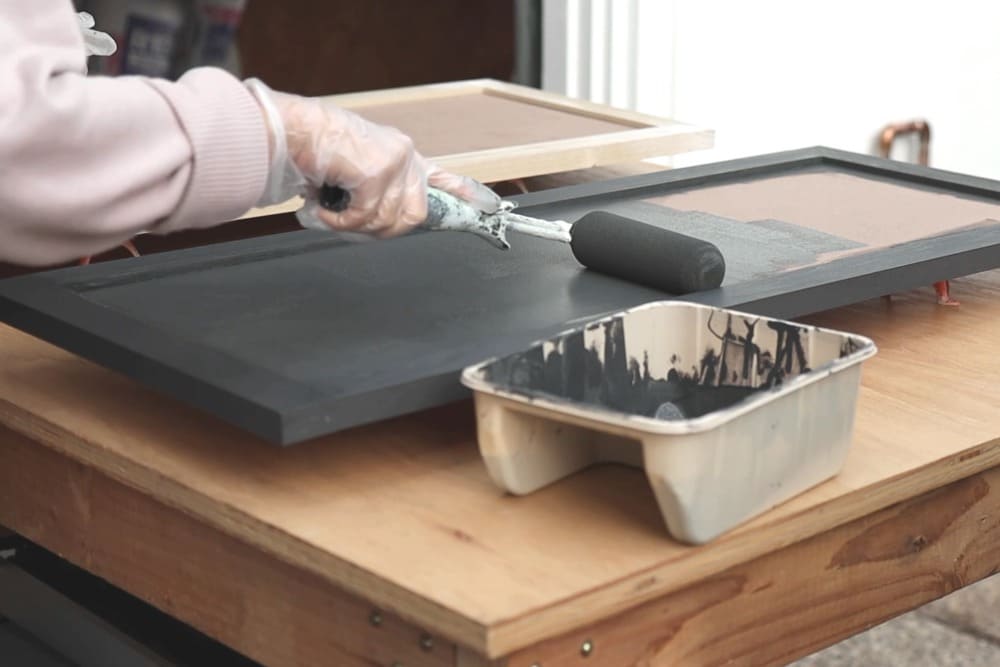
I should’ve used a primer, but I was too lazy to create any more additional steps, so I just did three coats of paint. I used the same paint as the vanity boxes to make sure they all look the same.
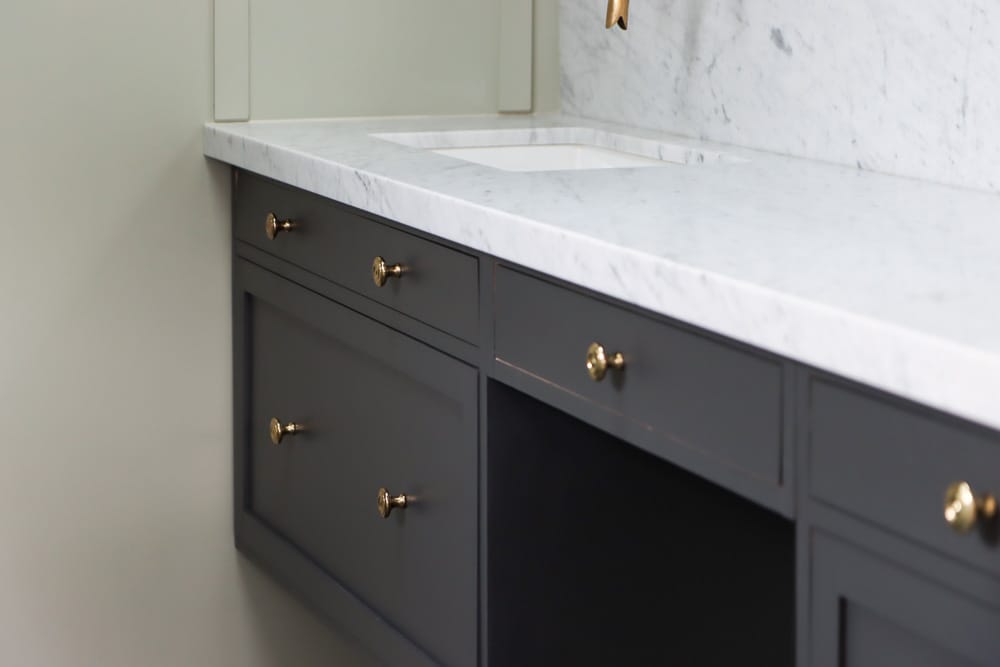
Then I installed the drawer fronts to the drawer box and added some beautiful brass knobs. I used two knobs for each drawer since the drawers were pretty wide.
Because shaker-style cabinets are concave in the middle, I added a piece of ¼ inch plywood to bridge the gap between the drawer box and the front.
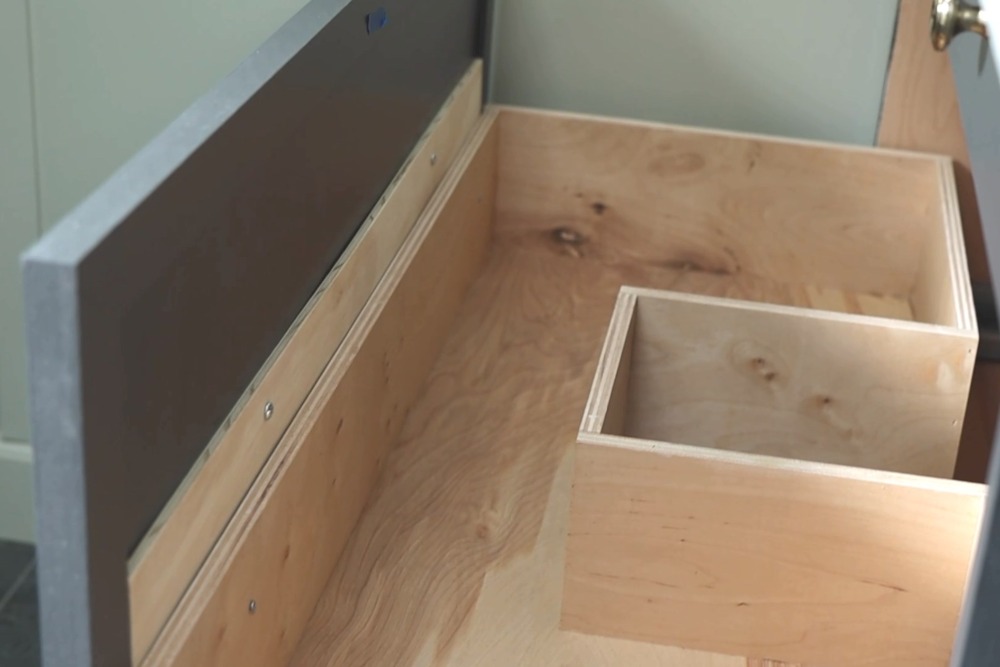
This also enabled me to install the knobs on a thicker board, given my drawer box wasn’t high enough to reach the knob hardware.
But I usually prefer a slightly shallow drawer box anyway, because it allows me to save on materials.
Step 8: Enjoy your Vanity!
Now that the bottom drawers are done, the entire project is done!
I’m so thrilled with how it turned out, and how functional it is. I’ve always been a big fan of drawer cabinets compared to door cabinets, because of how easy it is to reach things inside.
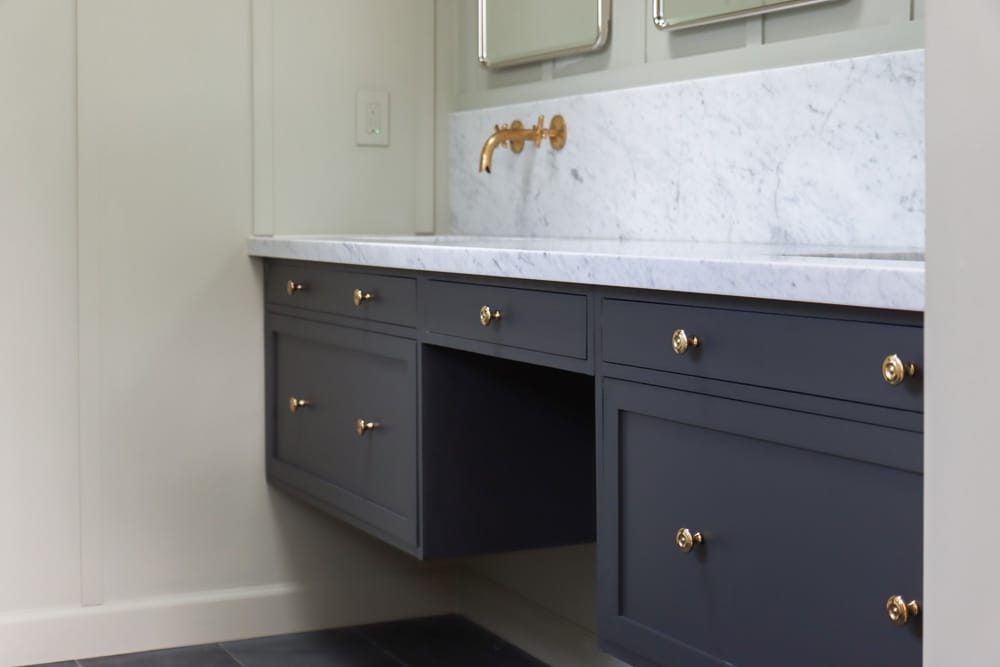
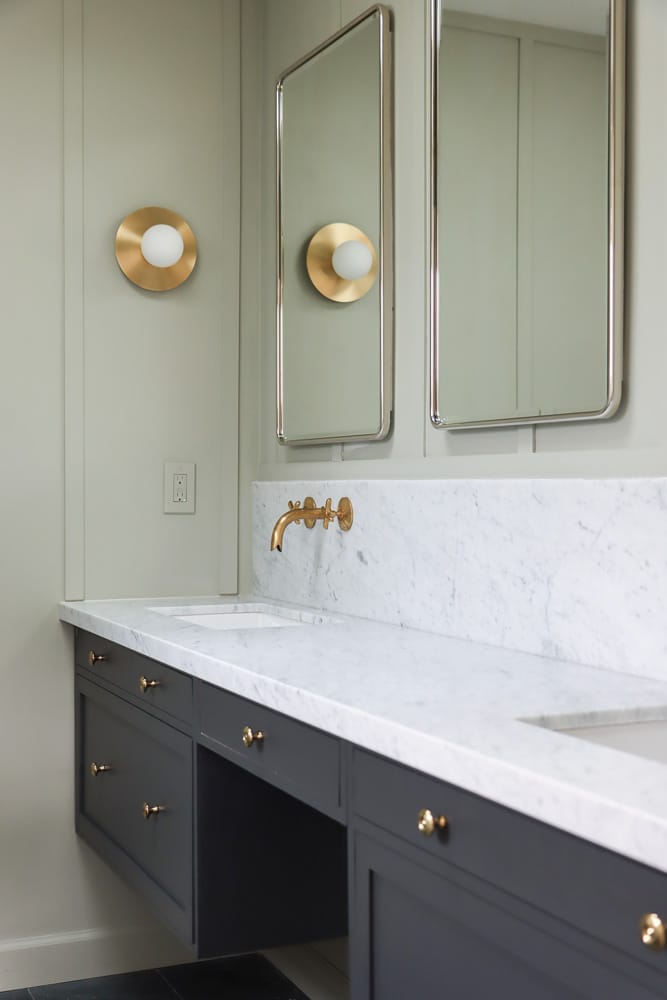
I also love how much storage it adds to my small master bathroom.
If I were to order this custom cabinet from a store, not only would it cost a lot, but it would also be hard to customize to my specific needs.
DIY Floating Bathroom Vanity summary
I hope this tutorial has helped you create your very own beautiful DIY Floating Bathroom Vanity.
You can always refer to the video tutorial on my YouTube channel if any of the steps here are a little confusing for you. Feel free to leave comments there if you also have any questions.
With that said, I wish you the best of luck on this project, and I hope you enjoy your stylish yet functional DIY floating bathroom vanity!
More DIY projects
DIY Window Seat with Ikea Nordli Hack
Pin it for later
Hi Kelin – We’ve made the same mistake with the veneer trim… Were you able to do anything to repair the bubbling?
I haven’t repaired it yet. My plan is to reheat the glue, remove it and reapply a new strip. Or iron it flat with a paper to protect the paint?