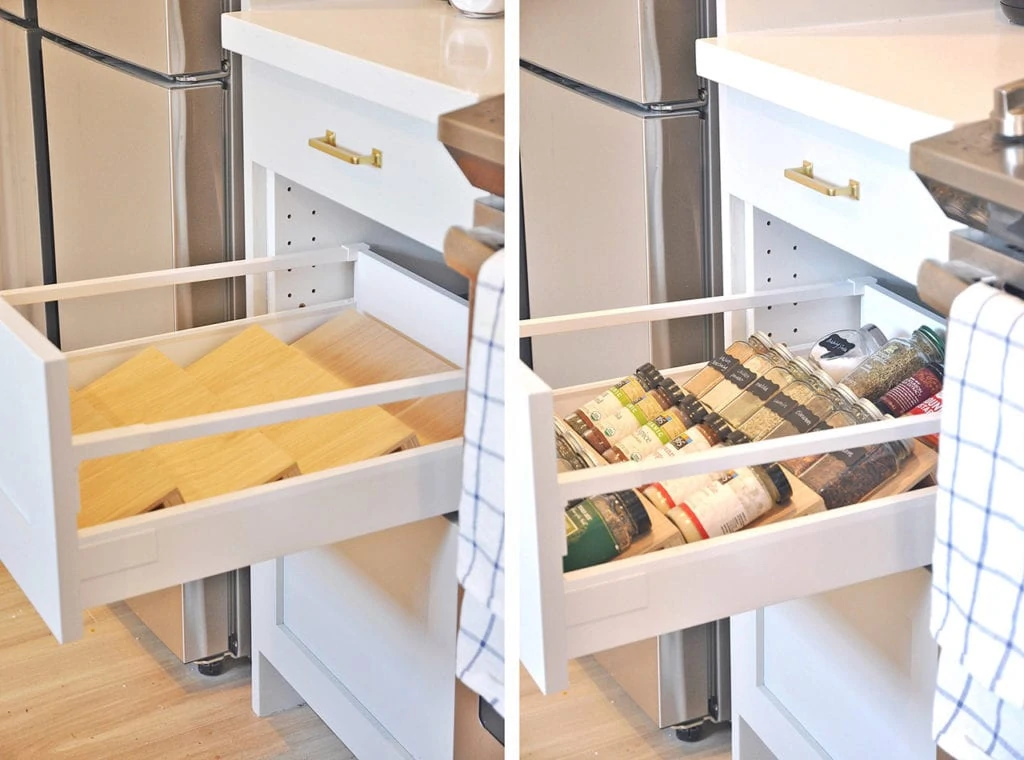
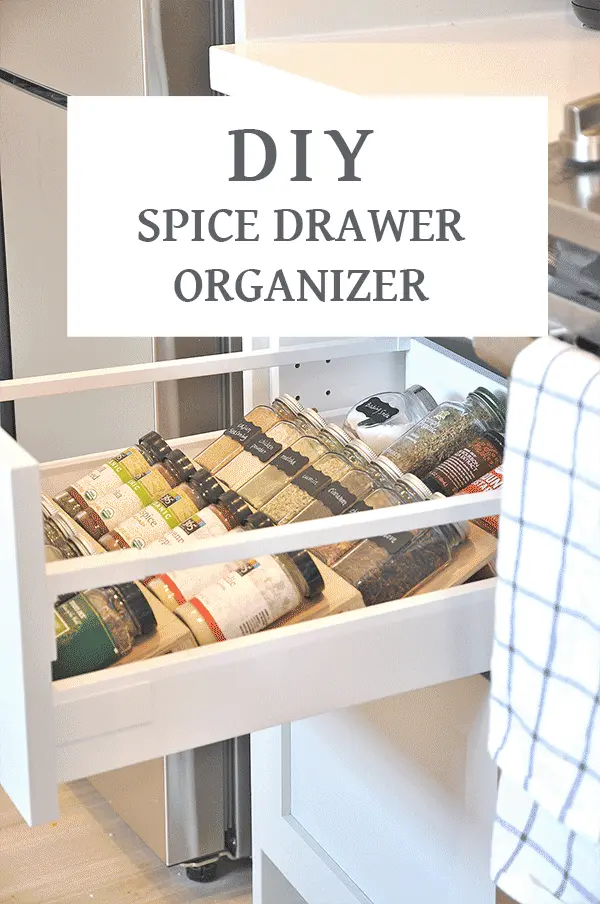
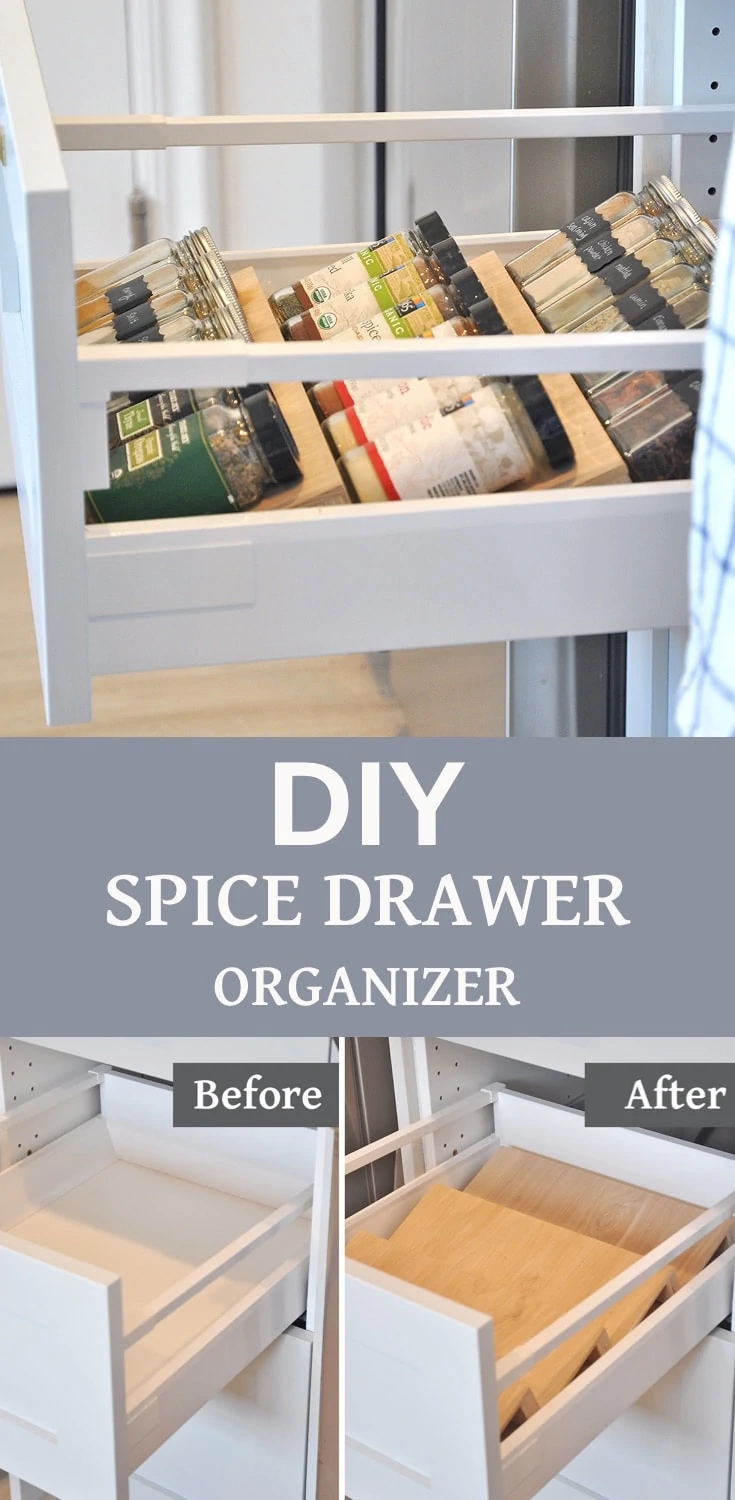
This DIY spice drawer organizer will definitely level up your kitchen organization game! Not only this DIY spice drawer insert will fit your drawer perfectly, its tiered structure will also make picking spices so much easier when you are busy with cooking.
Don’t forget to download the 2-page printable build plan so you can have this tutorial when you build your own!
DIY spice drawer organizer VS. buying it online
Have you seen those dedicated spice drawer with tiered racks inside? I have and I was jealous to be honest. I have an IKEA SEKTION system that I love, but that also means I have to say goodbye to those fancy spice drawers which comes with some kitchen cabinet makers. IKEA kitchen system doesn’t offer a tiered drawer option like that, instead there’s a type of plastic flat organizer available. The problem is with that IKEA organizer, all the spice bottles will be laying flat inside and touching each other head to toe – it is definitely harder to take them out when you are in a rush cooking, plus the plastic material looks a little bit cheap.
Before thinking about I could actually DIY this, I was a lazy bird. I looked around on the internet such as Amazon and Wayfair to purchase something like this, because I thought they are both readily available and affordable – I was proven wrong. They are not super available and the nice ones turned out to be $30+! If I want to buy a wood finish tiered spice rack, both of the width and length will be fixed, meaning I cannot make then custom sized to my spice drawer. There’s a type of adjustable plastic spice rack on Amazon which is pretty affordable, but again, it the length cannot be adjusted.
Luckily with the help of Google, Pinterest, and Youtube, I have found some helpful tutorials, such as this one from Anna White. So thanks to internet god, I’ve finally figured out the secrets to custom make DIY spice drawer insert organizer to fit my drawer width and length! And to be honest, I’m smile every time I open my spice drawer that I just cannot live without it anymore. It has also received a lot of praises from my friends. With this beginner friendly DIY tutorial, you will be able to organize all your spices in a fancy way too. I highly encourage you to give it a try – I promise it will be a big kitchen life improver.
How to DIY Spice Drawer Organizer Video
I know sometimes the written steps sound complicated than it actually is, so I made a short video to demonstrate the entire process of making this spice rack drawer organizer. When I decided to DIY this spice drawer, I searched on Youtube first like I always do for DIY projects, but there’s not so much video tutorials available. I hope you find this video tutorial easy to follow and helpful!
P.S. Subscribe to my youtube channel to get more DIY videos like this!
How to DIY Spice Drawer Organizer Instruction
Looks like you are onboard right? Let’s get started!
Materials
- 1/4″ thick 2′ by 4′ plywood
- 3/4″ thick 2′ by 4′ plywood (you can also use 2×4 so you don’t have to rip it)
- measuring tape
- clamps
- wood glue
- some type of saw. I used miter saw for this project, but you can use circular saw, jigsaw, or even hand saw!
- (optional) glass spice bottles and labels to keep them tidy and easy to see
Step by Step Instructions
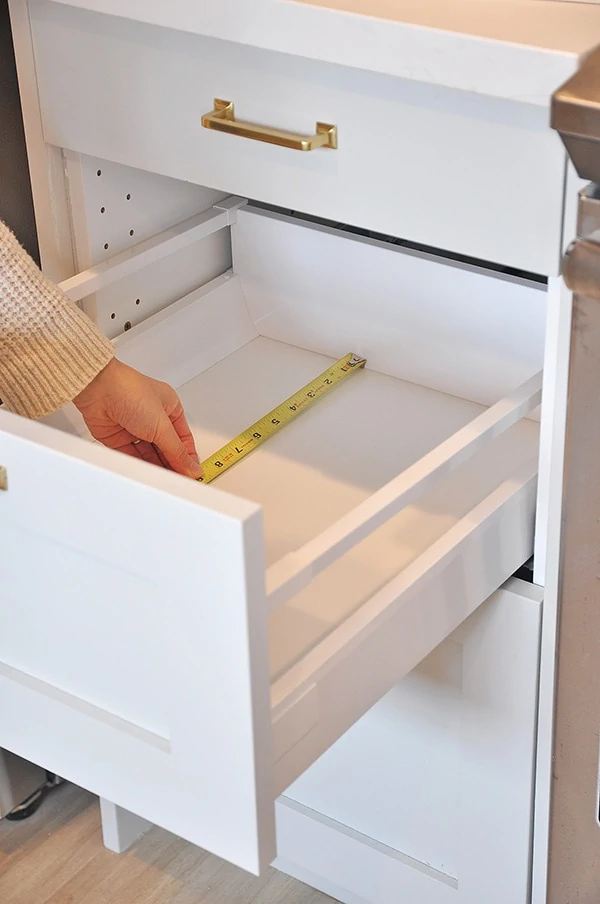
1. Mesure
Measure your dedicated spice drawer inner width and length. My IKEA drawer is curved on the side, so I measured the very bottom surface of this drawer (where the spice rack will sit)
2. Transfer the measurement to the wood you want to cut
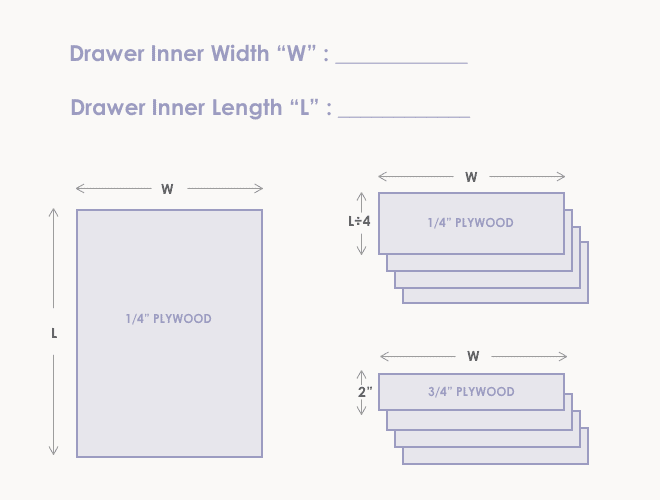
Here’s the sizes you will need to cut:
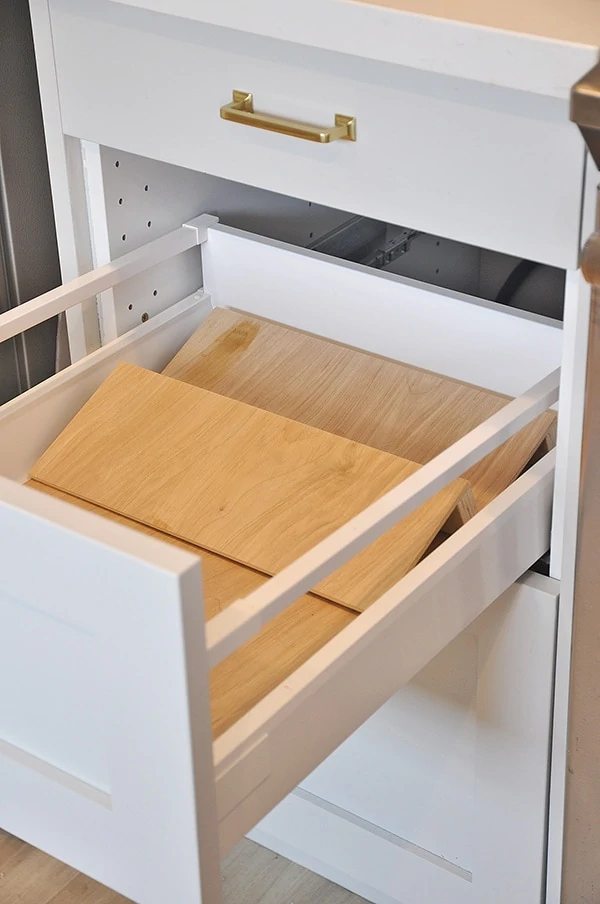
So first of all, the idea is that you’ll want to have a thin(1/4″) wooden board served as a base liner with the almost exactly the size of your inner drawer. Later on you will place those “tier” components on top of it. It serves 2 purpose: 1. It protect your drawer from any spices spills (my vanilla extract once spilled inside the drawer). 2. it add more friction for the “tiers” to sit on, and you can even glue or nail them together for stability – I didn’t because I like bing able to slide them up and down as I need. With the spices bottle weight, they are very stable without even being glued to the base board.
For this project, I cut a piece of 1/4″ board with almost the exact size of inner drawer size as the base liner, and then cut 4 pieces of drawer width x drawer length/4.
For the 3/4″ board, I cut 4 of drawer width x 2″ as the tier riser. You’ll want to make sure your drawer is high enough for that(my spice drawer is less than 10″ H and they fit perfectly), otherwise reduce the 2″ to a reasonable number to accommodate your drawer hight.
Here’s a quick summary of the size you need for each wooded board:
(You can always download the free PDF building guide at the end of this post)
3. Cut wooden boards
Cut the plywood boards based on the measurement from step 2, and lightly sand the edge if needed.
4. Glue and clamp
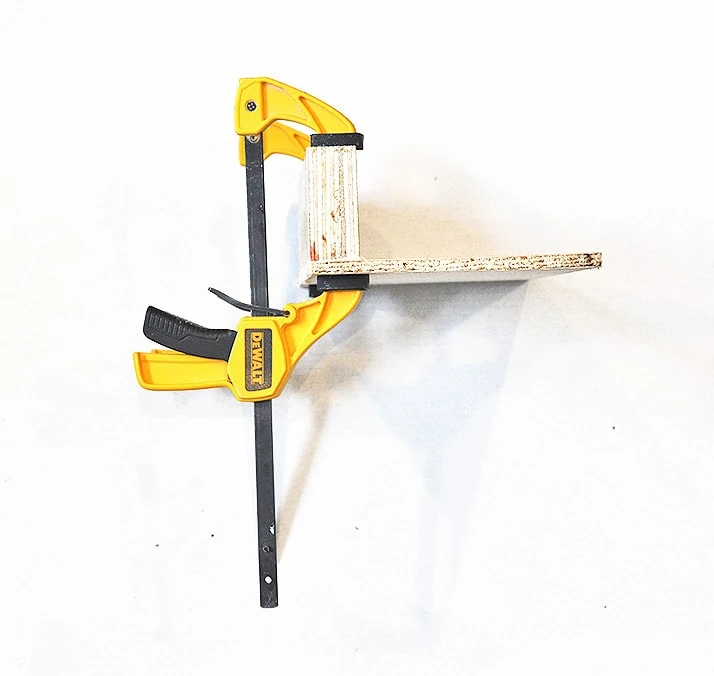
apply wood glue and put two pieces together then clamp them with 2 bar clamps!
5. Assemble
Once they are dry, it is time to assemble – exciting times! First put the base liner in first. Then put the tier component one by one, starting from the very end. I didn’t glue them to each other because there’s enough friction for them to stay when I open and close the drawers. Another reason is to allow for future adjustment so I will be able to move them around.
6. Enjoy
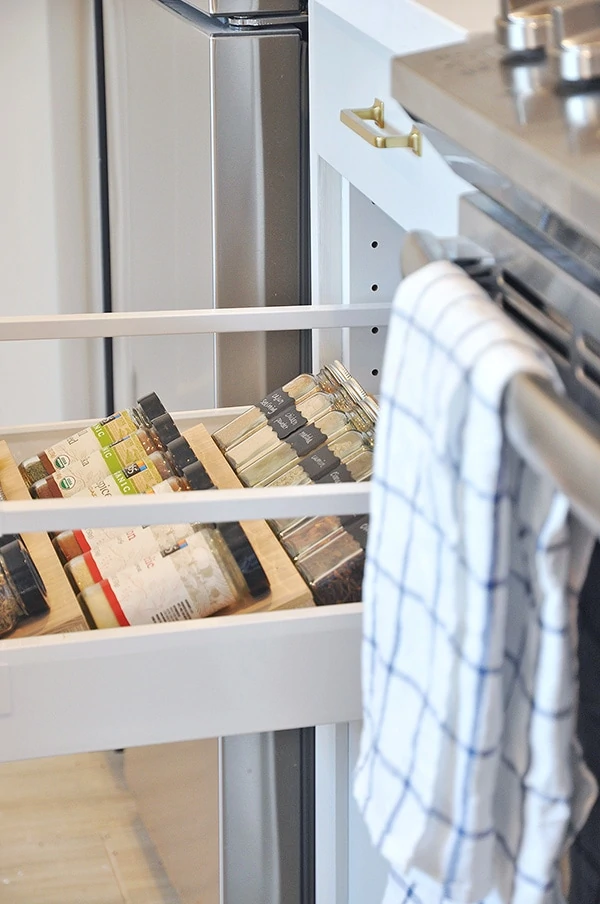
Now it’s time to enjoy. All you have to do is to put your spices back and organize them in your favorite way, then enjoy your fancy spices drawer!
I personally kept all my Whole Food 365 spices in their original bottle, and put other spices into those glass spice bottles to make them look more tidy and easy to see. Then I got some chalkboard labels to label them.
You are done! Pretty easy, isn’t it? I hope you enjoy this DIY spice rack drawer insert tutorial and will give it a try. I’m enjoying my spice drawer everyday. Cooking at home can be hectic sometimes. Having an organized spices drawer will make your life so much easier.
Some Tips for This DIY Spice Drawer Organizer Project
- Wipe away the excess wood glue when it is still wet. It is wayyyy easier to clean them when they are wet.
- You can paint this spice organizer based on your liking! If you do, I would recommend a satin to semigloss finish as they will be easier to wipe down later on.
- Wood glue is sufficient enough to keep the two piece together when you are making those “tiers”, as long as you clamp them tightly. If you don’t have lamps on hand, you can simply nail them together and let the wood glue to do its magic.
Get DIY Spice Drawer Organizer Build Plan:
Other kitchen organization ideas
Small Kitchen Organization: 5 Tips on How to Maximize Storage And Keep Things Organized
IKEA Kitchen Cabinets Organization Ideas and Hacks

Love this DIY spice drawer organizer! It’s so easy to make and has helped me keep my kitchen organized and clutter-free. The labeling system is genius and makes it so much easier to find the spices I need. Definitely saving this to try in my own kitchen!
So happy you found this tutorial useful 🙂
Jaki wymiar miała Pana szuflada? Łącznie z jej wysokością? Świetny pomysł:)
Jaki wymiar ma Pana szuflada? Przepraszam za błąd poprzedniej wiadomości 😉