Looking for pretty picture frame? No need to run to the store. I’m sharing my tried and true picture frame makeover tutorial to transform this $1 thrifted picture frame to something truly classic and timeless.
Picture frame is one of the best thing to thrift
Do you have a lot of empty walls? One of the easier way to solve it is to hang some arts. After discovering thrifting, I pay extra attention to frames whenever I step in a thrift store or estate sale. Please don’t laugh at me, I didn’t know thrifting was a thing until a year ago and would only buy things brand new – I must be living in a totally different world >_<
There was a while I was so obsessed with watercolor, so I had the dream of hanging my artwork everywhere in my rental apartment. Time has passed and I moved to my new house with 20+ frames I have hoarded. I wouldn’t even call them a collection, as they are just boring white frames, no details, no characters. And these frames are not cheap, I used to spend $10 – 20 on a medium sized frame and thought that was a norm. I don’t even want to do the math on how much I have spent on them in total.
But now with the knowledge of thrifting, I have changed my game completely. That is: I will no longer buy full-price frames from the store, I would only buy thrifted frames:
Thrifted frame pros:
1. They are full of personality. You can find simple looking basic frames, as we’ll as something more ornate and vintage
2. They are super cheap. For a lot of my local stores, it costs $1-$2 for a small size picture frame, $2 – $5 for a medium size, $10 – $15 for a large size.
3. Because of the above 2 reasons, you won’t feel guilty of paint it over
Thrifted frame cons:
no cons I can think of !!! …hmm… maybe sometimes you have to do some simple cleaning/wiping?
The Before & After
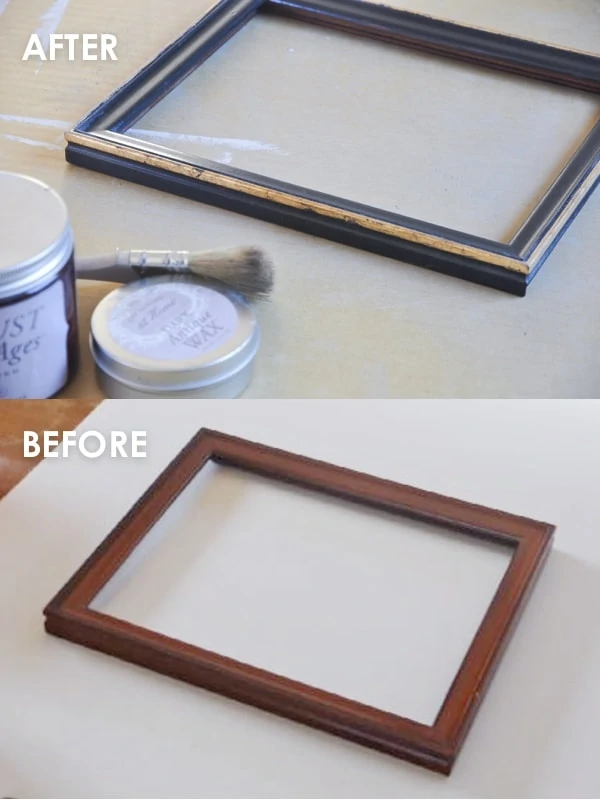
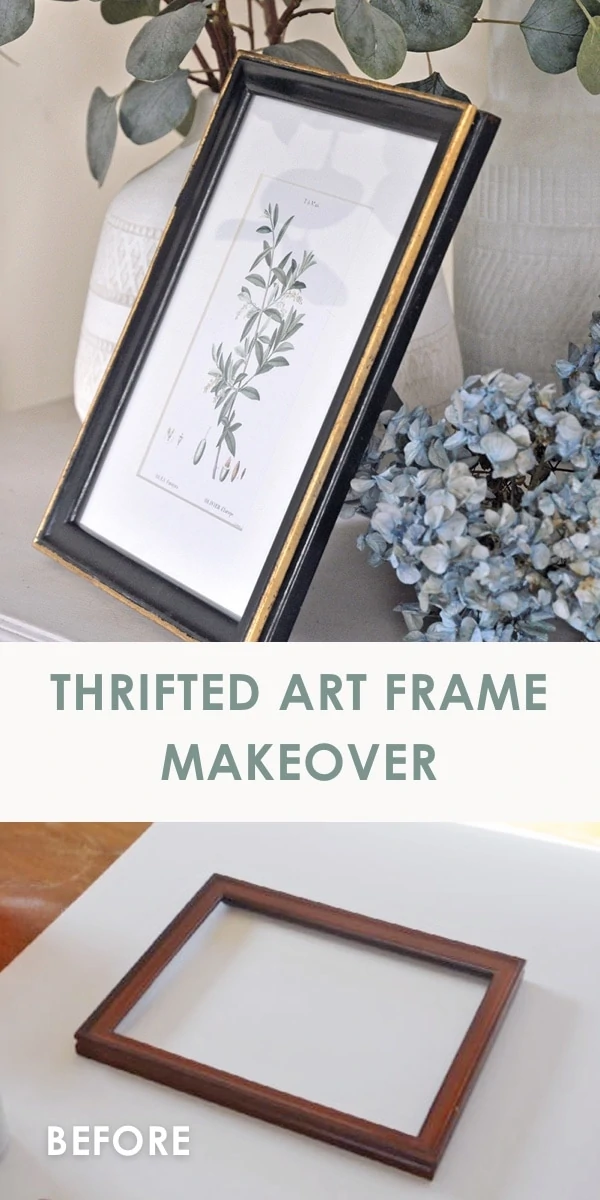
I found this frame for $1 at a local estate sale. I was desperately needing some vintage looking frames to mix and match with the boring white frame I bought before knowing about thrifting.
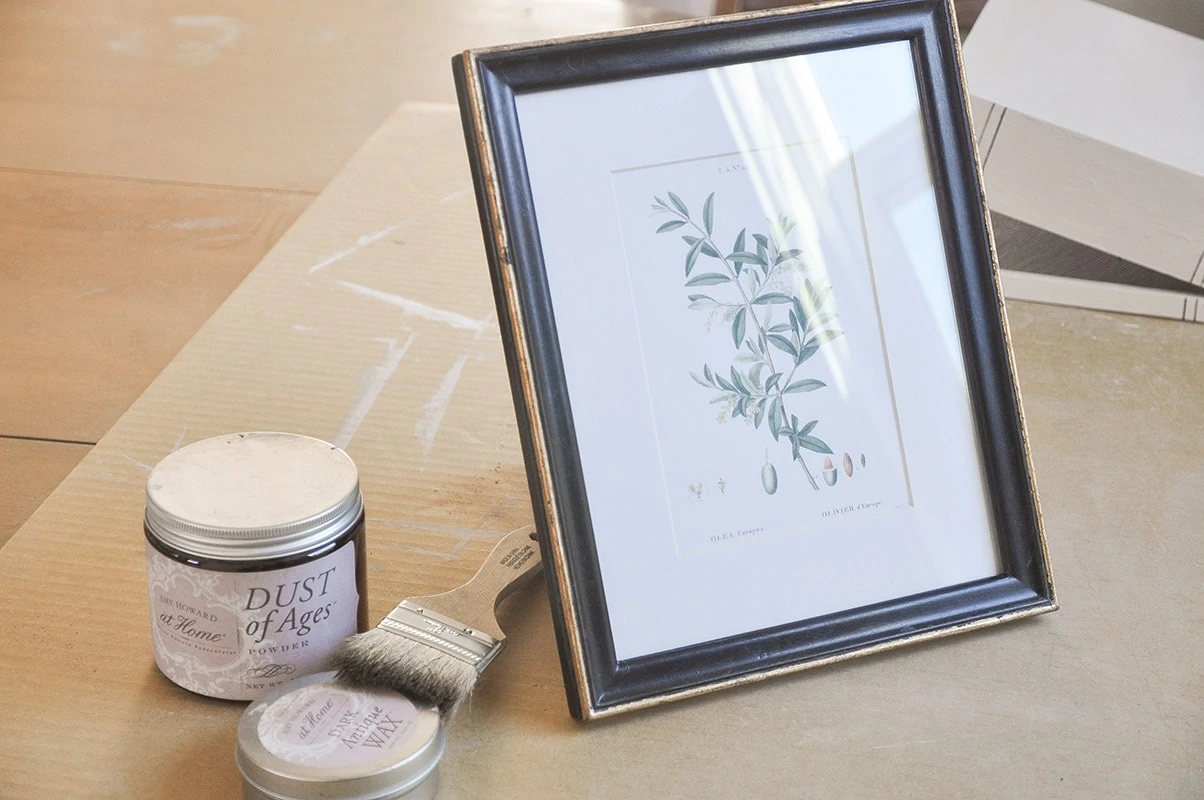
The before is pretty old looking – the typical burgundy wood color that are not trendy these days, so I had the idea of paint it black. Although I don’t have any black paint on hand, I do have a small bottle of black outdoor rated acrylic paint that I could use. It is not perfect but if you have read some of my DIY posts, you probably have noticed that I’m pretty frugal (or resourceful?). The paint turned out to be great! The application is pretty smooth and there’s barely any stroke marks on the frame. The sheen is on the glossier side so I toned it down with Dust of Ages.
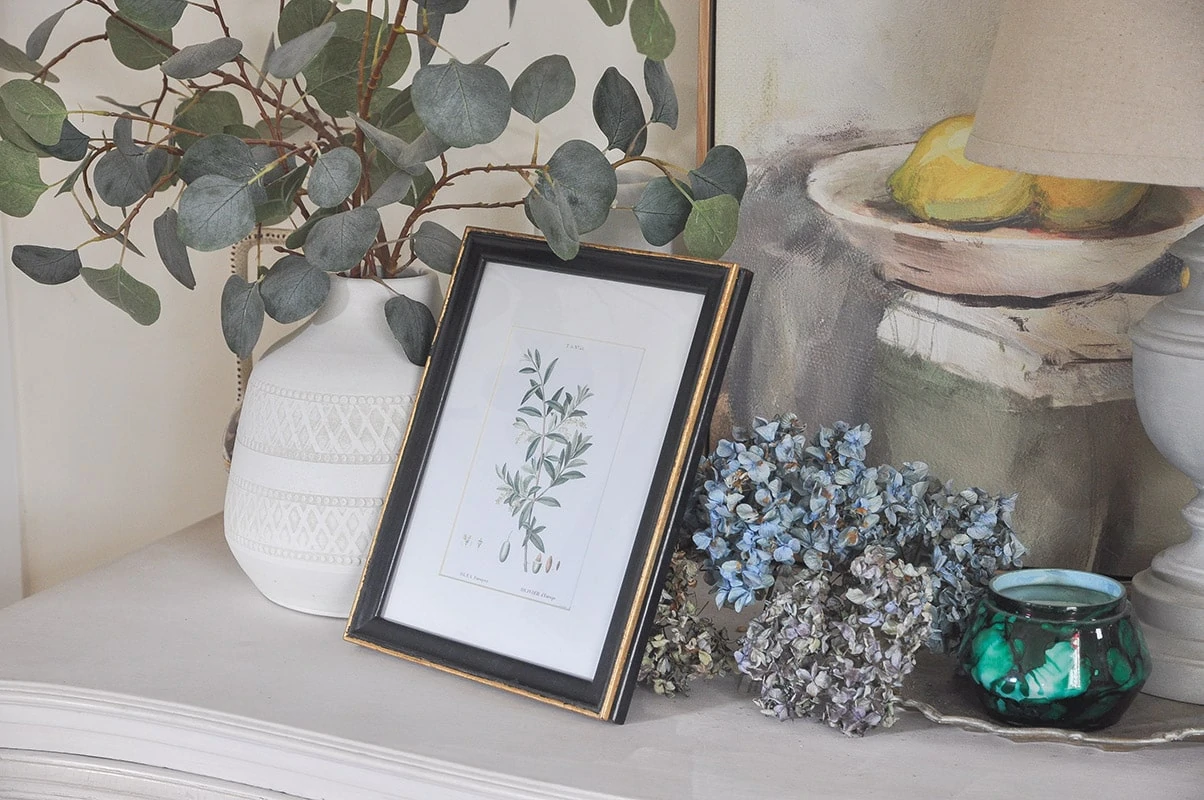
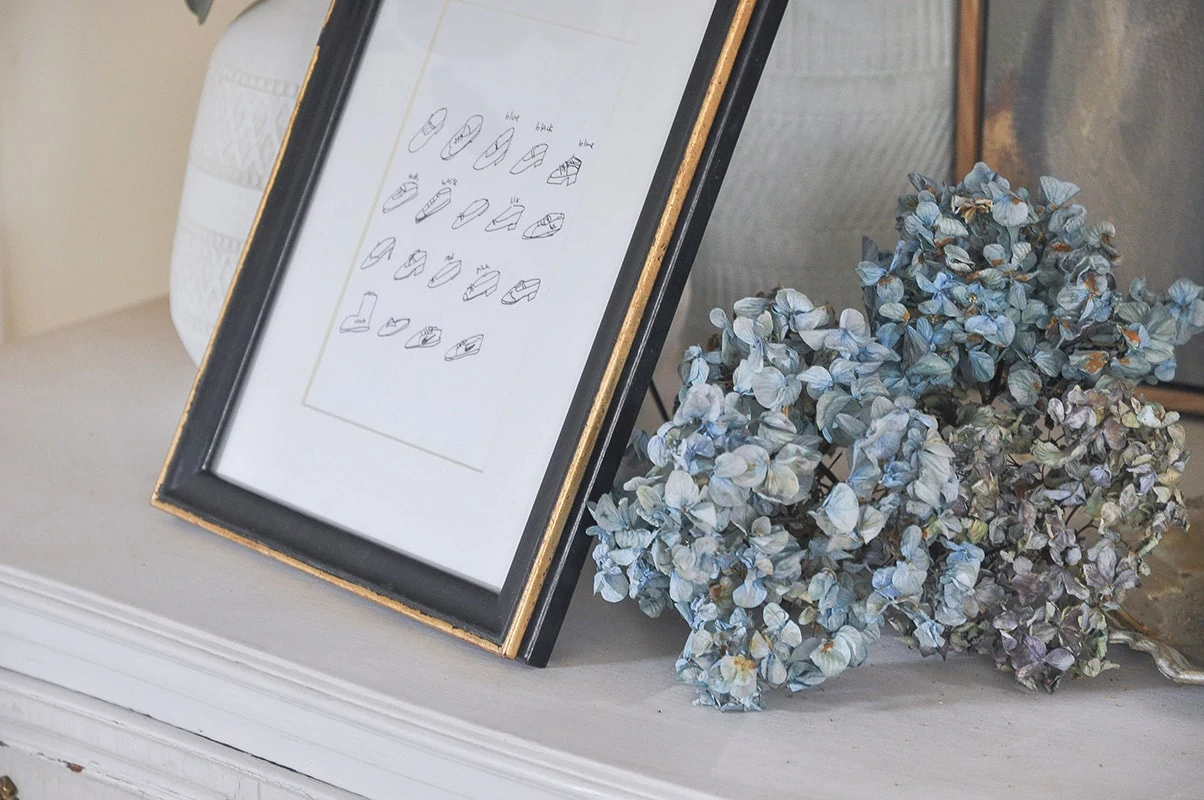
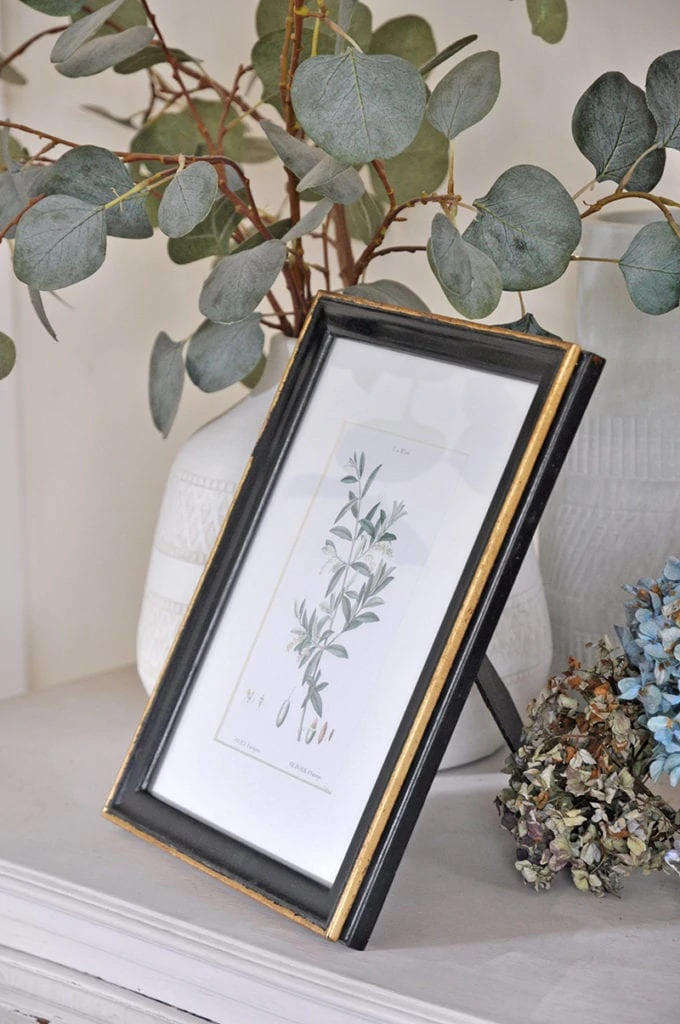
The after is truly a classic art frame I can use for almost any space. After I placed the vintage olive branch print inside, it immediately screams “classic” and “timeless”. I also tested it out with the Shoe Hand Drawing print, and it looks great together as well!
Picture frame makeover materials and tools
- Thrifted picture frame
- Masking tape
- Gilding size
- Gold leaf sheets
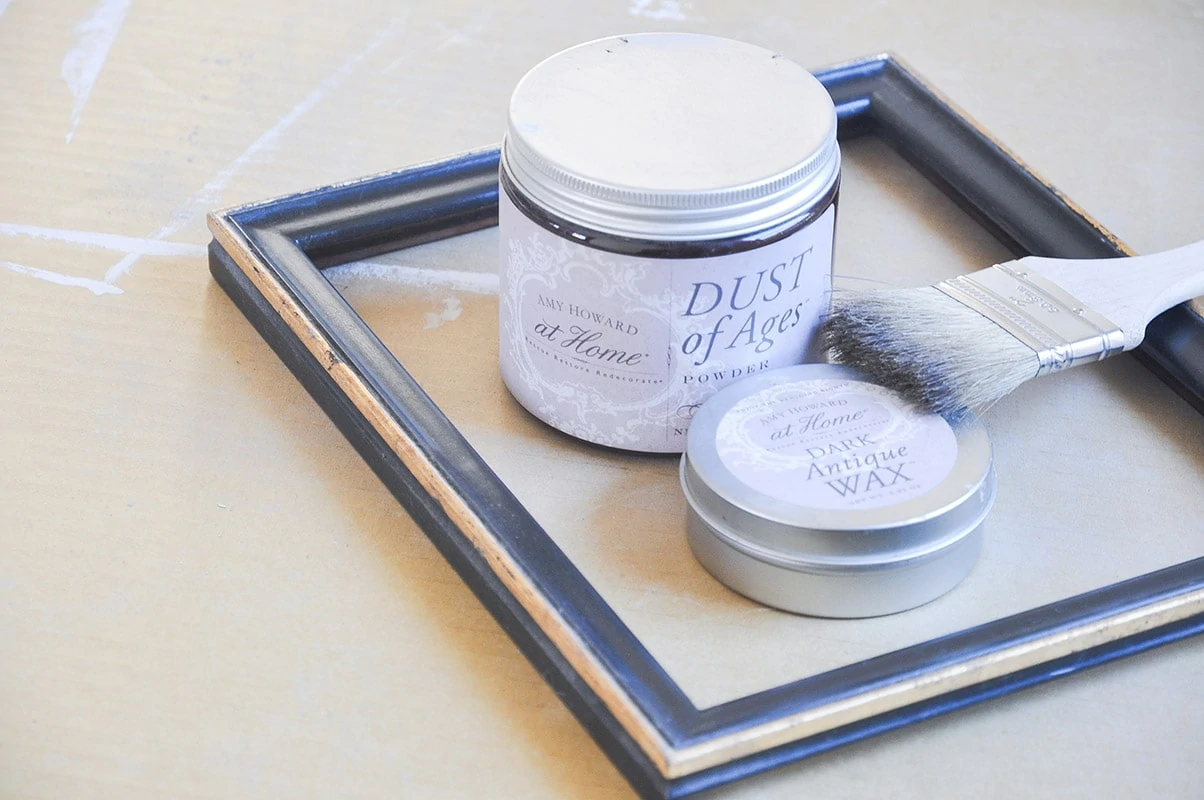
- (optional) Dark antique wax by Amy Howard At Home
- (optional) Dust of Ages by Amy Howard At Home
Picture frame makeover video
If you are a “video learner”, definitely check out the video tutorial. Don’t forget to subscribe to my youtube channel if you like this video 😉
Picture frame makeover step by step instruction
Prepping
Remove the glass and mat from the picture frame. Wipe off the dust and grease from the picture frame before painting. This will ensure the paint will adhere well.
Refinishing
1. Paint the frame. I used some leftover black paint from a project and mixed it with a little bit of water to make it smoother to apply. I’ve applied 2 coats in total to get good coverage.
2. Masking. After the paint dries, use masking tape to tape off the surface you don’t want to apply gold leaf on. This step is to ensure the gilding is not added to the unwanted part. In this case, I want to add some gilding details to the edge of the frame.
3. Apply Gilding Size. Apply gilding size, then wait for it to dry a bit to become tacky. The waiting times depends on the specific gilding size you’ve got. Mine says 30 minutes on the bottle. You should be able to find that piece of information on the product label.
4. Attach gold leaf. Once the size becomes tacky, cut gold leaf sheets into a manageable size, and attach it to the area you’ve applied gilding size on. Use a brush to gently press it down into crevices, and brush off the excess. If there’s any part missing gold leaf, repeat step 3 to 4 until you achieve the gilding coverage you like.
5. Waxing. Apply dark antique wax to the entire surface, especially the gilded part. This will tone the color down a bit to achieve an aged gold look.
6. Apply Dust of Ages. To further enhance an aged look, dip your brush into Dust of Ages by Amy Howard At Home, and evenly distribute it on the front surface. Let it sit for a few minutes, then dust it off (you can recycle that dust back to the container). The more you buff it, the less aged it will look. So make your own judgement about when to stop 🙂
Add Art and enjoy
Once everything looks good and the gilding is fully dried, put the glass back and add your favorite art! You can download the art I used HERE for free.
Get the FREE Printable Art
This vintage olive branch downloadable art is so classic and versatile. Whether you are traditional, modern, farmhouse, or eclectic, it will bring beauty and personality instantly. Simply leave your email below and it will be delivered straight to your inbox!
More DIY makeover tutorials
Nightstand Makeover | How to Update an Old-looking Furniture
Large Wall Art is Up! Master Bedroom “Half” Tour
Antique Dresser Makeover | Adding Faux Entry Way to My Home
Leave a Reply