Master Bedroom Space Planning and Mood Board
When there’s a need for sleeping on a bed, not a mattress
Master bedroom design is our second space to tackle of this 1940s house. It is time because we just finished a big kitchen renovation and has been sleeping on a mattress on the floor for 3 months.
When I was reading The Nester’s Cozy Minimalist Home during Christmas, there’s one thing really caught my attention. I cannot remember the exact wording, but the idea is that during a home renovation, you want to make sure there’s a room/space away from construction zone so your family can rest without being affected by the reno. That is such a good point! I used to think I can just have a lower quality life during a renovation, but the problem is: Renovation always take longer than expected. At the beginning you might be ready for the challenge, but with the random drama or events happening during a big renovation, you are very likely be exhausted and impatient at the end.
I personally find having a peaceful place to rest and sleep is the way to keep me sane through the entire process. So this master bedroom will serves as the peaceful for us to live through all the big or small reno in the next couple years.
The master bedroom space planning
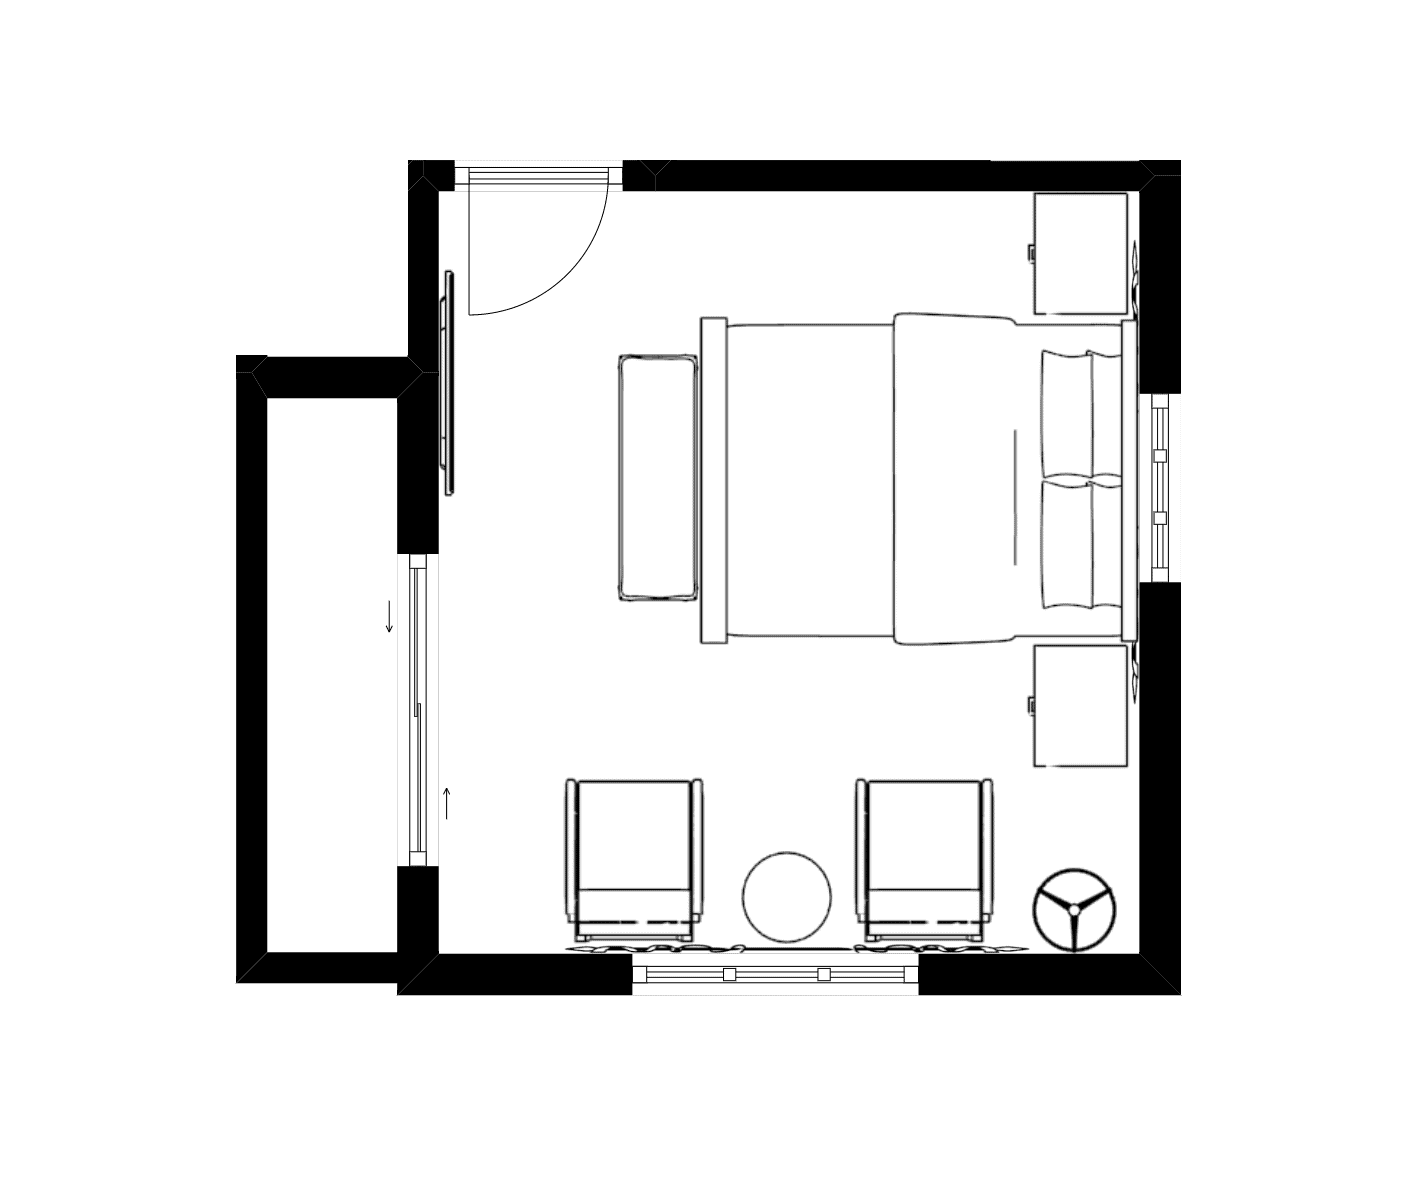
Our master bedroom is not actually master as we only have one full bath in this house. Since this room is a bigger room, we have decided to sleep here and call it a “master” bedroom. It is around 13′ x 11′, kinda small by US standard, but decent by Silicon Valley standard.
My plan is to place the bed in parallel with the shorter wall, so we can add another zone. I’m always drooling over those bedrooms with seating area inside! I’m currently thinking about having two accent chairs placed next to the big window to utilize the natural light, but I might choose to use a chaise instead, or the French settee I scored from a vintage shop.
Master bedroom mood board
Although I’m super passionate about decorating spaces, I’m still kinda new to this interior design thing. So when I came up with the mood board, my goal is to set a neutral tone, and let the decoration define this room’s personality as my style evolve and settle.
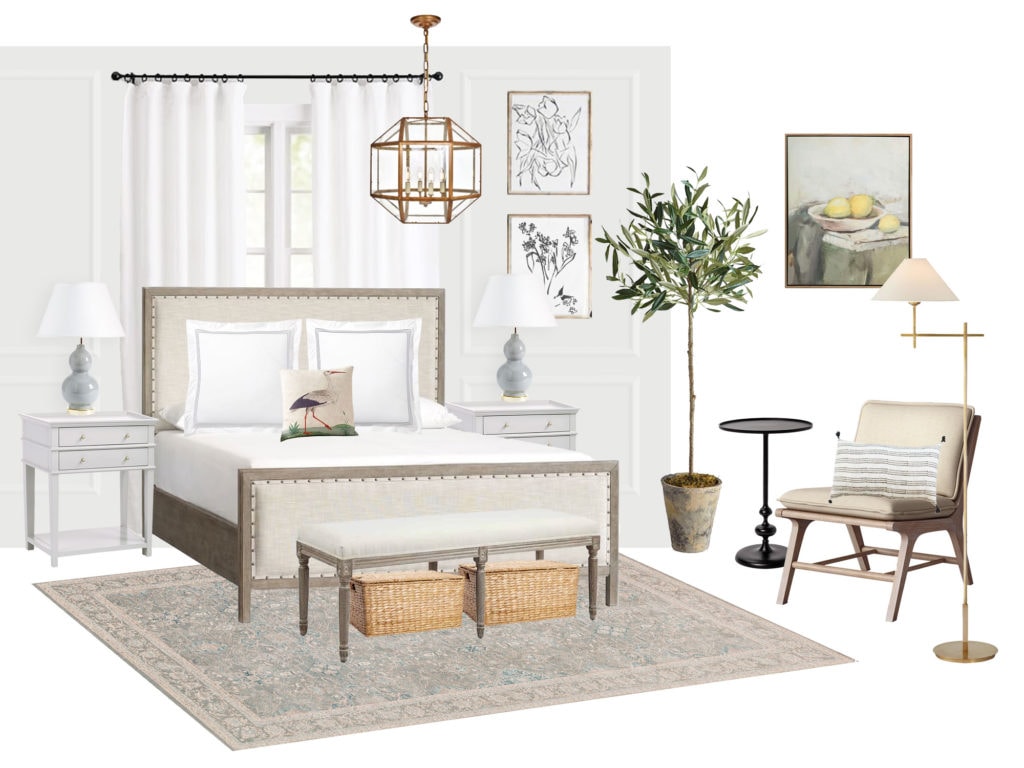
So here’s the mood board! The goal is a serene and peaceful space with a subtle hint of romance, leaning on the traditional side. The color palette is quite neutral : a lot of light gray and white, with black and brass accent.
Wall:
I’m always a big fan of architecture details and all sorts of molding details. So one non-negotiable for me is that I must have some sort of wall molding for this room. I landed picture frame molding at the end because it is high impact and low cost on both time and money.
For the color, after sampling a few white and light gray options from Benjamin Moore, I picked OC-22 called “Calm”. It is a pretty neutral color without looking green or beige – quite an interesting color.
Bed:
This bed was bought on a whim before the moodboard was created. One day my husband and I were walking around at our local Pottery Barn store. We saw this bed is on sale as floor sample. Since I have seem people used this bed to style, I surprisingly didn’t feel uncomfortable to make a purchase before extensive research (like I usually do). With the floor sample price and an additional 20% off on sales, we ended up paying $720 before tax, while its retail is $1599.
Nightstand:
The ones is the moodboard is just to show the color and style I’m going for. I wanted to save on those and had refinished a pair of second-hand nightstands scored from Facebook Marketplace.
Closet:
We ended up choosing California Closet to build our closet which I will be sharing in another post soon.
Accessories:
With this super neutral foundation, I’m planning to inject personality through accessories such as wall art, lights, pillows, etc.
Related post
Large Wall Art is Up! Master Bedroom “Half” Tour
Nightstand Makeover | How to Update an Old-looking Furniture
Pin it for later
Hi! I recently found your blog and YT channel and love it! I was wondering what software you use to make these beautiful mood boards? Keep up the great work
I used Photoshop for these.