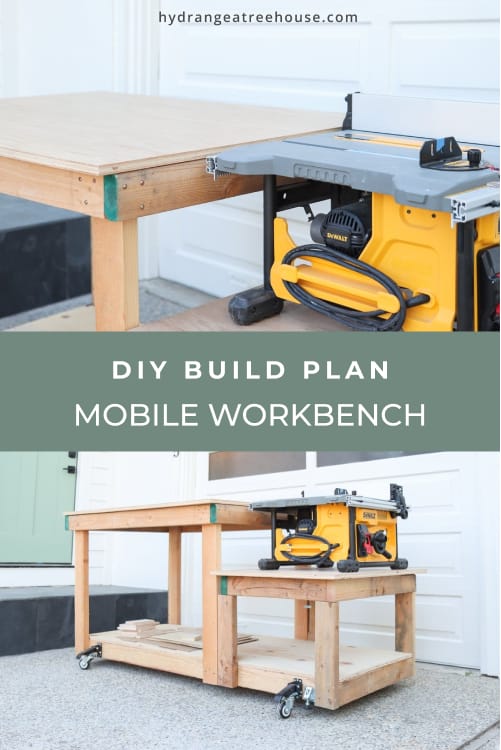
DIY workbench for table saw
How to build a mobile DIY workbench that can be used as a table saw bench. This is a simple but very useful DIY garage workbench plan with casters and levelers. I hope you enjoy this build!
Actually, since building it, this garage workbench has become my go to surface to build any DIY projects. It is the type of DIY project that will enhance your future woodworking experience.
First of all, this project is really simple. It only uses 2x4s and 3/4″ plywood.
Also, it’s pretty forgiving: the main goal is to create a flat surface for a table saw and a tabletop that you use as a DIY surface. The work bench structure needs to be robust, but it doesn’t have to be very accurate. The addition of levelers means that your structure doesn’t even need to be perfectly level–you can adjust the levelers later if your project requires a level surface.
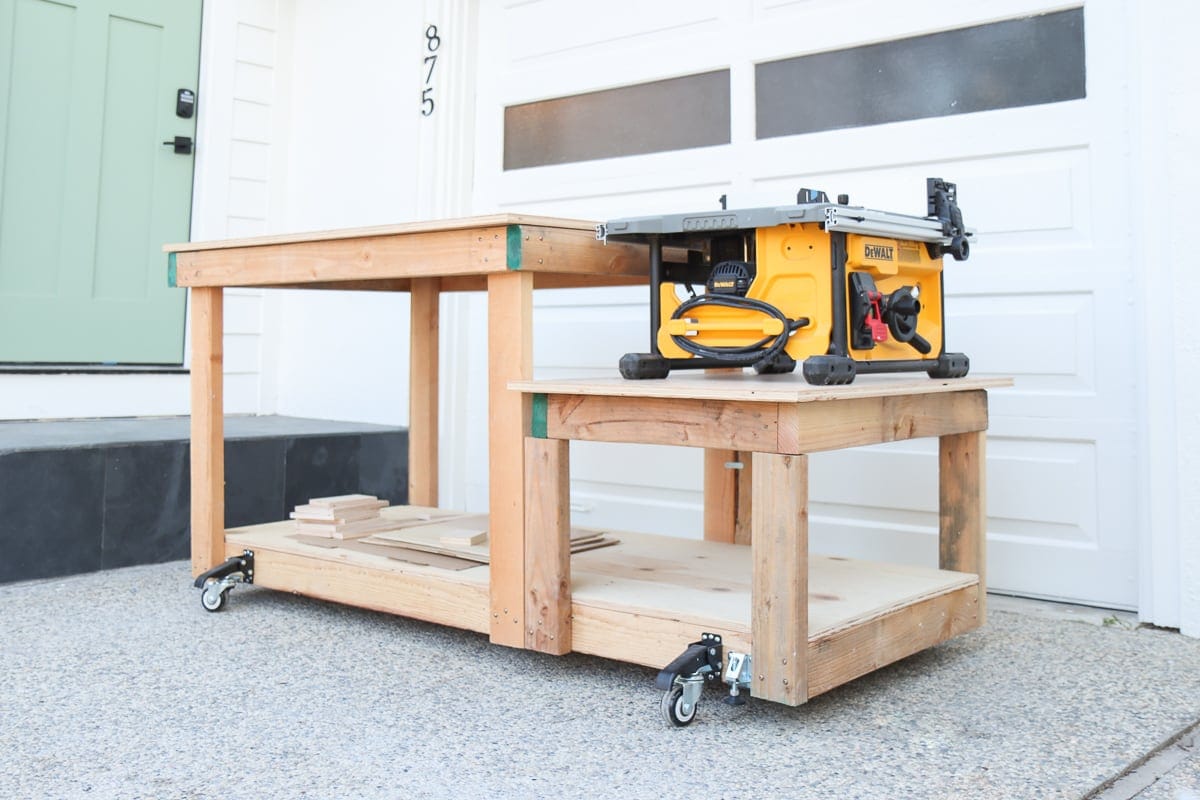
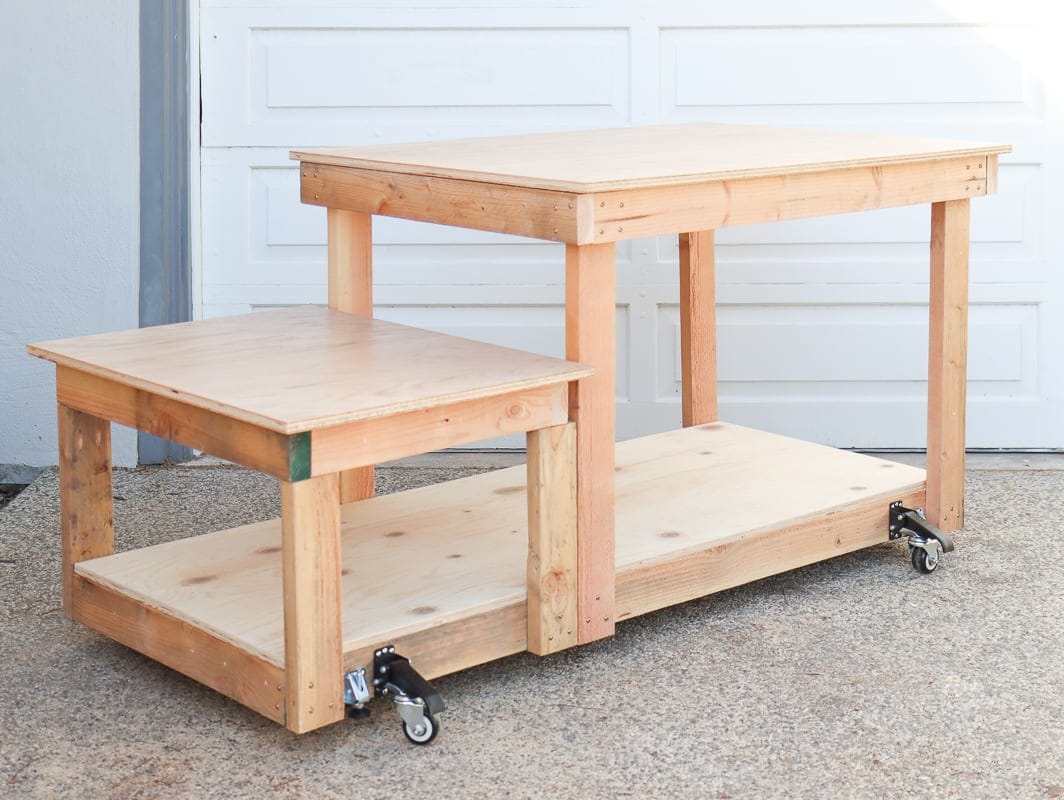
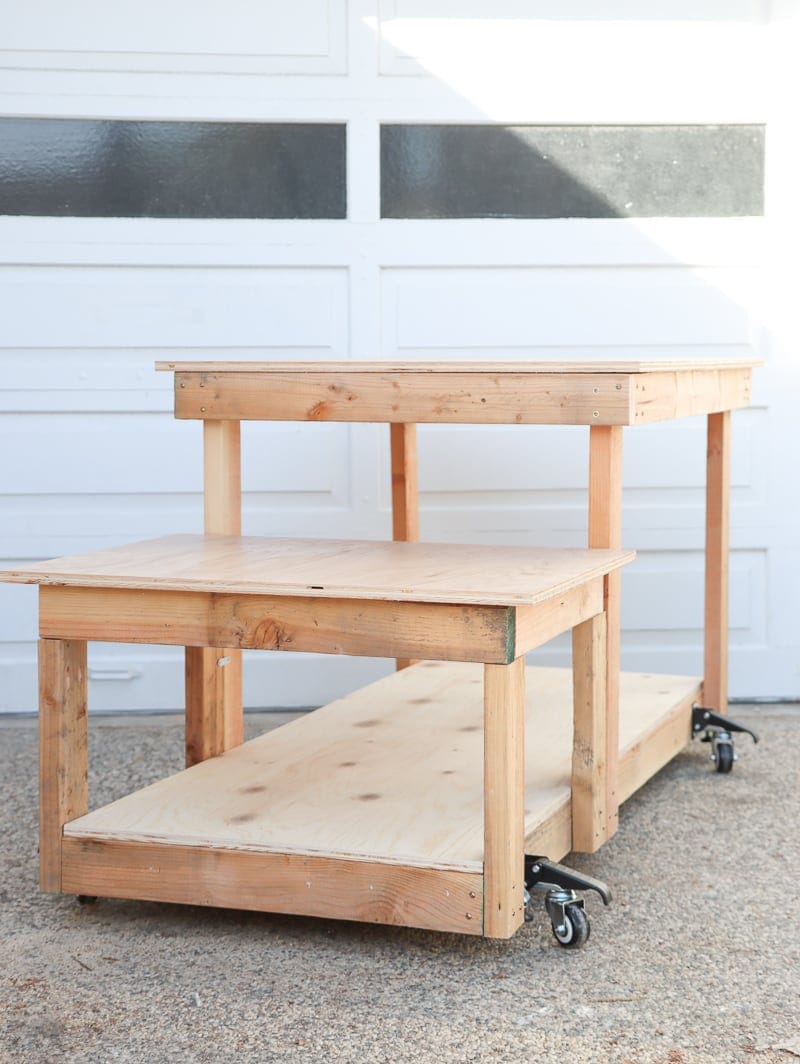
DIY table saw workbench finished look
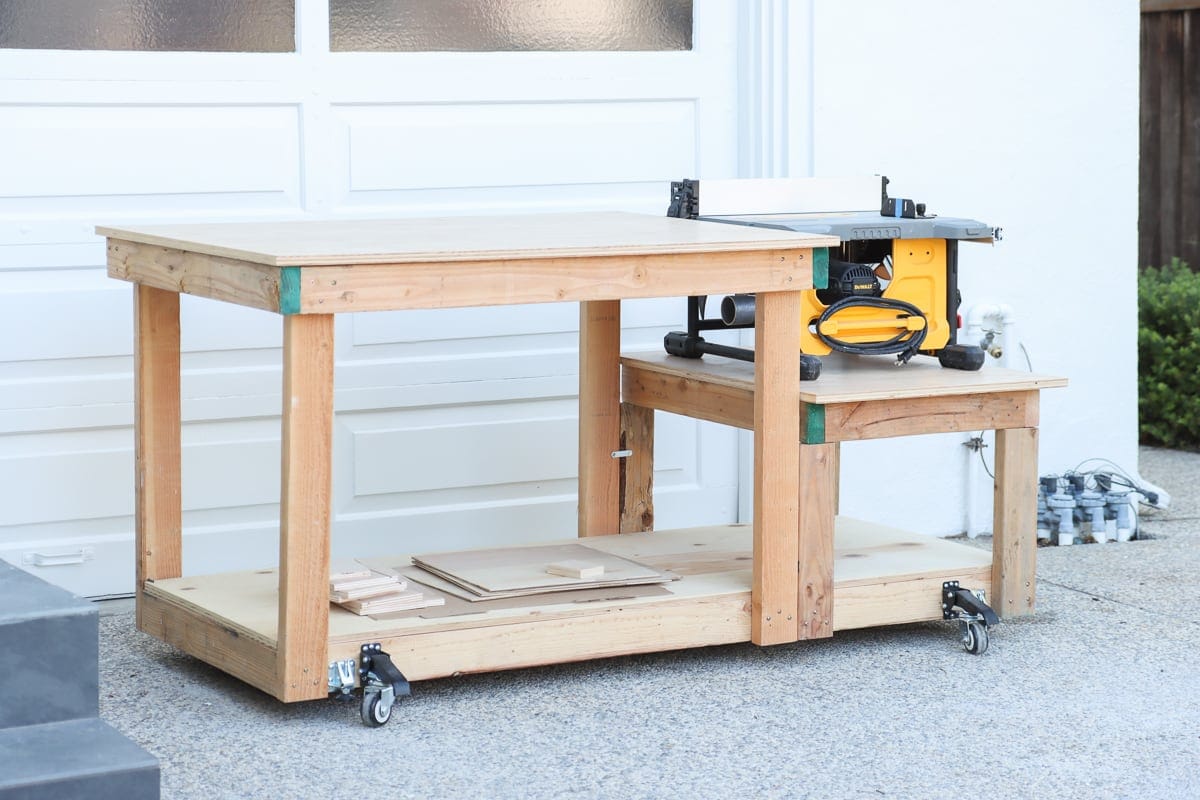
Here’s what the finished DIY work bench looks like. I designed this mobile workbench and my husband and I built this together.
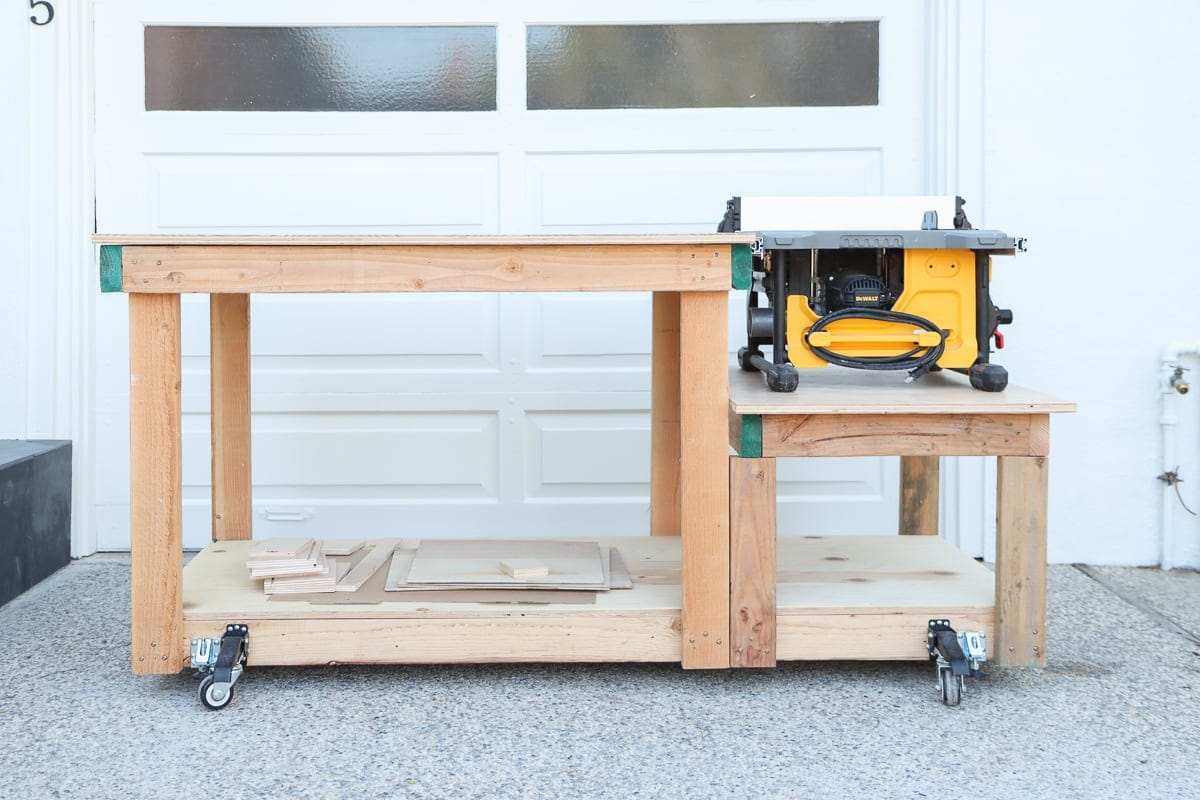
The main table is a large surface, which is great to build things on. It is just wide enough to pass the exterior door which connects my front and back yard.
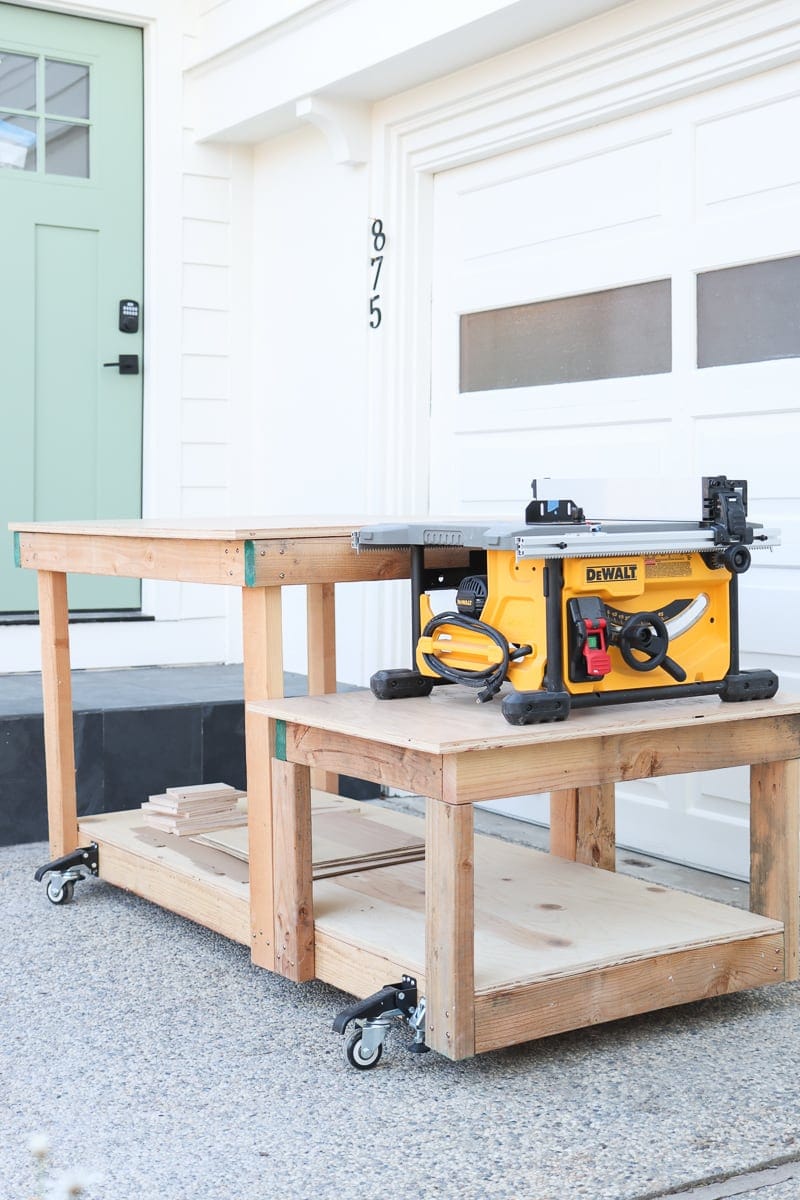
On the lower table, we put our portable table saw, so that we can use it as a table saw bench. The table saw has become one of my most used tools in my DIY arsenal, and it really came in handy when I was building the window seat with Ikea hack.
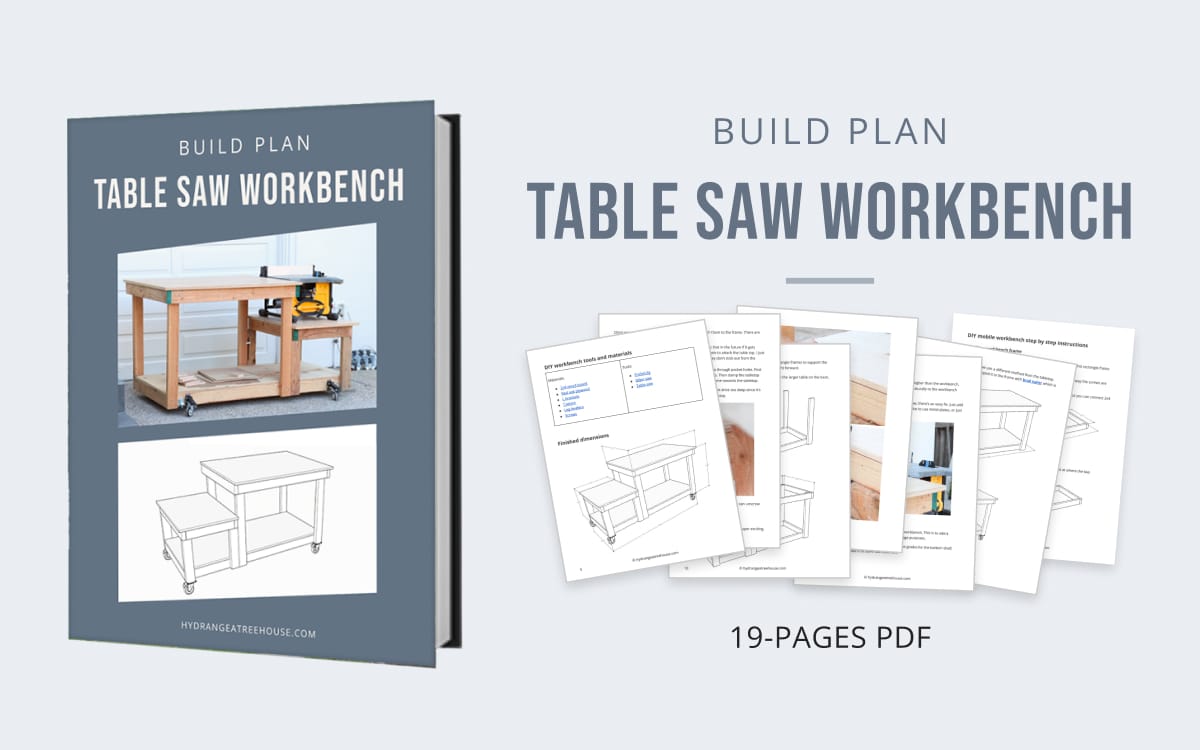
Get the PDF build plan
If you plan to build this workbench, you have the option purchase the PDF build plan for only $4.99.
It has the full instruction with expanded details, optimized in a book format, faster to read, and free of ads. It includes exclusive cut list and detailed dimensions on each step to make easier to follow and take the guess work out.
Click on the picture below to purchase.
DIY table saw workbench video tutorial
For DIY projects, it is always nice to follow a video to get a general idea of all the steps. So I created this video walking you through my workbench building process, and highlighted a few key points to make this project successful. You can click on the video below to watch it.
If you want to watch more videos like this, be sure to subscribe to my Youtube channel.
DIY workbench tools and materials
Materials I used for this project:
- 2×4 wood board
- Red oak plywood (tabletop grade and shelf grade)
- L brackets
- Casters
- Leg levelers
- Screws
Tools I used for this project:
DIY mobile workbench step by step instructions
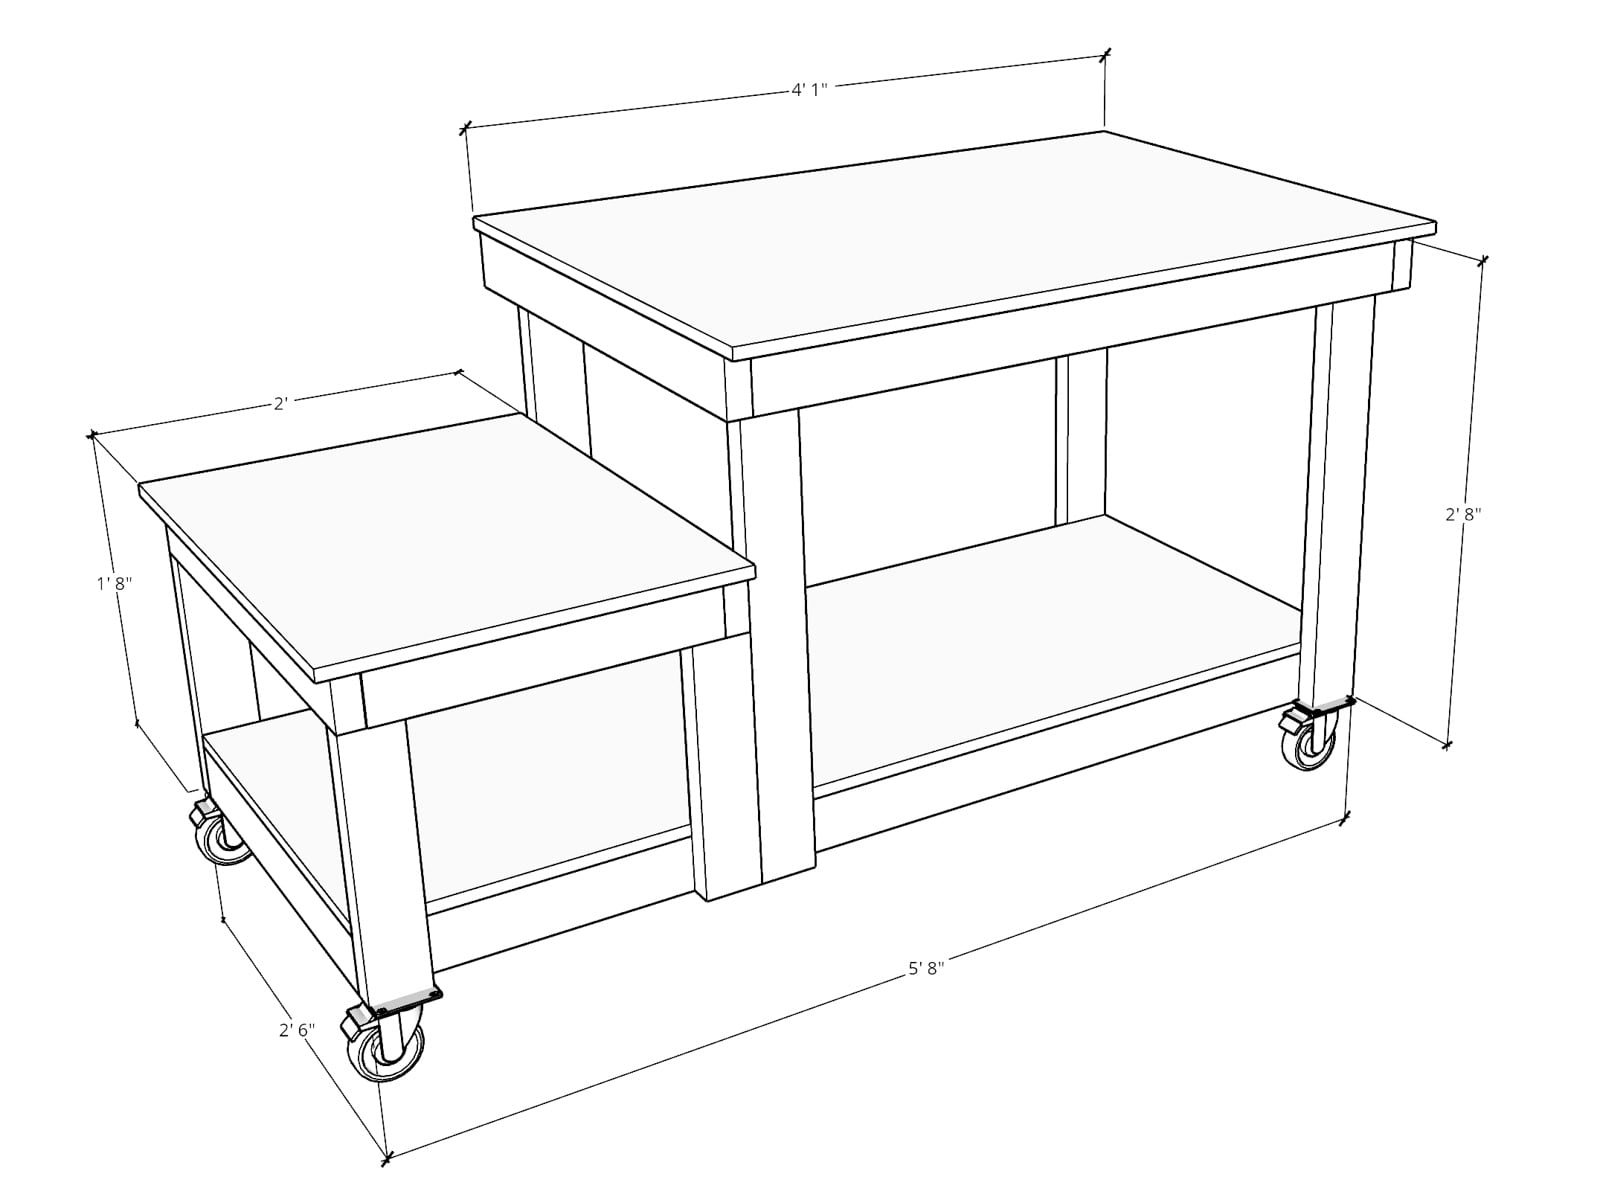
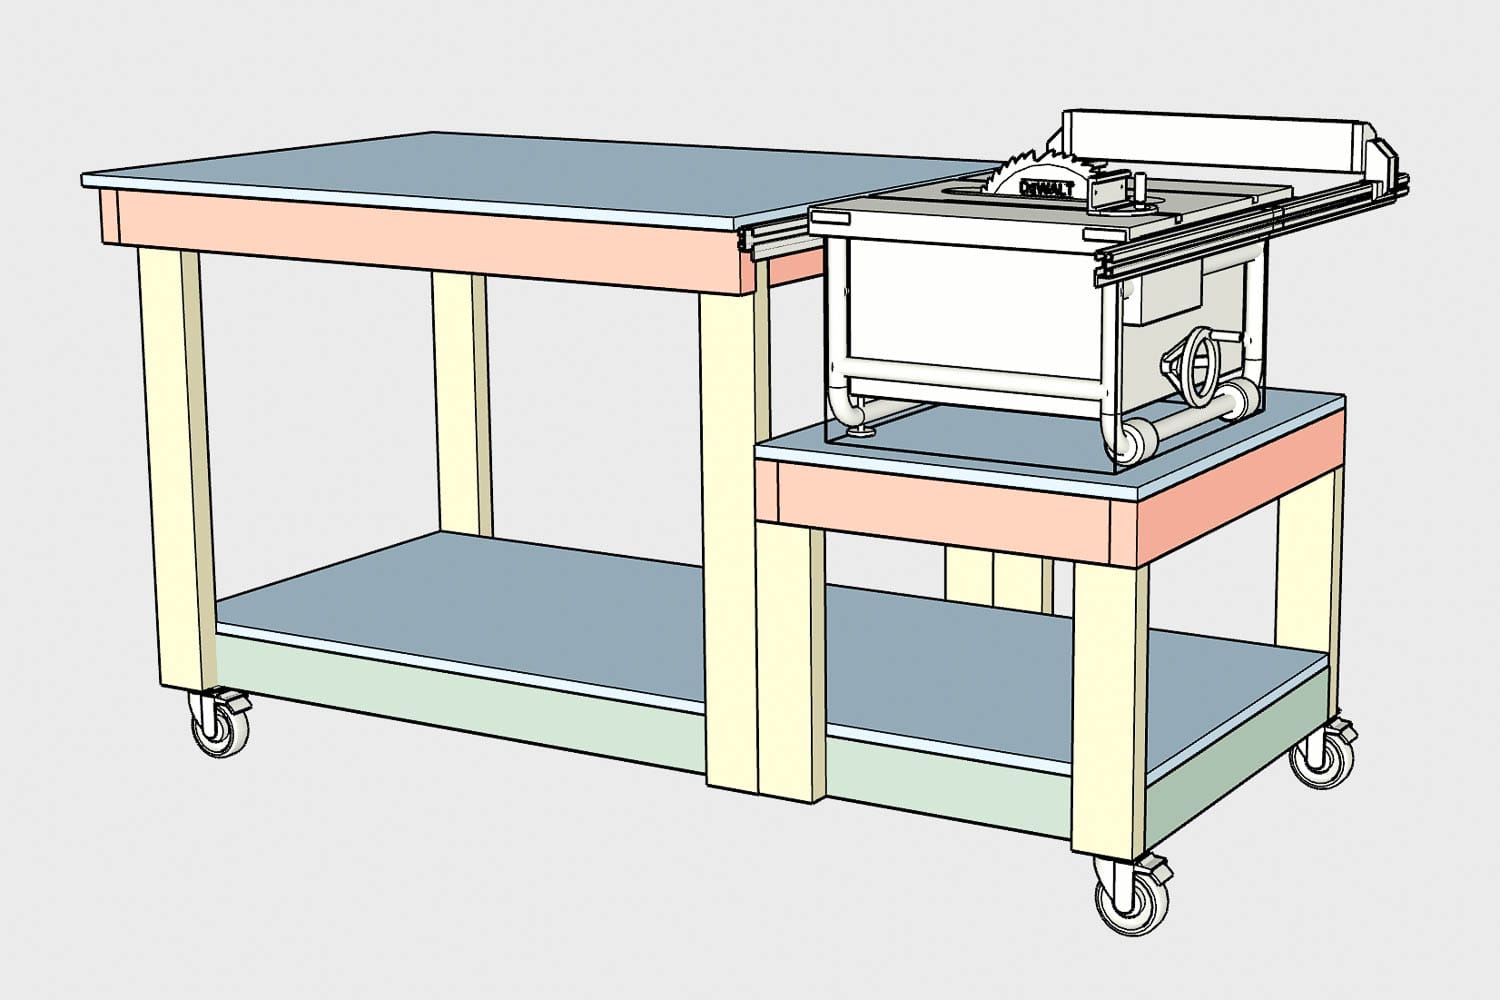
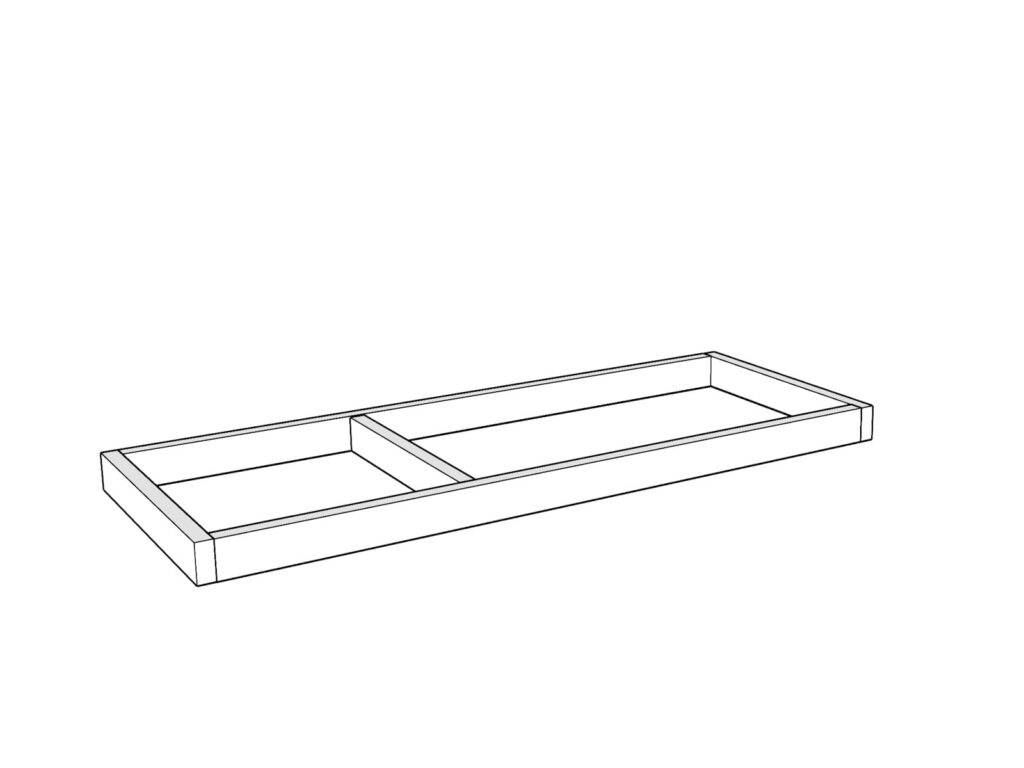
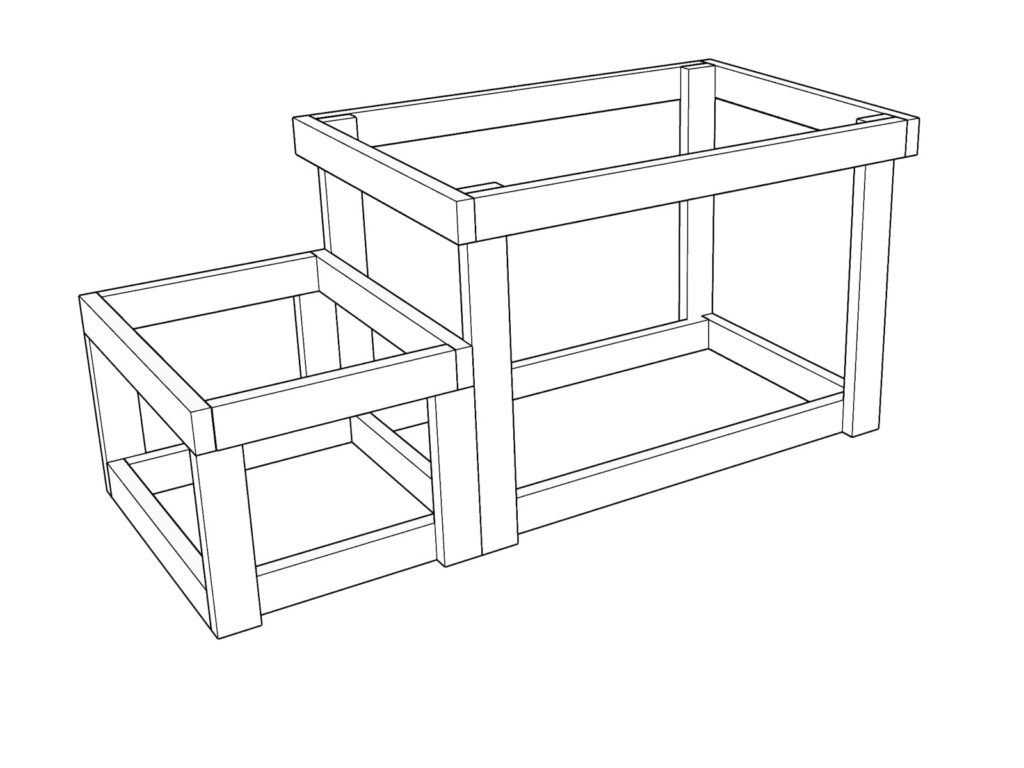
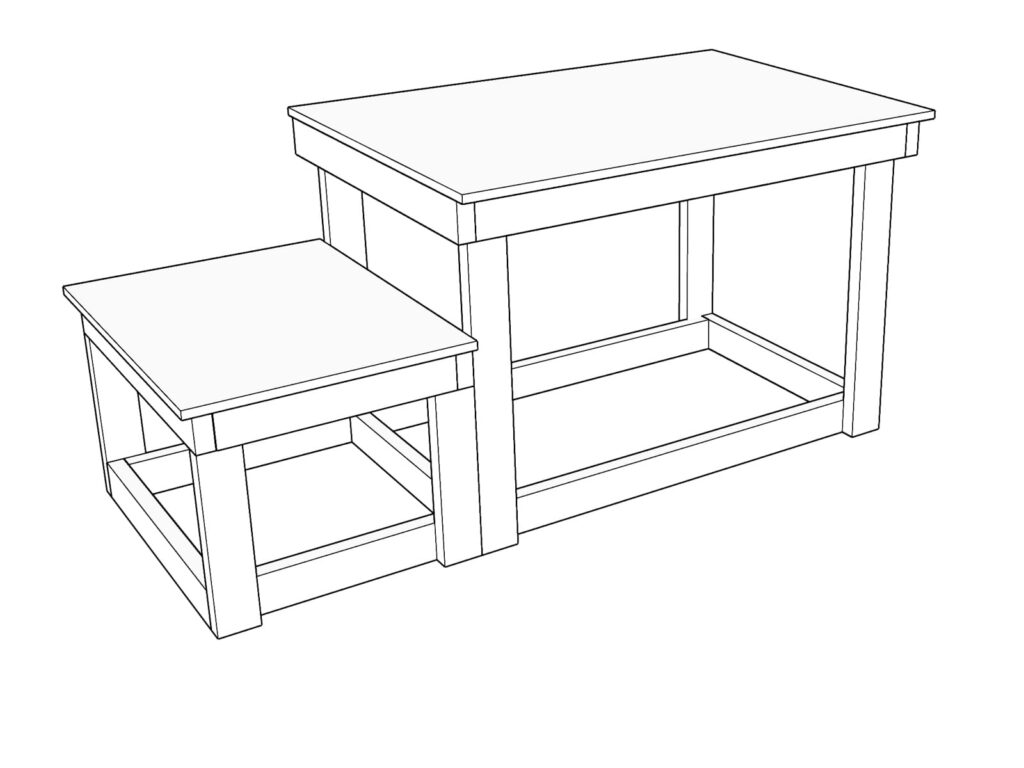
DIY workbench diagram
Here’s a 3D model I have built in SketchUp. The entire workbench is around 68in L x 35in W x 36in H, and I store it in my garage most of the time.
The dimensions I decided on were based on my garage size (where this workbench will be stored), and also to make sure it can pass the door to our backyard in case I want to move it to the backyard for some future DIY projects. When deciding on a size for your workbench, think about where you will store it as well as any doorways you may want to move it across.
Building workbench frame
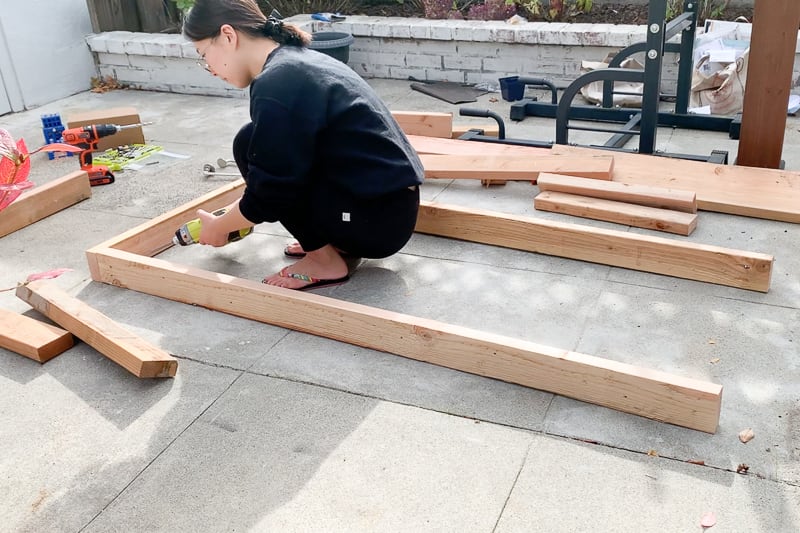
First of all, let’s start with the base.
We’re starting off with building this rectangle shape with the center reinforced.
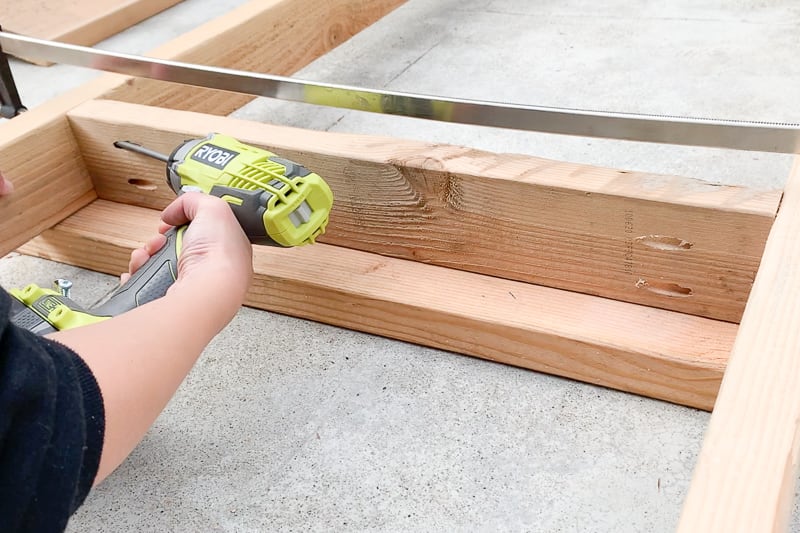
To join those boards together, I used the Kreg pocket jig. This way the screws are more hidden, and it is easier to attach boards on top of that.
However, I’ll say using pocket holes is optional for this project, since you can connect 2×4 boards together with L brackets or just countersink the screw.
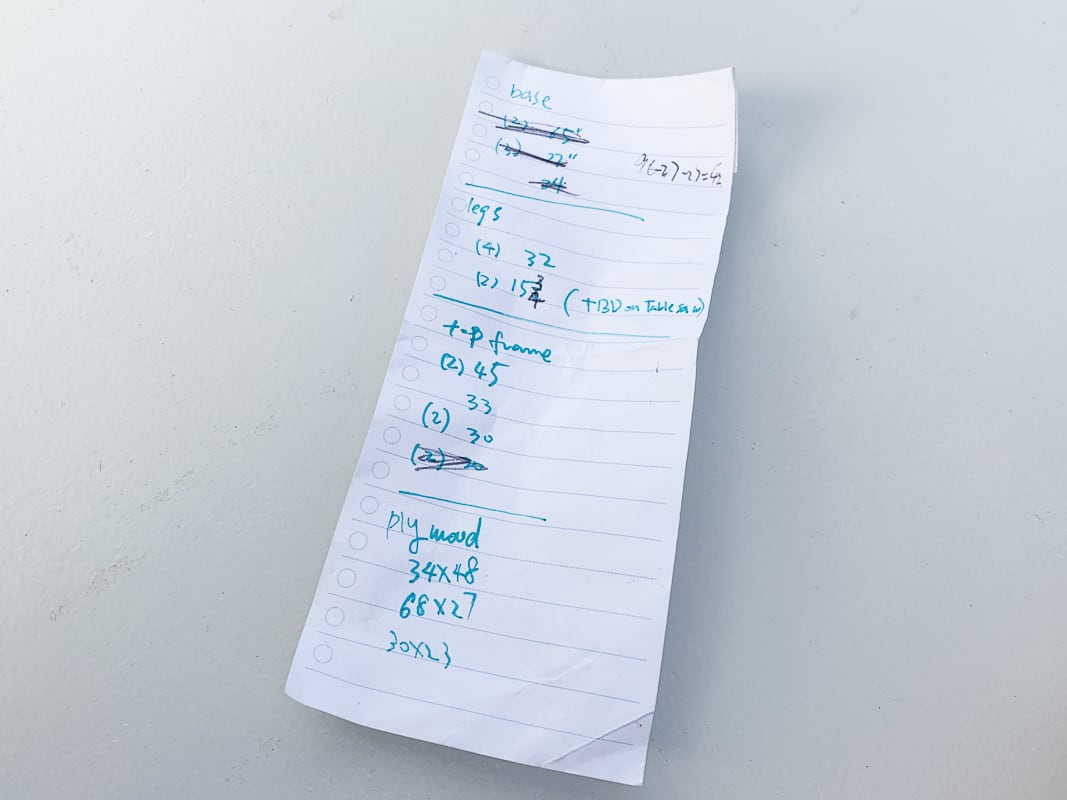
Btw, here’s a quick tip for keeping track of your cut list. I like to write everything down which includes how long each board is and how many I need. While I am cutting the boards, I can scratch them and keep track of what’s remaining.
Build vertical height
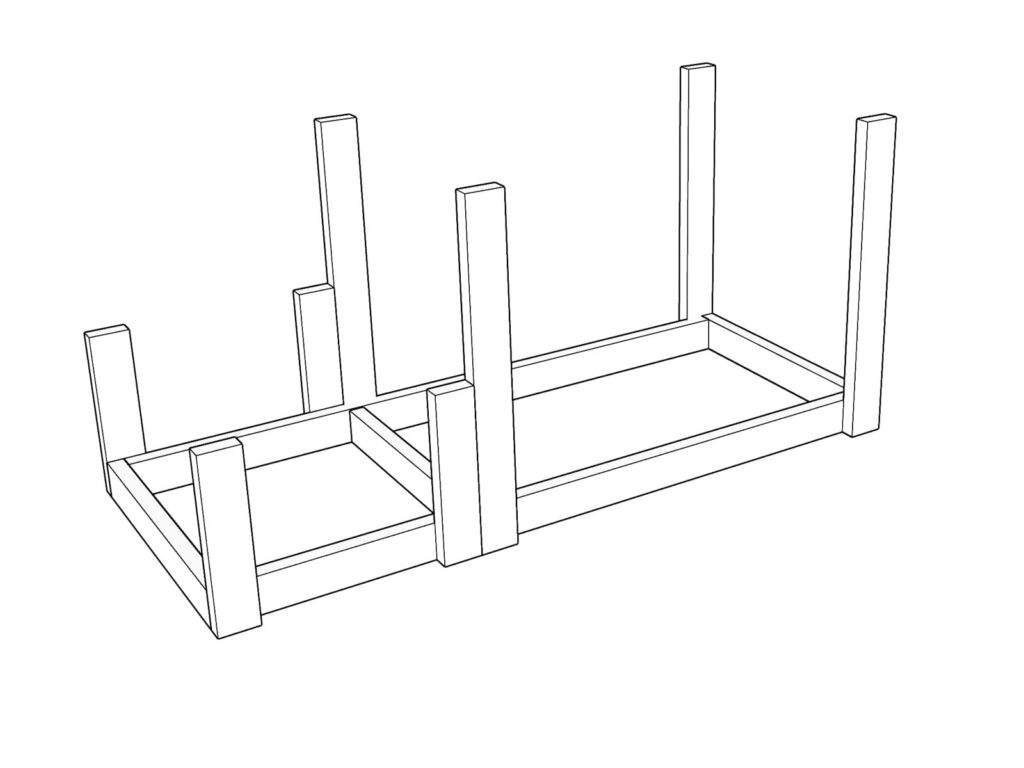
Now let’s build some vertical boards to support the height. I’m using eight 2×4 pieces in total.
Just like the bottom frame, I cut them to length with a miter saw and attached them to the base frame.
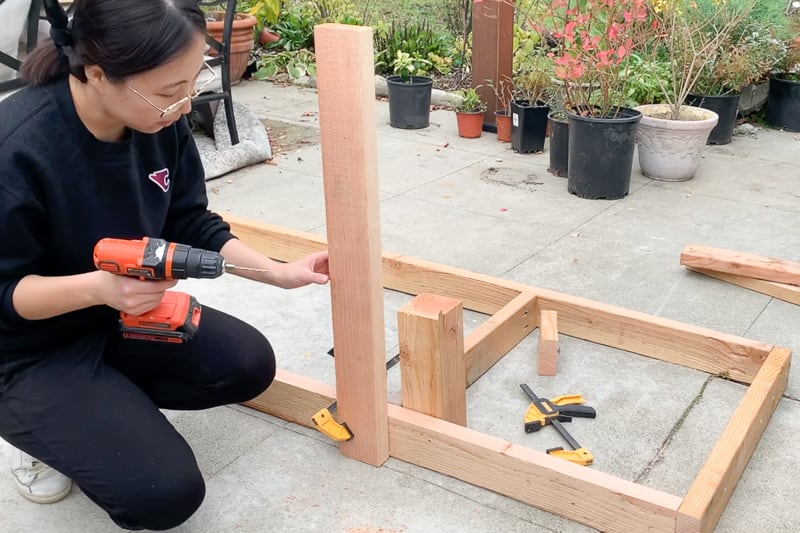
Because the contact surface is pretty large, I didn’t bother with pocket hole connection. Besides, this is the outermost layer, I’m fine with the screw head sticking out.
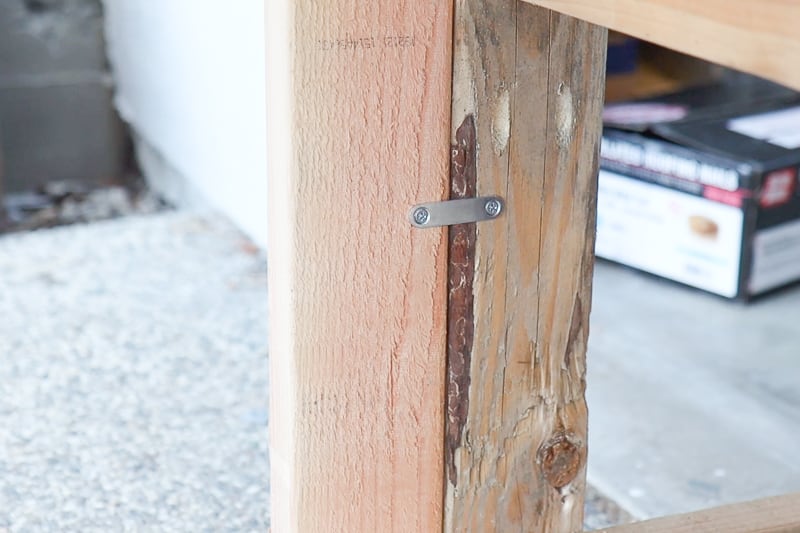
By the way, where there are two 2×4 boards butting against each other, I added a metal hardware piece, and attached them to the 2x4s to make the frame more robust and keep them connected neatly.
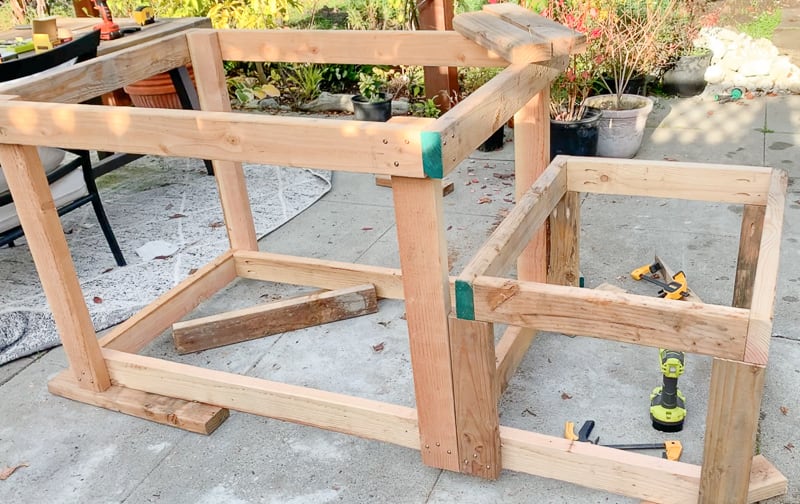
Once we finished adding all the vertical boards, we attached two rectangle frames to support the tabletop that we’ll attach later on. This step is pretty straight forward.
And here is what it looks like so far.
Attach table tops
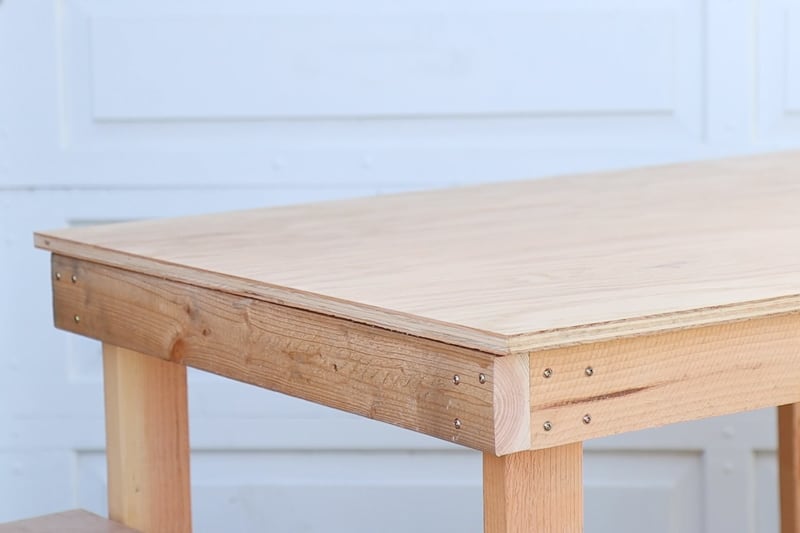
And now the structure is built, let’s attach the tabletop surfaces. And I promise once this step is complete, it will look a lot like a workbench!
For the table top. I’m using ¾ inch of plywood. I specifically got the high quality one because I want it to be flat, smooth and durable (less replacement in the future).
And also consider the wood finish. I chose red oak finished plywood because red oak is hardwood, which usually creates a more sturdy scratch resistant surface compared to soft wood. I used the same plywood to create a tabletop for my home office desk built-in.
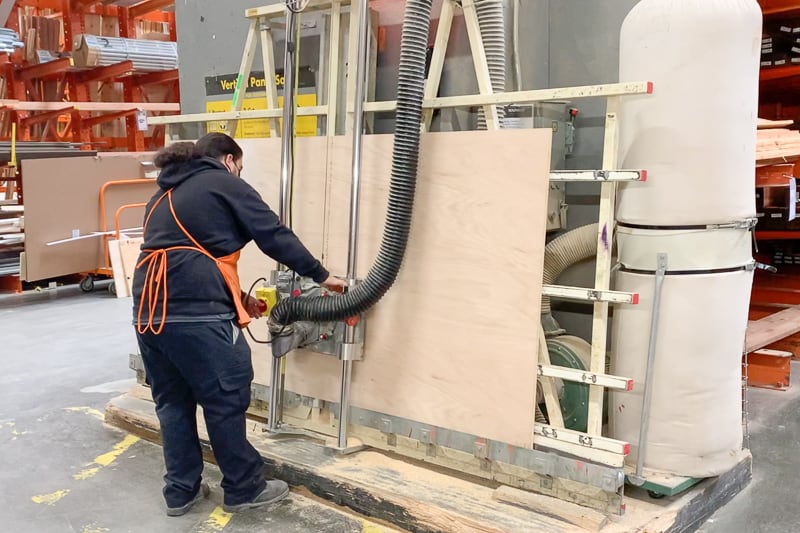
A quick tip of how to bring it back home if you don’t own a truck:
We bought the 4’ x 8’ sheet of plywood from Home Depot and we had the store cut it for us – just one cross cut will do (make sure to leave enough space for your table top). So we did one cut around ⅓ of the way and was able to fit it inside our small SUV.
Once we brought the plywood boards home, we cut them on top of our work bench, because it is easier to figure out the size. and we used our circular saw to cut it to size.
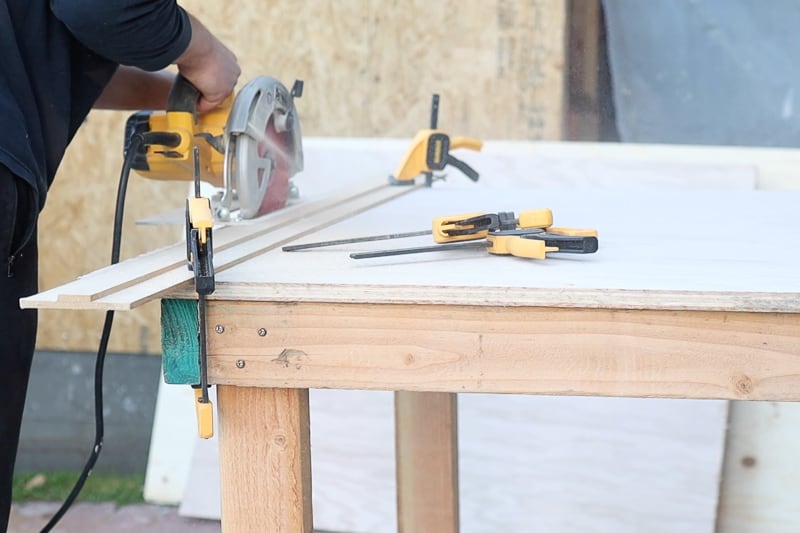
We left about 1 inch overhang on all sides. The edge can be quite rough after cutting for plywood, so I did some light sanding
I’m trying to make the tabletop removable so that in the future if it gets damaged, I can easily replace it. So I’m using L brackets to attach the table top. Just drill a pilot hole and attach with ⅝ screws.
When you are attaching the plywood, make sure to not drive too deep since it’s only ¾ inch. You can mark on the drill with blue tape where to stop.
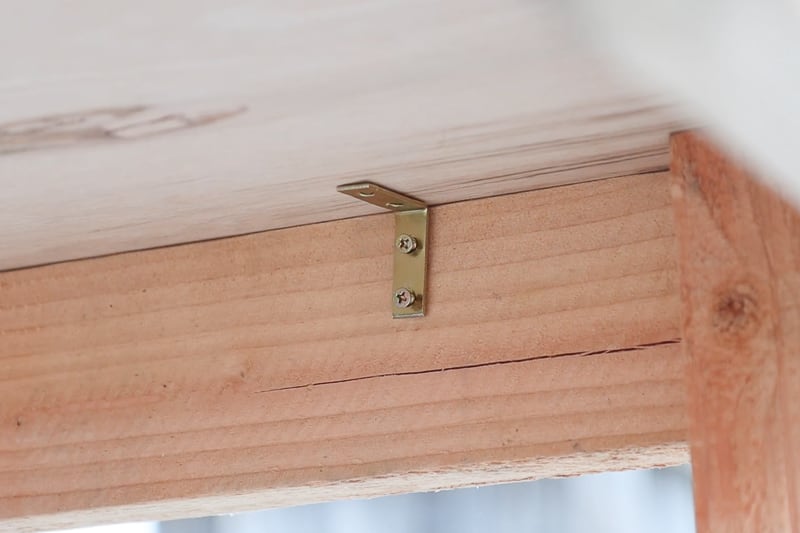
In the future if you need to replace them, just unscrew and swap the plywood.
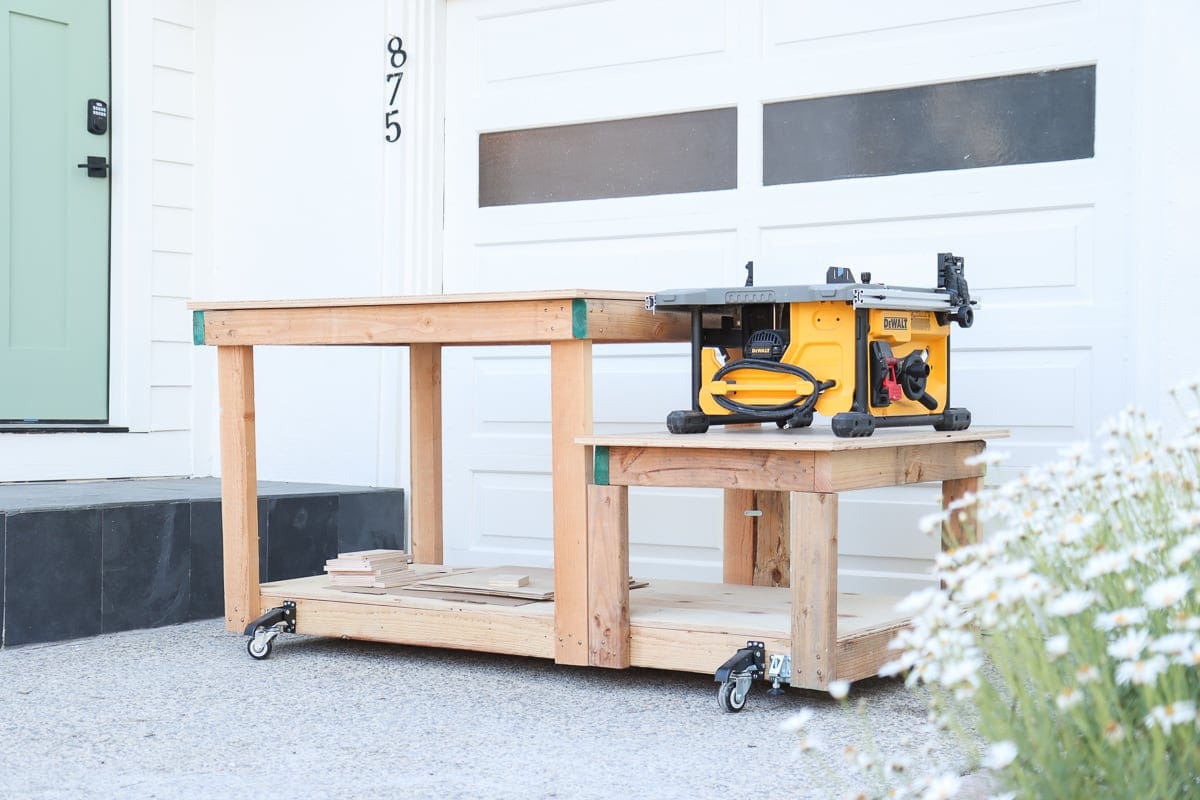
Add your table saw
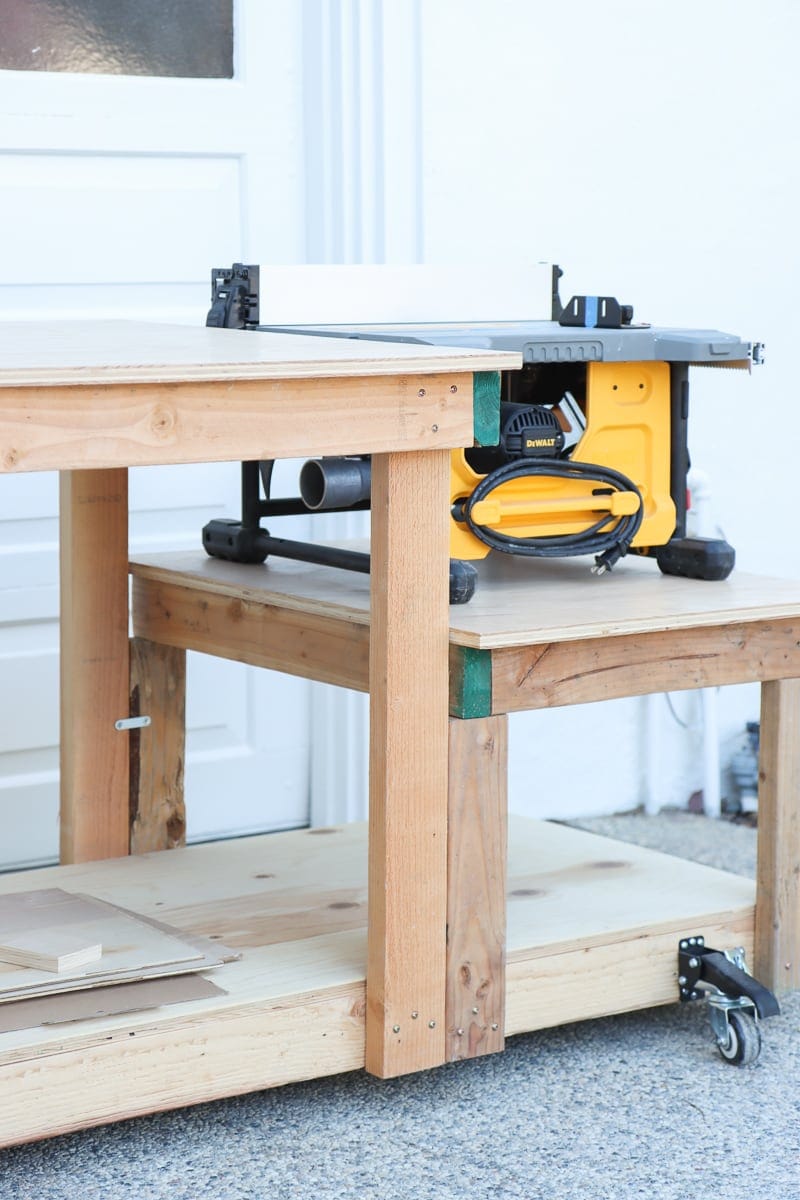
And once that’s done, we can add our table saw to the workbench, which is super exciting.
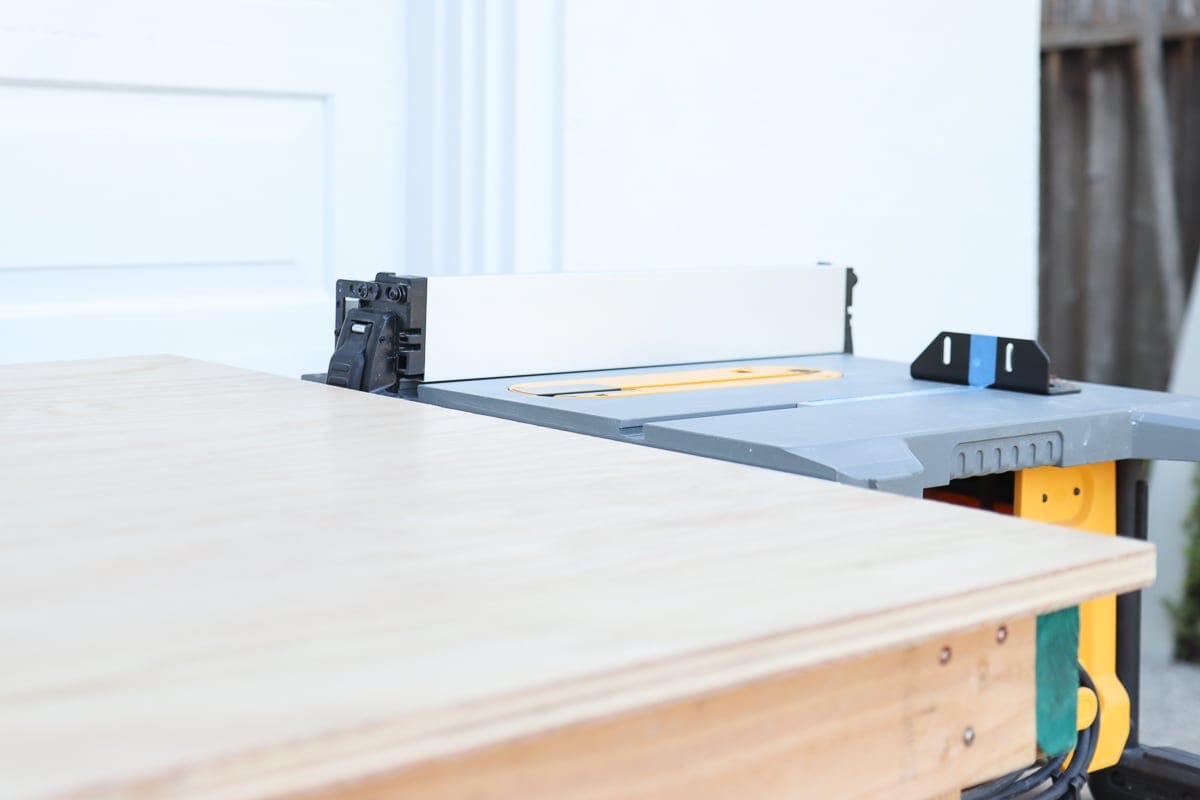
It is also the time to see if your table saw surface is slightly higher than the workbench, which would be ideal, so the wood you are cutting can fall naturally to the workbench without getting stuck between the ridge.
However, if your tabletop is slightly higher than the table saw, there’s an easy fix. Just add something to the bottom of your table saw to shim it up. I like to use metal plates, or just wood boards to prop it up.
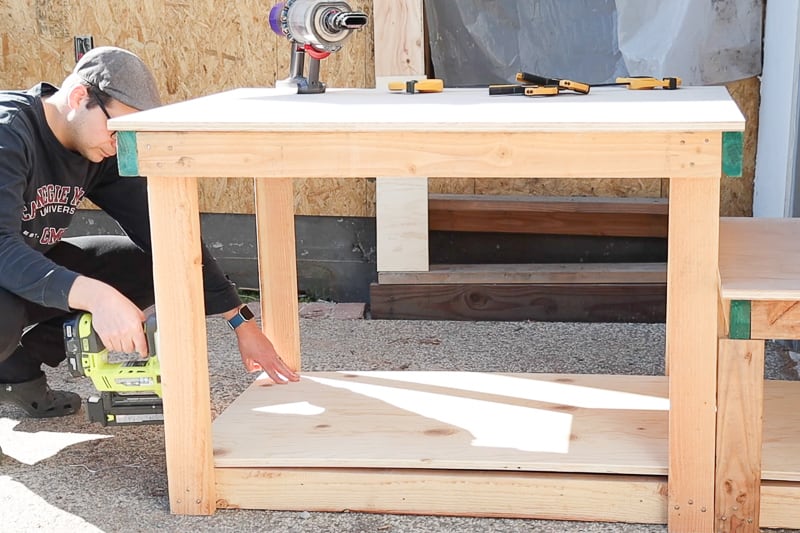
Attach bottom shelf board
Now, we are adding a large piece of plywood to this DIY workbench. This is to add a surface on the lower portion of this workbench, for storage purpose.
To save costs, we bought a cheaper plywood for the bottom shelf, since we’re just going to use it to store raw materials.
To attach the plywood to the bottom shelf, we use a different method than the bench top. We’ll be less likely to replace it, so we just tapped it to the frame with brad nailer which is pretty simple and quick.
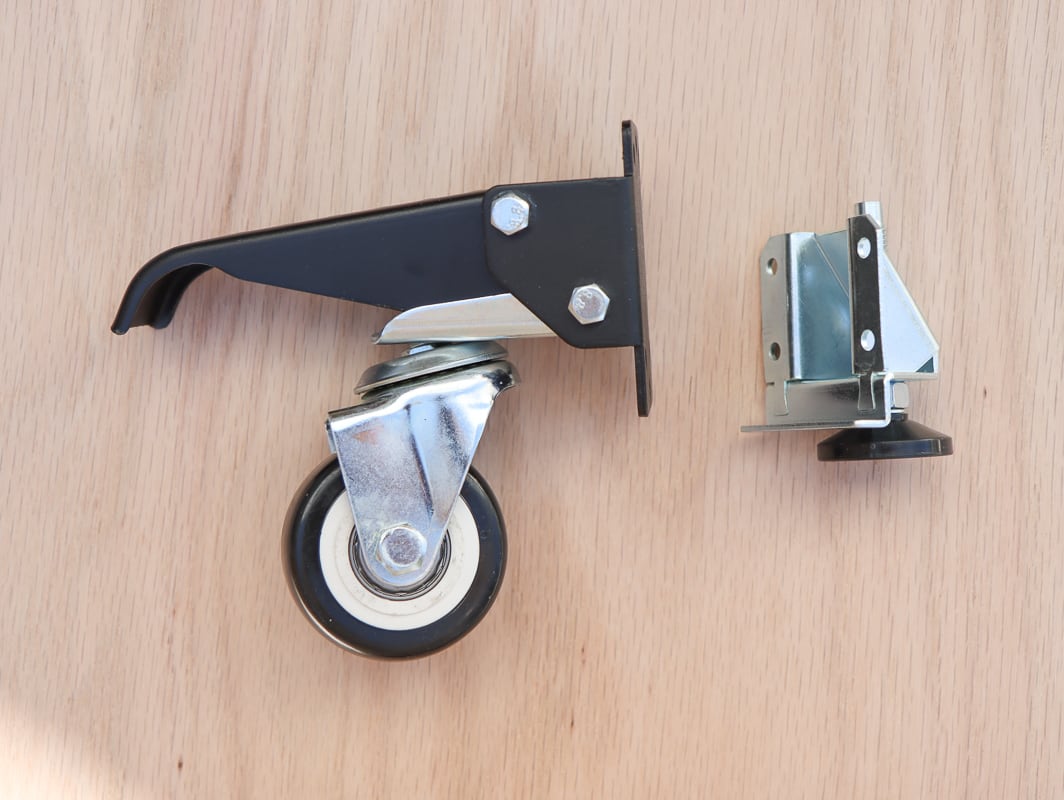
Install casters and levelers
And now the basic structure is done, we began to add the casters and the levelers.
I am using heavy duty casters so my work bench can move around freely.
Levelers can come in handy when I park the work bench and want to create a leveled surface for certain projects.
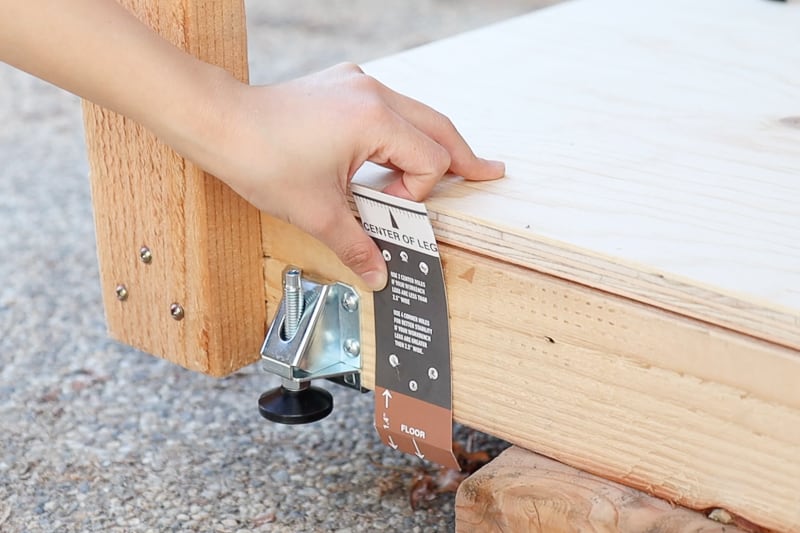
For the heavy duty casters, it came with a template. So I was mostly following the manual, and playing around with the template just making sure the height works well. I also made sure the caster will work with the leveler in terms of height.
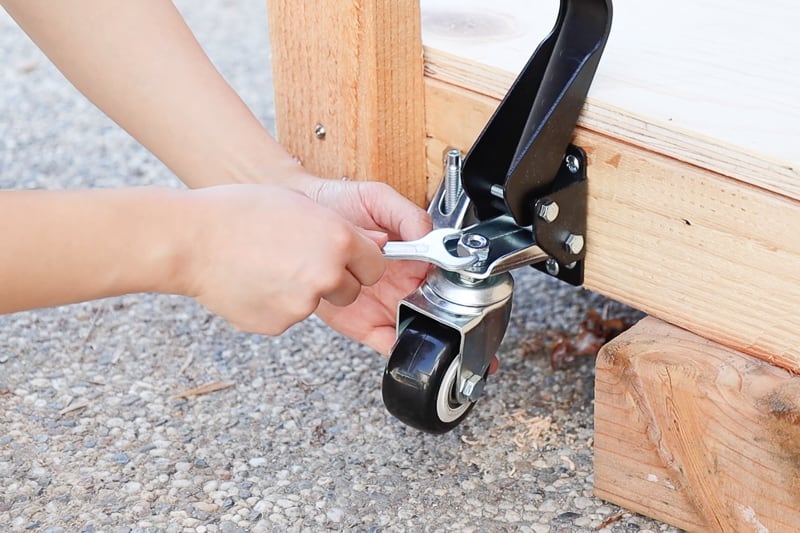
After installing the hardware, I tested it out by rolling the workbench around my driveway, and testing out the leveler. I have to say they work pretty well!
The caster wheels are turning smoothly, which will make it really easy to take out this workbench from our garage. And the leveler is really cool and pretty easy to raise and lower.

Finish touches and tips
Basically this project is complete, but I did an optional step which is to finish the surface of the table top to make it more durable.
I’m using water based poly. It dries really quickly and is odorless which I like.I have applied three coats in total.
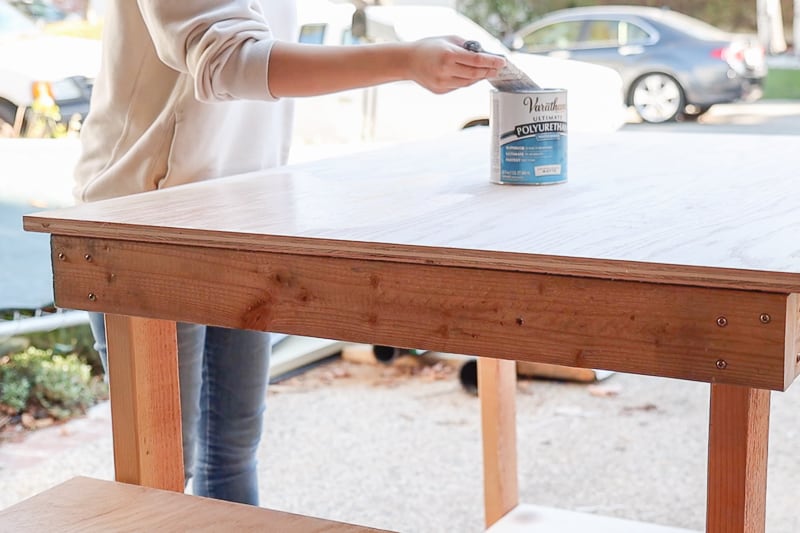
And you can see how smooth the surface is. I’m really happy!
Get the PDF build plan
If you plan to build this workbench, you have the option purchase the PDF build plan for only $4.99.
It has the full instruction with expanded details, optimized in a book format, faster to read, and free of ads. It includes exclusive cut list and detailed dimensions on each step to make easier to follow and take the guess work out.
Click on the picture below to purchase.
DIY mobile table saw workbench summary
We are so happy with how this DIY workbench project turned out.
I like how easy it is to move the workbench in and out of my garage.
And I can finally use my table saw on an actual table surface. This is a huge DIY life improvement because I used to cut wood with my table saw on the floor (I will never go back)
I hope you enjoyed this project of DIY workbench plan with table saw bench. It is definitely a simpler project I have built, but it made a world of difference for me. I have used it to create a floating double vanity for my master bathroom which has challenged my skills, but thankfully I have a great workbench to make it happen. Stay tuned for that post!
Other posts you might be interested
DIY Window seat with Ikea hack
Pin it for later
Save this post for later or share this post if you find it helpful!
For more DIY projects, you can always visit my Pinterest board DIY Tutorials from me and other creators.
Do you have the cut list measurements for this available? I want to make the table, but couldn’t read the cut list measurements clearly.
Thanks for your feedback Alex! I added measurement to diagram section. Since this project mainly use 2×4 boards, the remaining measurement for each piece is easy to figure out. Hope it helps!