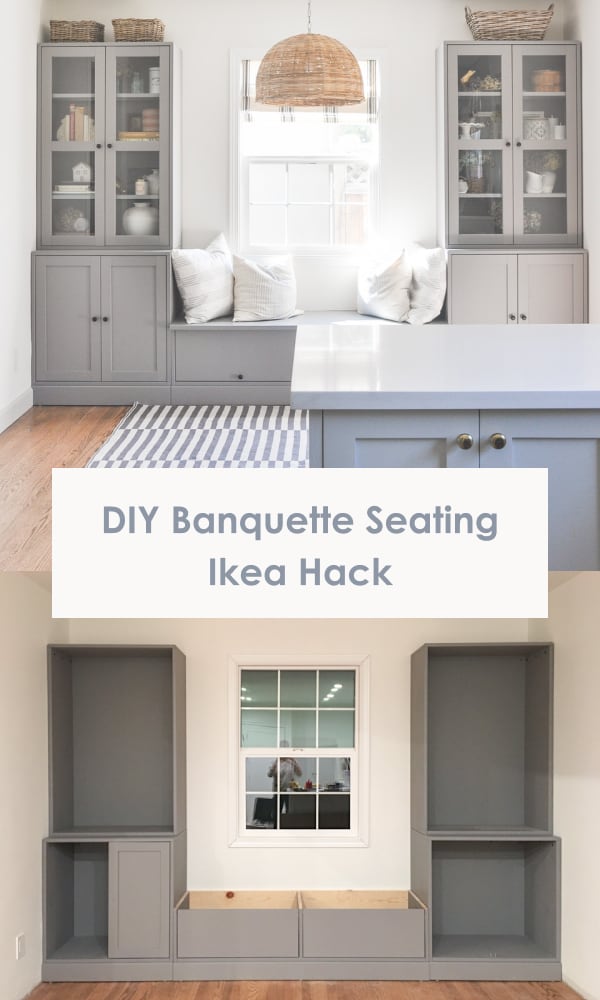
DIY IKEA Banquette Seating Built-in | IKEA Havsta Hack
I hacked IKEA Havsta cabinets into banquette seating for my dining room. In this post, I’m sharing why I chose IKEA Havsta hack for my dining bench seat, the built-in design, cost and DIY process.
Havsta cabinet offers tons of storage and is made of solid wood so it can be repainted to your liking too! Great for customization. If you are interested in IKEA Havsta series, check out my Havsta honest review after using it for 3 years.
I got asked on Instagram quite often on where I get all the furniture and decors, such as pendant light, rug, paint colors, etc), so I have linked everything in the dining room source part at the end of this post 🙂
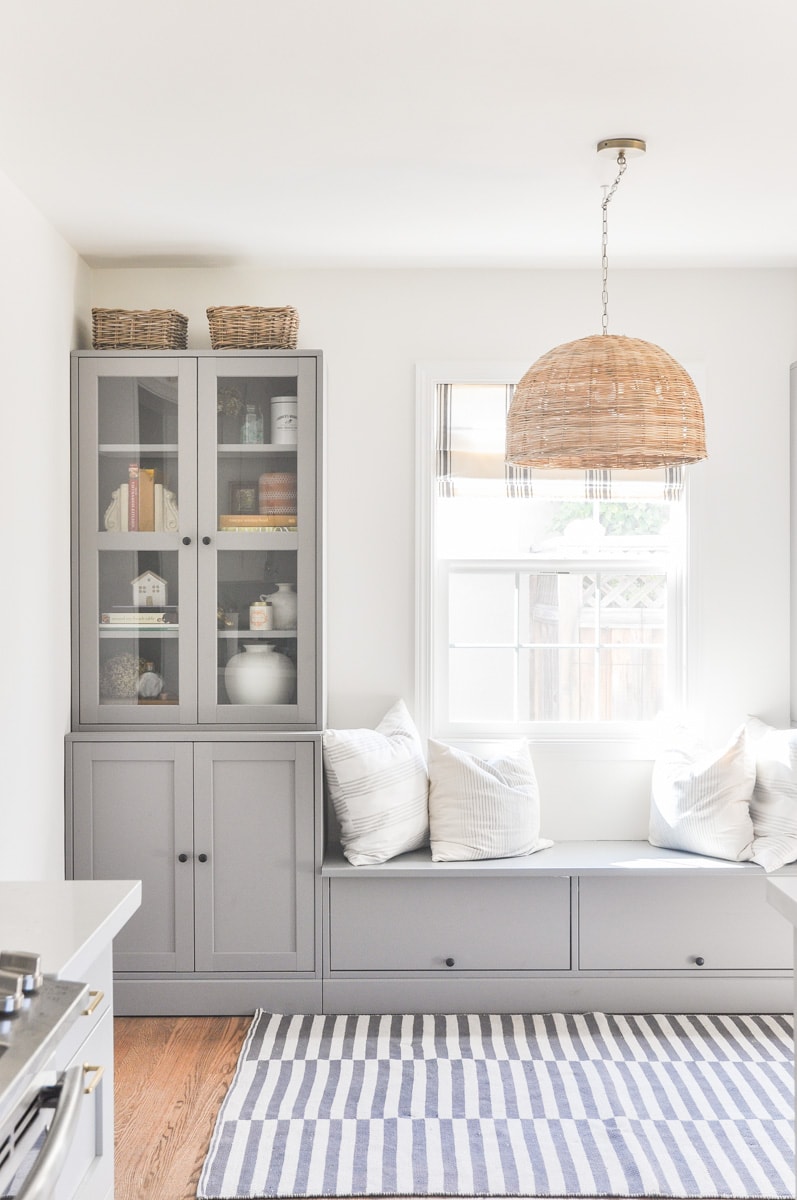
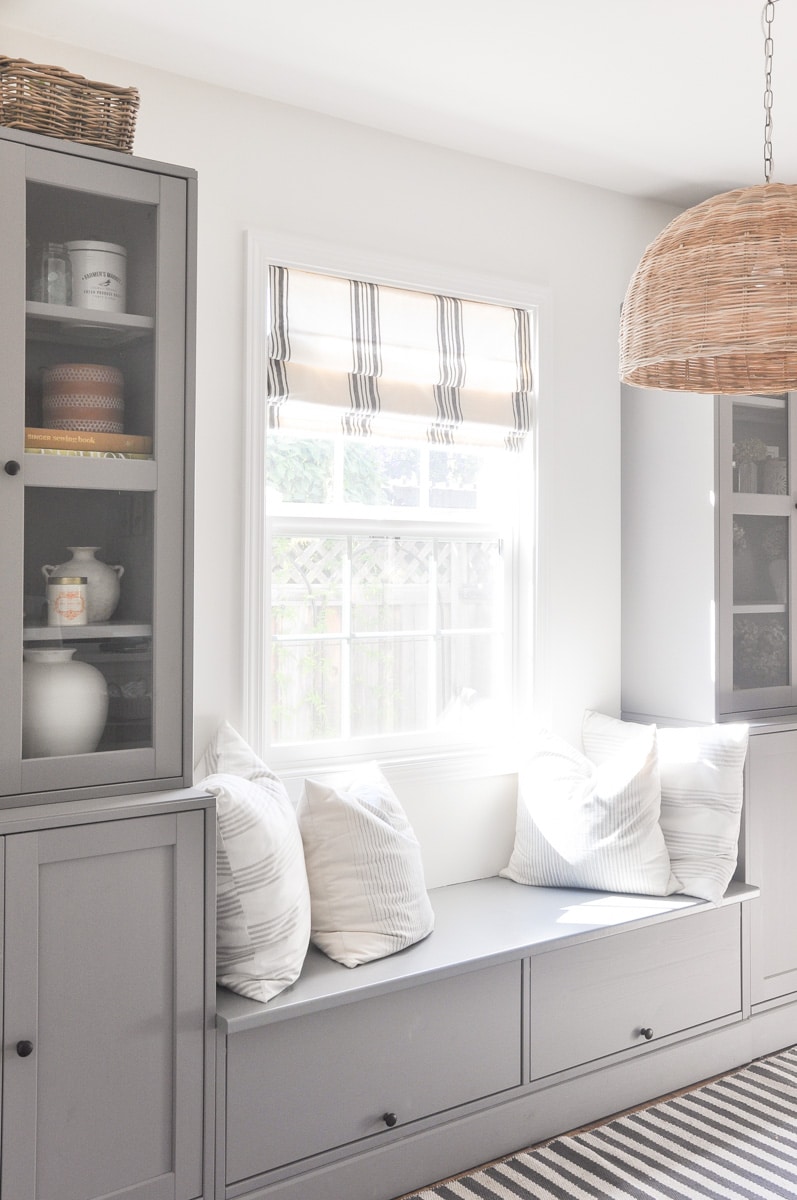
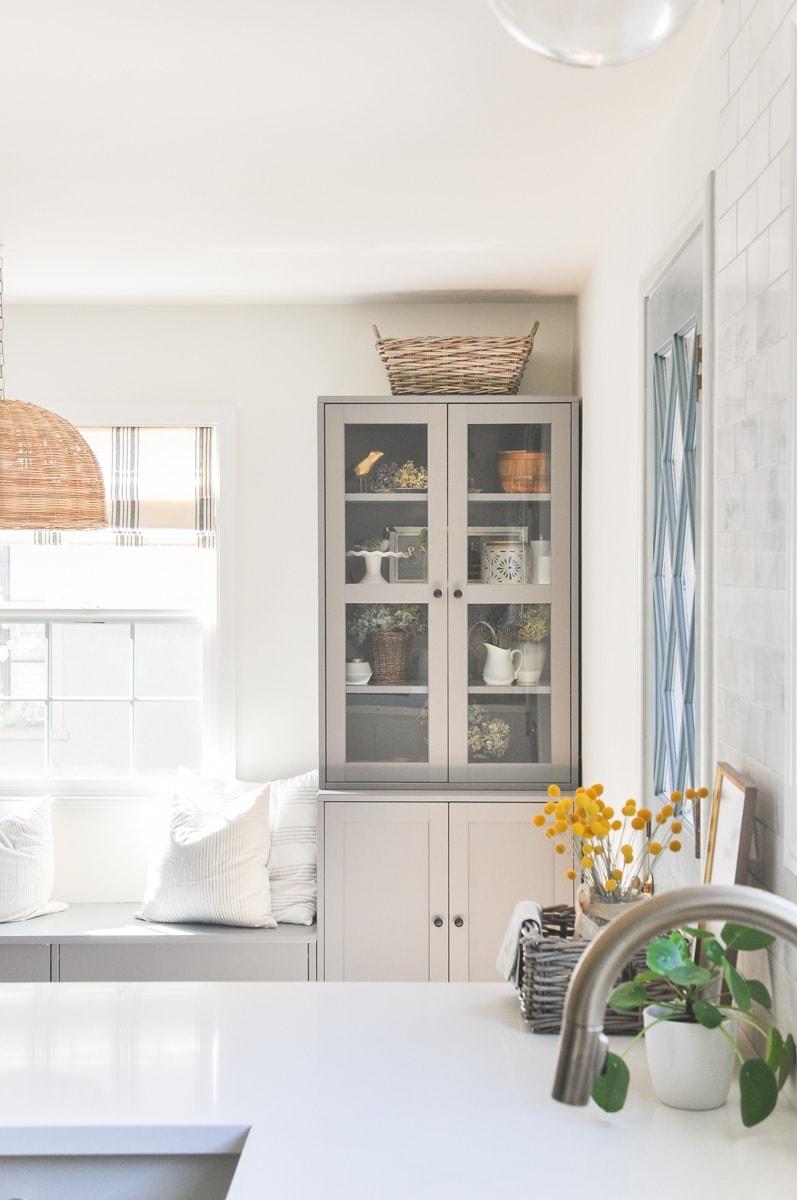
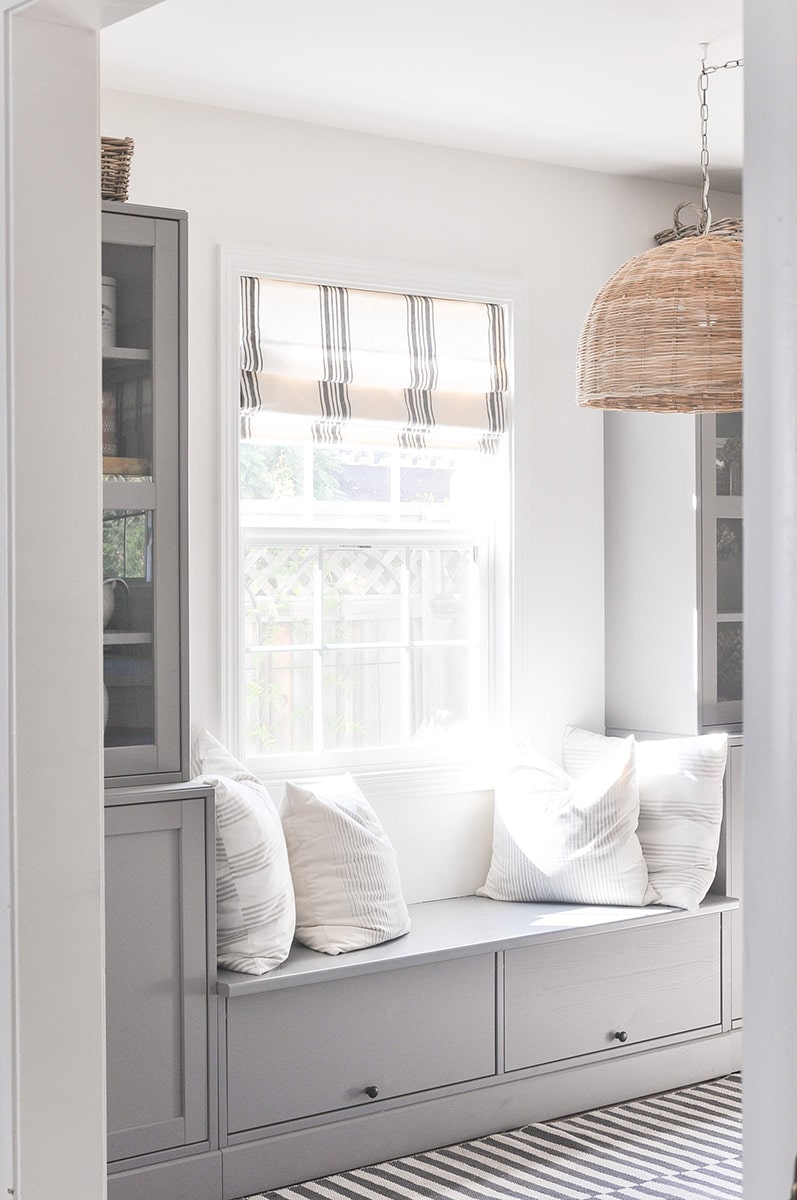
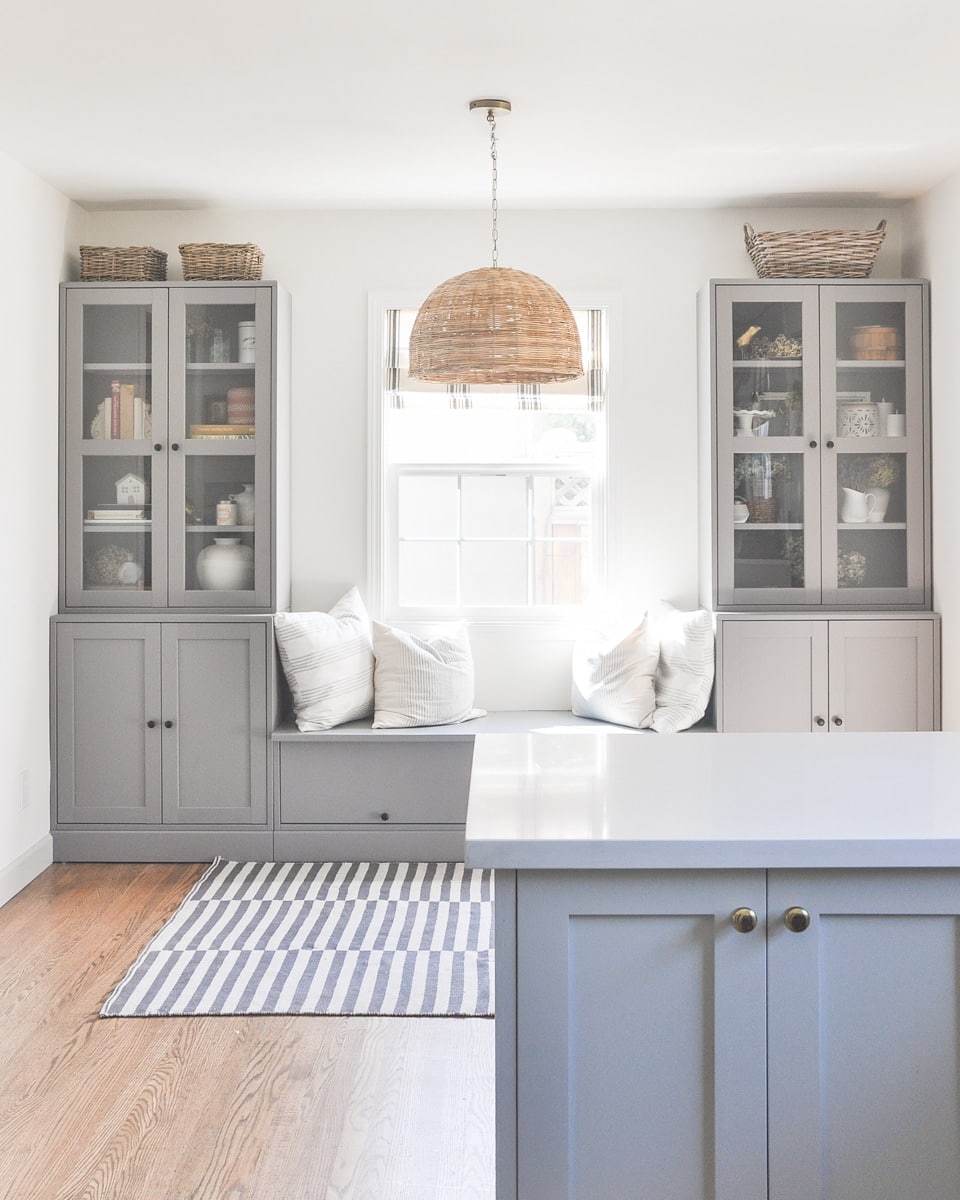
IKEA Havsta hack finished look:
This DIY IKEA banquette seating with Havsta is a project we did last year and it remains as my favorite home renovation project – also my most popular space on my Instagram account! It is holding together really well in terms of sturdiness and versatility.
This DIY banquette seat has absolutely become our go-to place to eat, hangout, and even work. In fact, 99% of the time we sit on the banquette seat rather than dining chairs because it just feels more comfy and cozy.
And I have recently DIY’ed a bench cushion to go with it that you can check out in this post or this video.
The finished size of banquette seat is 63″ long, 19 1/2″deep (18″ furniture depth + 1 1/2″ overhang), and 18 1/2″ high.
Interested? Now let’s dive right to it on how I hack IKEA Havsta cabinet into this dining room banquette seating. And for my dining room sources, including furniture, decor, paint colors, you can visit dining room sources page.
The banquette seating planning
As I mentioned in the dining room plan post, with the small footprint of our dining space and my bench seat dream, it is a no brainer to DIY banquette seating for this space. So at the outset I was determined to figure out how to DIY banquette seating with the budget I have.
This dining room remodel is a complete DIY. Although I hired out partially on our kitchen and master bathroom remodel, dining room is simple enough that I decided to DIY in my free time, with the help from my husband.
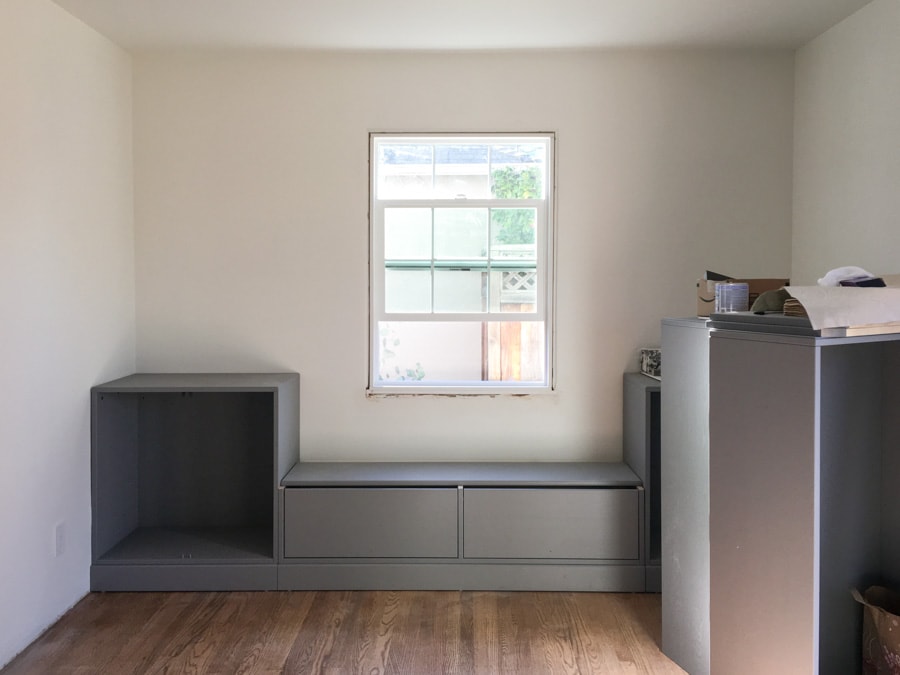
Before building the banquette seating, things we have done are:
- remove all the old baseboard. They were pencil molding just a couple inches above the floor so it looked quite dingy. To install cabinet and banquette seat, I need to remove all the surrounding baseboard to that things can sit flush to the wall. After installing the cabinets and banquette, I’ll install some new baseboards.
- smooth-coat the wall. The dining room and kitchen are technically one long rectangular space. The kitchen is fully remodeled with new drywalls. However, dining room still have those old plaster texture. Handling the transition between wall texture is extremely hard, so instead we decided to smooth coat the dining room walls and ceiling to make sure the entire space has the same type of wall texture.
- we have replaced the window(hired out) with a new window. I’m planning to install new window moldings ourselves.
DIY IKEA banquette seating options and costs
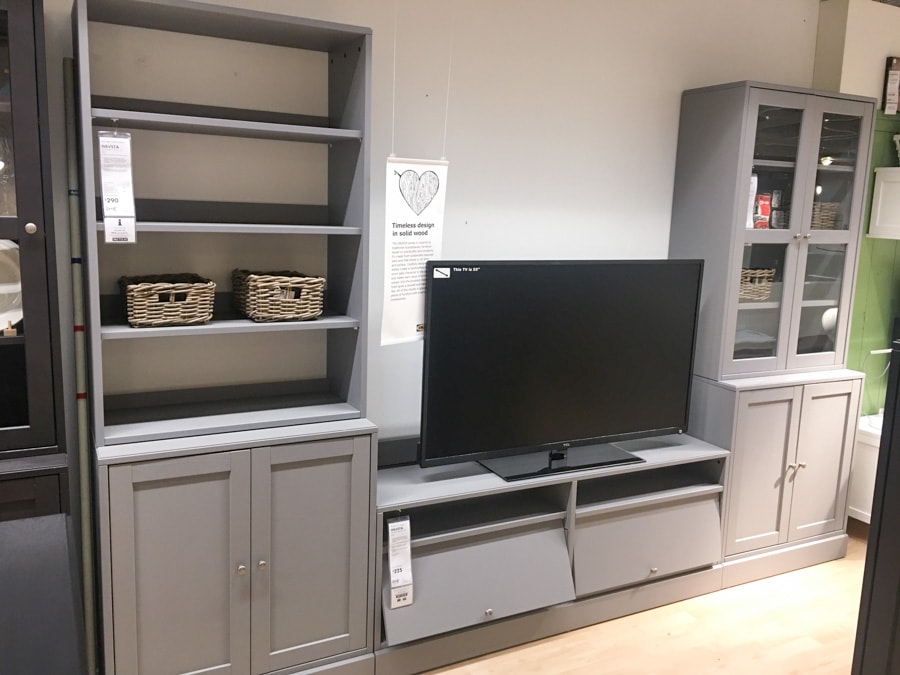
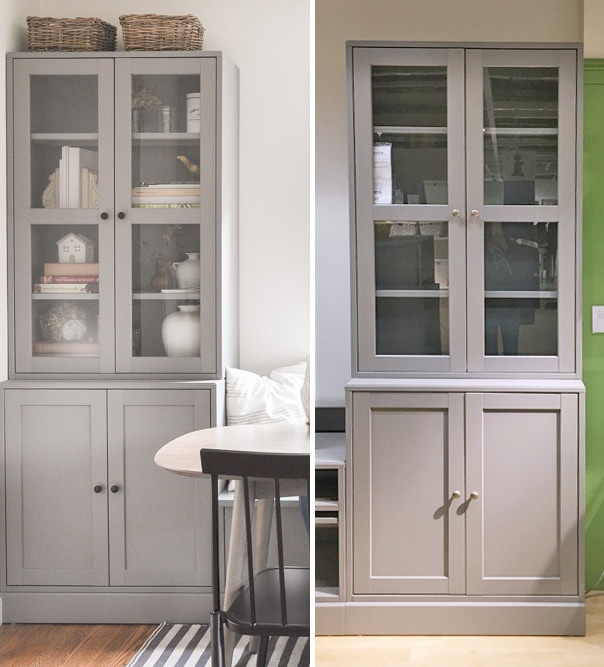
The point of DIY is always the combination of customization and low cost. So I turned to IKEA looking for a system that I can hack into a banquette seating with cabinet built-in.s There were a few options I was considering:
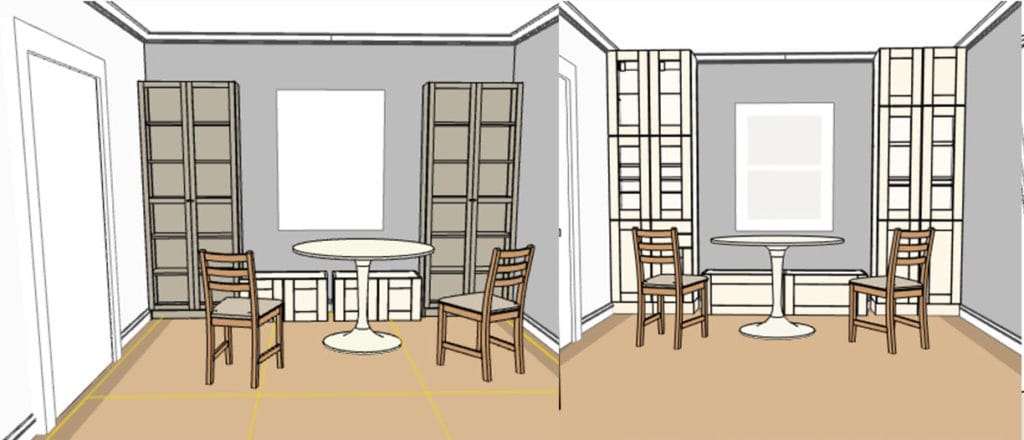
1. Billy bookcase + Sektion kitchen wall cabinet (left)
2 Sektion wall cabinet for banquette seat + 2 Billy bookcases for storage cabinets. The total costs only $600. The downside is that Billy bookcase is not very deep, so the bench will stick out a few inches at least. Also it may not be as sturdy as Sektion kitchen cabinet line.
2. Sektion kitchen cabinet system (right)
2 wall cabinet serving as banquette seat + and two tall cabinets. This option is very customizable, as I can pick specific cabinet layout, door style, etc.
The cost of this option is around $1200. The downside is the installation difficulty which we experienced a lot during our IKEA kitchen renovation.
3. Local closet store
While I was debating for these options, I also called a local closet company who built our pantry cabinet to give me a quote. Th total cost will be $3400 with MDF materials, and I will need to paint the surface myself.
Planning A Home Renovation?
Stay on top of every detail & beat overwhelm with the Home Renovation Tracker!
An encounter with IKEA Havsta system, and why it is meant to be
After comparing the options we have, I was pretty sure I want to take the IKEA route. It is so much cheaper without really sacrificing any quality.
So my husband and I took on a field trip to our local IKEA store to look at those options in person. While we were there, we discovered their new furniture line, called Havsta.
The furniture combo layout in the show room is almost exactly as what I wanted for my banquette seating builtin: a bench which can comfortably seat three people with tall cabinets on both sides to add storage!
The whole combo costs $945 and interestedly the dimension of this combo is EXACTLY the width of wall we have(~127″) – it is meant to be! That means I can achieve a semi built-in style without adding filler pieces and cover panels.
The only downside is that the cabinet doesn’t go all the way to the ceiling, so it will not look super customized, also I have to modify the TV stand so it is at bench height.
Overall I think it is the best option we have. It require less woodwork and has a lower cost than Sektion kitchen cabinet system. I also love how perfectly it fits my dining space.
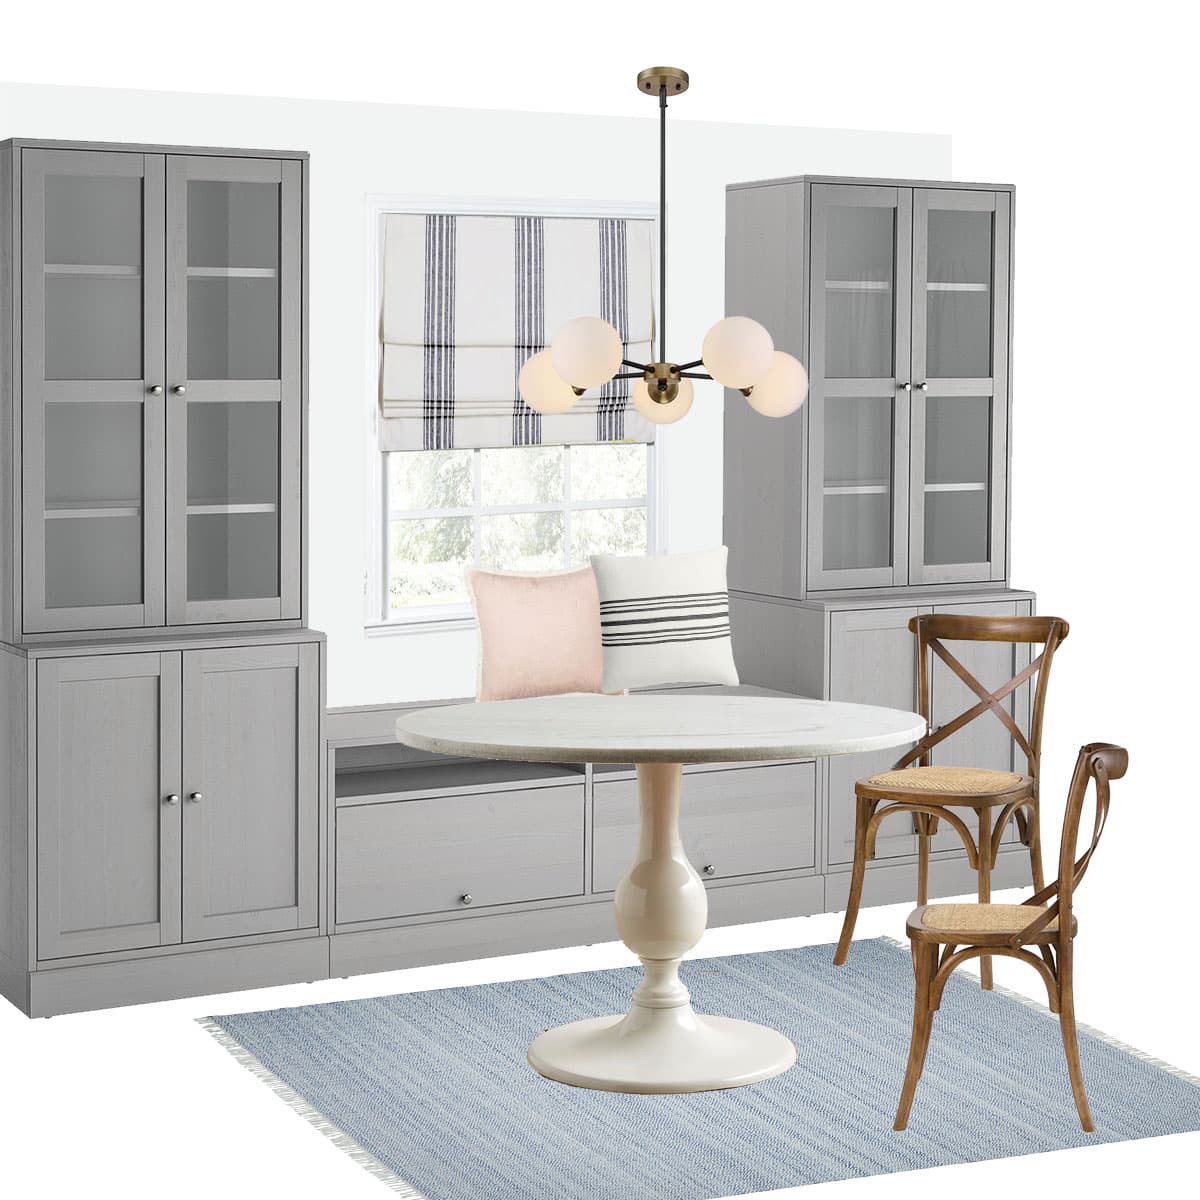
So here’s the new mood board with Havsta system in. But instead of a round table, I will use a long rectangular table so we can comfortably fit 8 people in our small dining space. And of course I’ll remove the top portion of the TV stand and sturdy it up a bit so people can sit on it comfortably.
IKEA Havsta hack banquette seating Video
I created this video talking you through my process of this DIY Ikea bench seating project, and highlighted a few key points to make this DIY project successful. You can click on the video below to watch it.
If you want to watch more videos like this, be sure to subscribe to my Youtube channel.
Update: IKEA Havsta TV unit new design and how to convert it to bench seat
I’ve noticed earlier this year Ikea updated their Havsta TV Unit with Base design. But don’t worry, if you still like the Havsta cabinet look, there are 2 ways to make it work:
1. Use Nordli drawer or dresser unit for banquette seat.
I have a blog post and video on hacking Nordli drawer unit for a bench seat. So if you’d like to have drawer storage for your dining banquette, this could be a good option.
I used it for my window seat which is higher than a normal bench seat. If you would like to use it for dining seat, you can opt for a lower base to achieve the perfect dining bench seat height.
Check out this post for instructions.
The downside is the base would look different than the Havsta cabinet. A good solution is to skip the base for Havsta cabinets, and use your custom baseboard for all the Havsta units for a consistent and custom look.
2. Hack new Havsta TV unit into a bench seat.
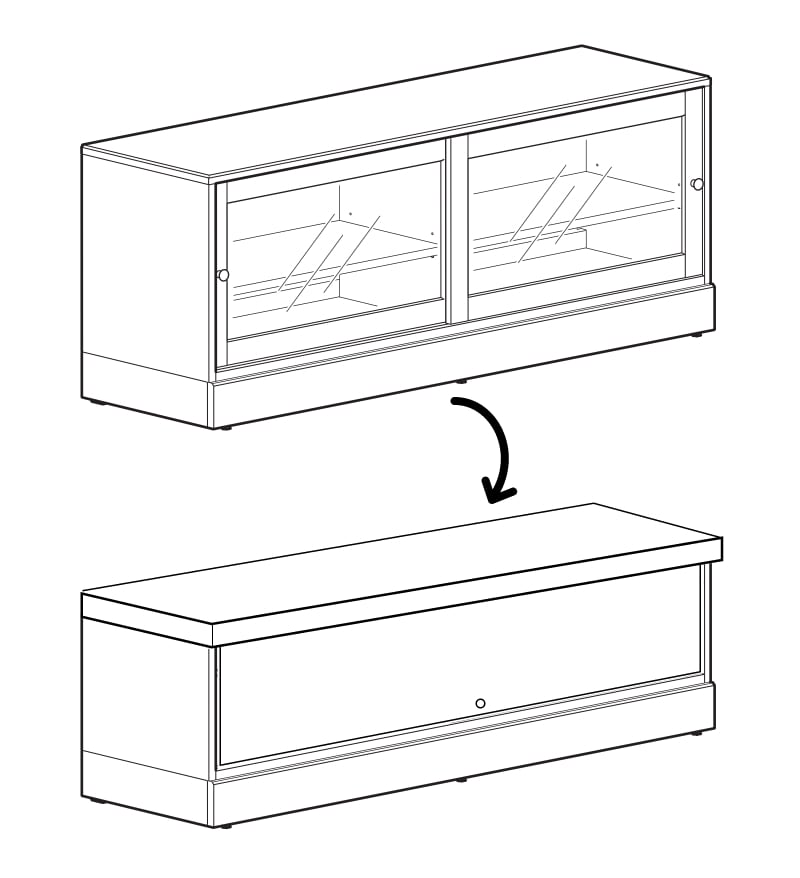
The second way is to hack the new Havsta TV unit into a banquette seat. Basically you’ll follow the same DIY instructions below, but replace the door to adopt to the new height. Here’s how it works:
First cut off extra height from the TV unit vertical board, and this time there’s no limit of how much you can cut off (yay!). Then attach a bench top to it.
For the doors, replace the sliding doors with 1/2 inch or 3/4 inch board. Cut them to size and use hinges to attach to the main TV unit. Then you can paint everything together with Benjamin Moore Hearthstone (close match to Ikea grey) in a matte or eggshell finish.
Check out this diagram below to see what I’m talking about.
Alternatively, you can skip the door all together and just use some beatiful baskets to store things.
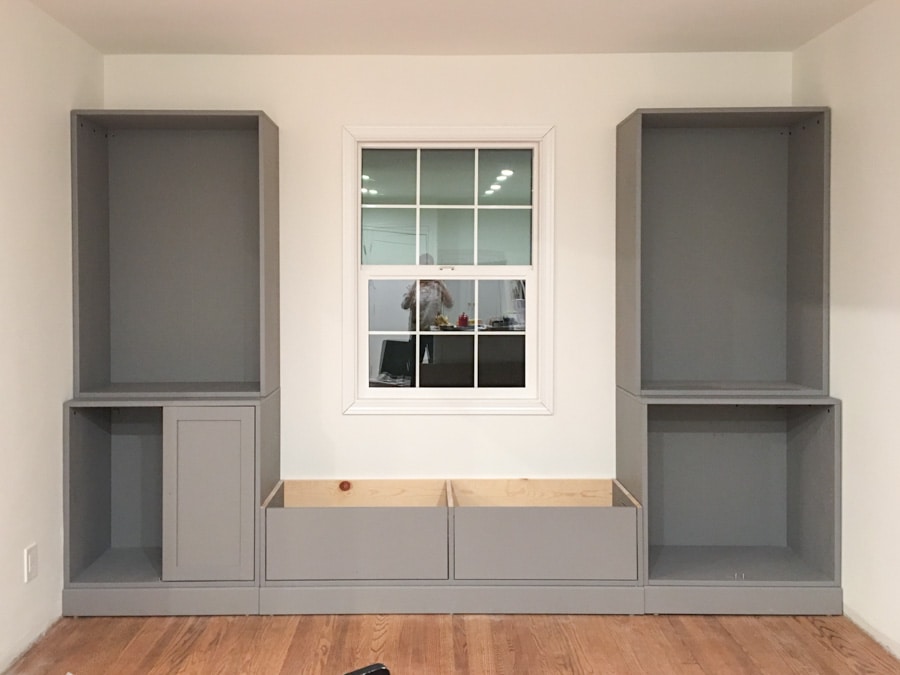
IKEA Havsta hack banquette seating DIY process
Step 1. Assemble the cabinets half way
This step is pretty easy, just follow the manual to build up all the boxes. I used a power drill makes my life a little bit easier.
For the tall cabinet, it is actually made of 2 boxes stacking on top of each other. I strategically leave the doors and shelves out in this step as I want to install them when everything is in the right place.
Leaving them out will make anchoring the tall cabinet to the wall a lot easier.
At this phase, don’t fully assemble the TV unit either, since it will require some modification. I’ll talk about it more on step 3.
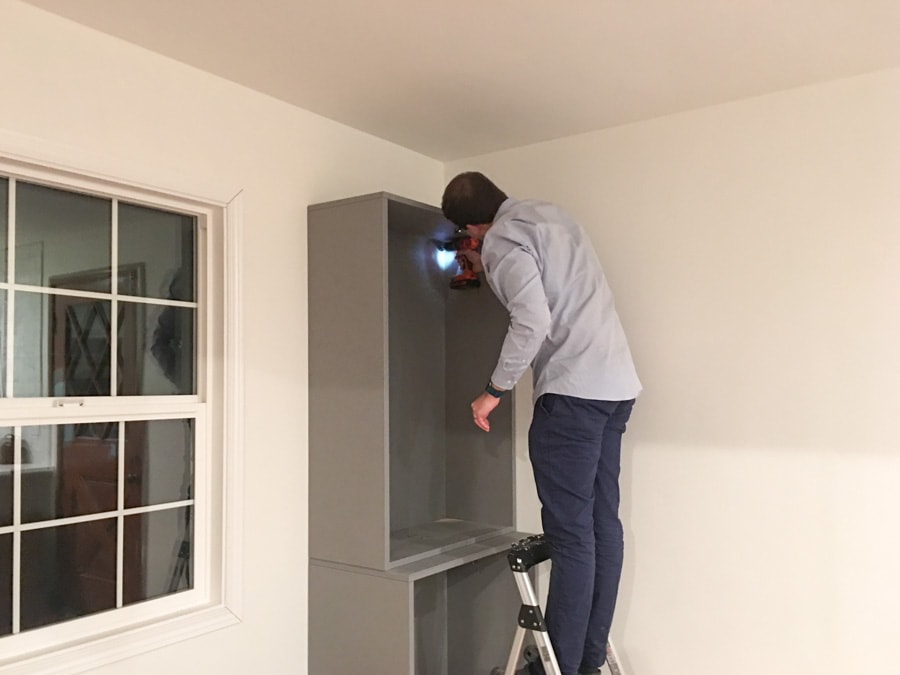
Step 2. Arrange the cabinets to the desired location and anchor them to the wall
Because our wall width is the same as this cabinet combo, we push everything straight into the wall. In order for them to stay secure and not tip over, we used the plaster wall anchor to secure all cabinets to the wall, except the banquette part.
The banquette is so low that it won’t tip over. And because things fit tightly, it won’t shift left to right either.
Step 3. Modify Havsta TV stand
Update: Ikea has since update their Havsta TV unit design, and there are a few new ways to hack it into a bench seat (yay!).
Check out the “Update” section to see how to convert it to a bench seat.
For the TV stand (soon-to-be-banquette), it is slightly trickier, but totally achievable.
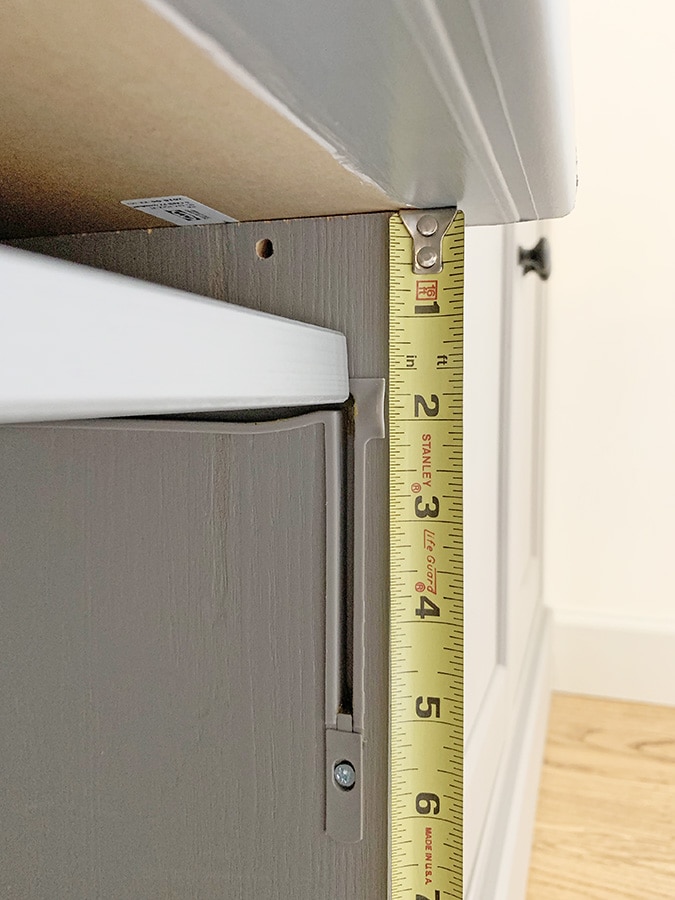
First, I build up the base frame – the thing at the very bottom that looks like a baseboard. Then after some measuring and calculating, I cut the three vertical boards shorter. The new height is 12 7/8″ for the two side boards, and 12″ for the middle board, no change on the depth.
Because the door track is built in on these boards, be sure not to over cut. Test the new height by sliding the door to make sure it can move freely on the track once the bench top is on.
You can see in the photo below, I had about 1 1/2″ above the front top of door track.
The original back support was just two thin boards, definitely not sturdy for a bench. So I replaced them with two 1″ x 8″ pine boards siting on the base and stacking on top of each other to add more weight support.
I did trim the top pine board so it is top aligned with those vertical boards.
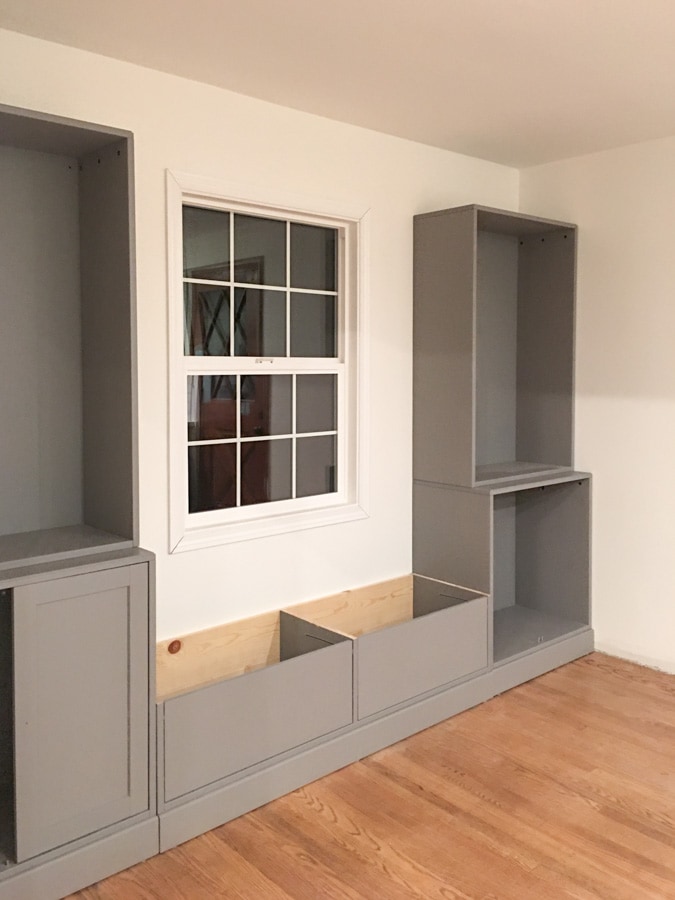
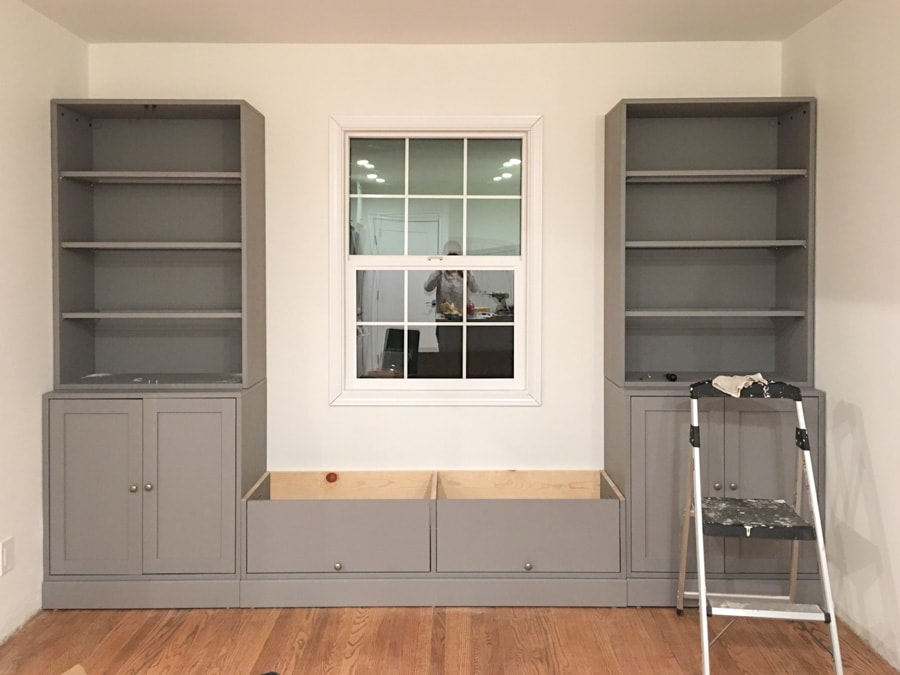
Step 4. Attach doors and shelves
Once the location for those cabinets are set, and tall cabinets were anchored to the wall. I started attaching the shelves and doors, following the installation manual.
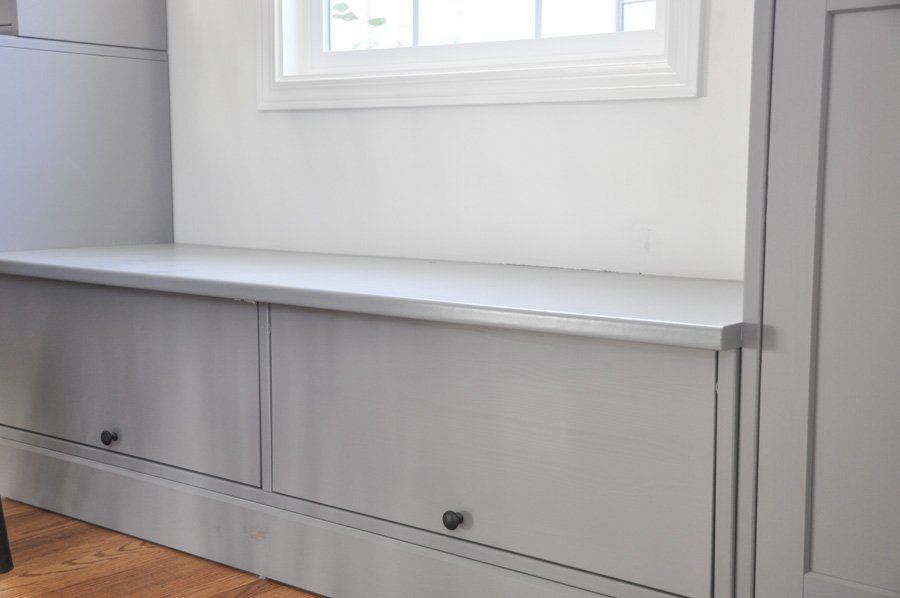
Step 5. Add banquette top board
For the top board where people will sit on, I bought IKEA white laminate kitchen countertop for the sturdiness. They are 1 1/8″ thick with laminate finish.
I cut them to size with a circular saw, and paint it with a coat of primer which bonds with laminate surface well.
Then I used Benjamin Moore Advance paint in satin finish for durability. The color is 1601 Hearthstone, and I gave it 2 coats of paint.
I also spray paint all the knobs into a matte black finish with this spray paint.
I just think it looks more classic and higher end. And you might have noticed that we also added window molding to this window. It made a huge difference!
Actually this matte black spray is probably one of my most frequently used spray paints.
Here’s the after/before comparison of the knobs:
That’s all for the DIY IKEA banquette project with Havsta hack! I hope you get helpful tips from this tutorial.
This dining banquette project turned out to be really successful and we have been seating on it daily ever since! No one seats on the dining chairs anymore!
With the banquette seat and cabinets, we were able to add so much storage without looking visually crowded – I always prefer to make use of vertical space.
To get all the sources of my dining room furniture, decor and paint colors, you can visit dining room sources page.
And follow me on Instagram if you’d like to see more ideas on making your home functional and beautiful 🙂
Dining room source
Wall color: Benjamin Moore Simply White
Banquette seating with cabinets
Dining Table (purchased second hand and refinished using minwax classic gray)

Planning A Home Renovation?
Stay on top of every detail & beat overwhelm with the Home Renovation Tracker!
More IKEA hacks
IKEA Havsta Series Honeste Review After 3 Years
DIY Ikea Window Seat with Ikea Nordli Dresser Hack
5 Ways To Make Your IKEA Sofa Looks More Expensive + IKEA Sofa Buying Tips
Home office desk built-in with Ikea Alex desk and drawer hack
IKEA Kitchen Cabinets Honest Review
IKEA Kitchen Cabinets Organization Ideas and Hacks
Pin it for later
If you’re looking for information about the N999 Game, this article will help you understand what the app offers before downloading it
If you’re looking for information about the N999 Game, this article will help you understand what the app offers before downloading it.
This customizable keyboard app also includes colorful themes, stylish fonts, emojis, GIFs, and various typing enhancements myphotokeyboardapk
godrej sector 151 noida
Godrej Sector 151 Noida is a project by Godrej Properties, located near the Noida Expressway. The project covers an area of 4.95 acres and is situated in Sector 151 of Noida, just off the Yamuna Expressway. It offers 3 and 4 BHK apartments so people can choose a home that fits their budget and needs. If you’re looking for a place that provides comfort and modern facilities, Godrej Sector 151 Noida is the best choice. It combines Indian traditions with Western lifestyle elements.
Great DIY IKEA Havsta hack! The banquette seating looks stylish, functional, and space-saving. Excellent creativity and craftsmanship—truly transforms the room into a cozy, modern dining area. Eddie Manson jacket.