How to change light switch and cover | single push button switch
How to change an old light switch and cover to a new one. Got an old looking light switch? No problem. It’s actually surprisingly easy to replace them!
In this post I’m sharing my step by step process of changing up an old light switch to a classic single push-button light switch and matching plate cover.
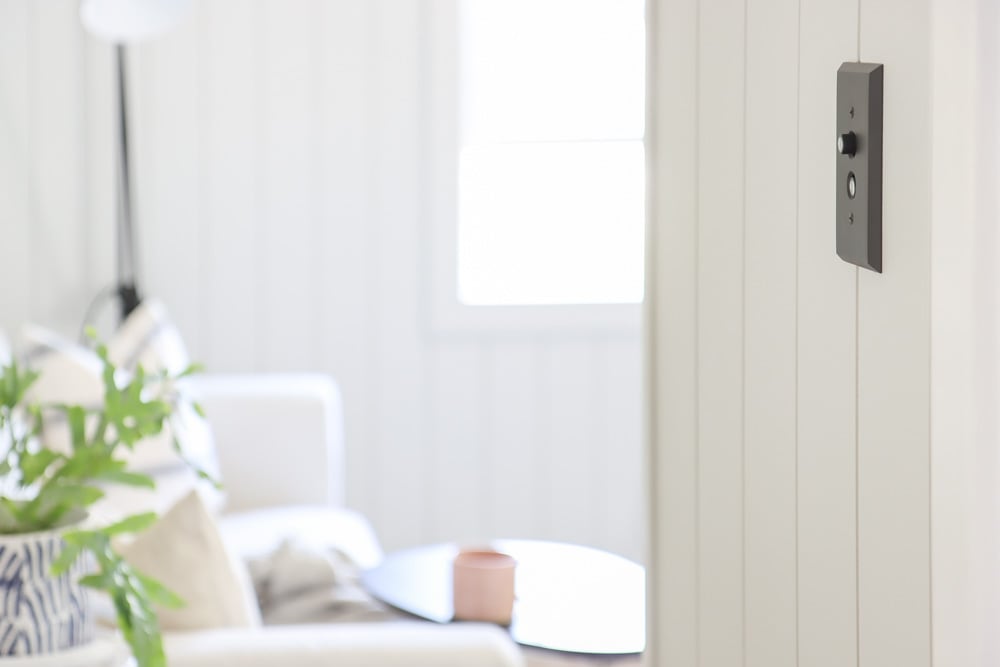
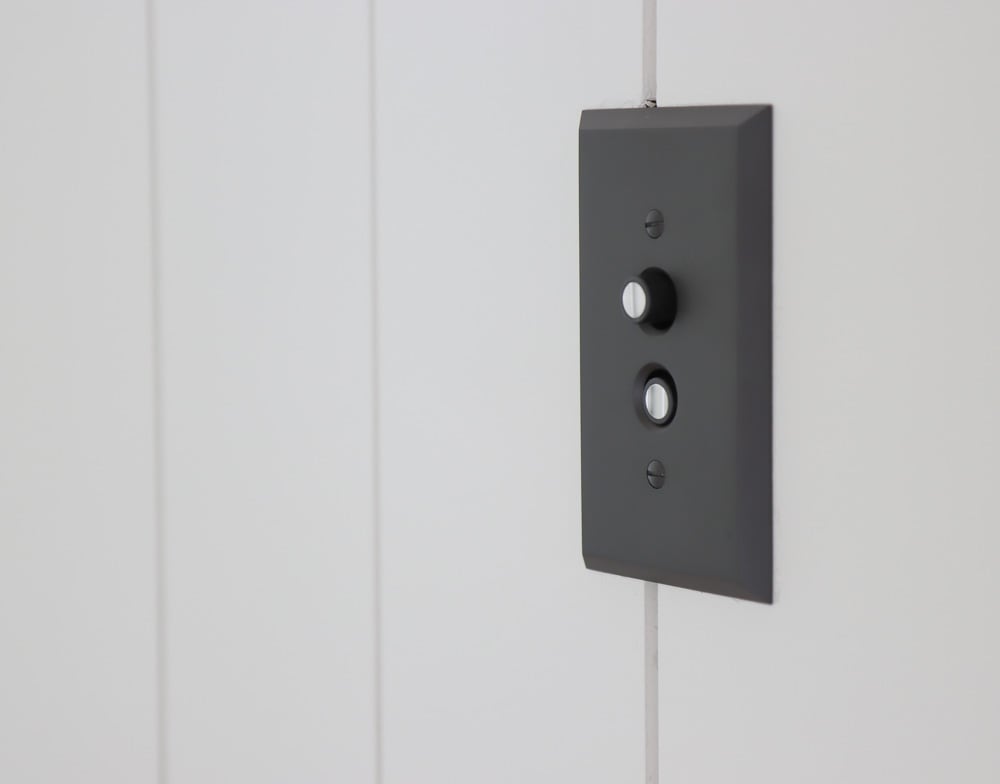
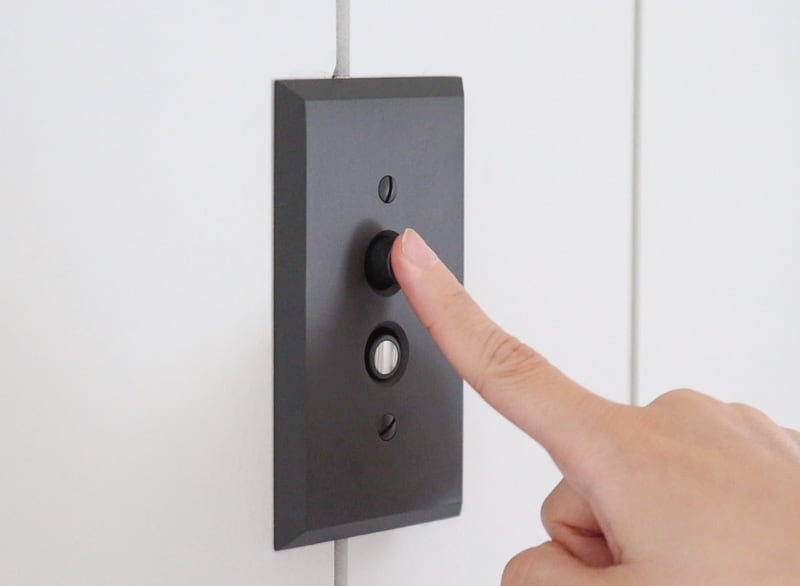
This retro style push button switch has become something that sparks me joy everyday.
I’m always secretly delighted whenever I use this button. So this quick and easy project is so well-worth-it!
Why change up a light switch?
Light switch is probably something you interact with at least a few times per room per day. If you have an old looking light switch, sometimes it is not only hard to use but also becomes an eyesore that you’ll see multiple times a day.
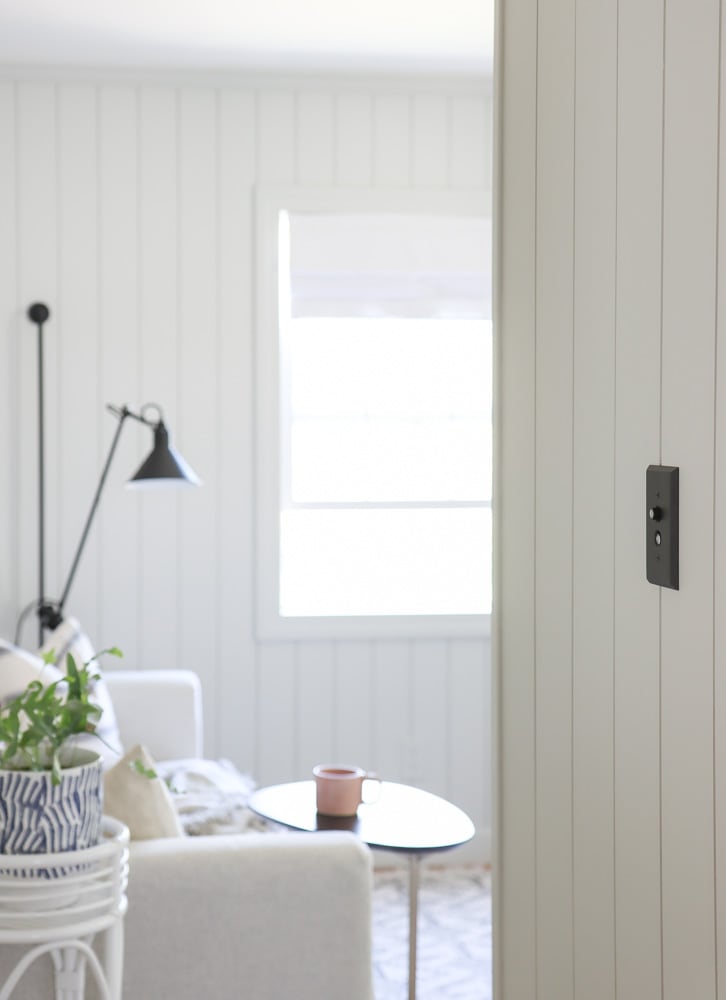
This photo below is the light switch “before”. It was in an old almond color, and I painted it over with the same color as wall. It helps with reduce the prominence but still doesn’t look great. Plus because of the painted surface, it is not super durable and I have small chips on the switch here and there.

So why not modernize your light switches at home with something that sparks joy? We recently changed our light switch and cover in our home office and just couldn’t be happier! It elevates the space by giving me a great impression because it is located right at the entrance! And every time I turn on and off the light, it makes me happy 😀
Video tutorial on how to replace old light switch and cover with new one
I made a quick 2-min video on how to change the light switch and cover. For some parts of the DIY process, it might be easier to understand by watching the video. So give it a watch and then read the step by step instructions for details on updating light switches.
Also be sure to check out my Youtube Channel for more DIY tutorials
Tools and materials to update light switch
For this project, you’ll need a new light switch and a matching switch cover plate.
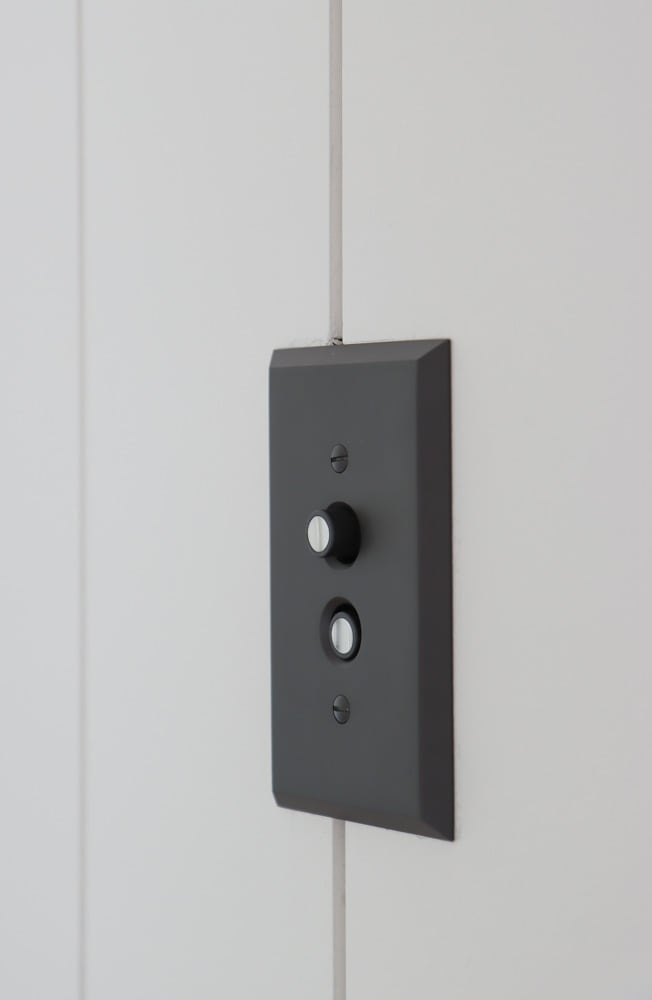
I’m obsessed with a vintage inspired single push button switch so I’m going with that and a matching switchplate. I got both from Rejuvenation and here are the exact ones I got:
Single push-button light switch
Screw driver
How to change light switch and cover step by step instructions
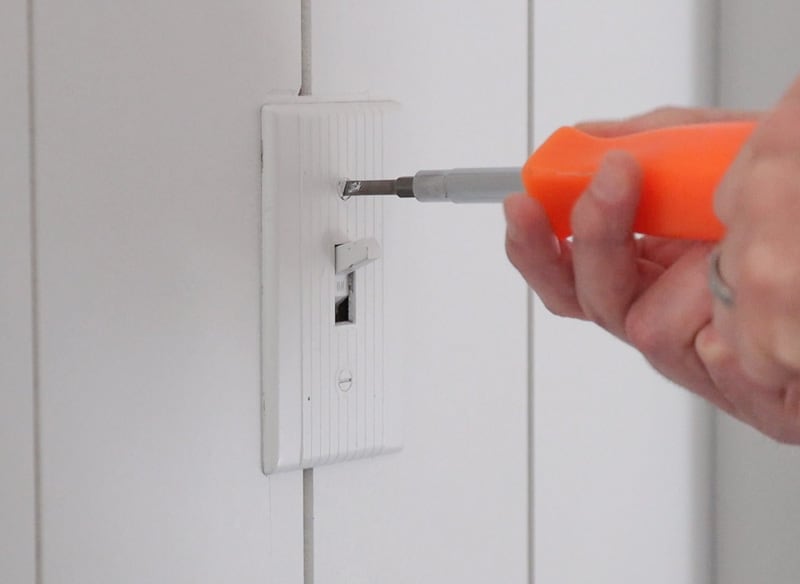
Step 1. Turn off electricity and remove light switch cover
So first of all, before doing anything, make sure to turn off the power! You can turn off the power of the entire house or just the room where you are changing up the light switch. I switch on and off the light switch to make sure the power is shut.
Once the power is off, use a screwdriver to remove those two screws which were holding the plate to the wall.
Once we remove the cover plate, you will be able to replace light switches
Step 2. remove old light switch
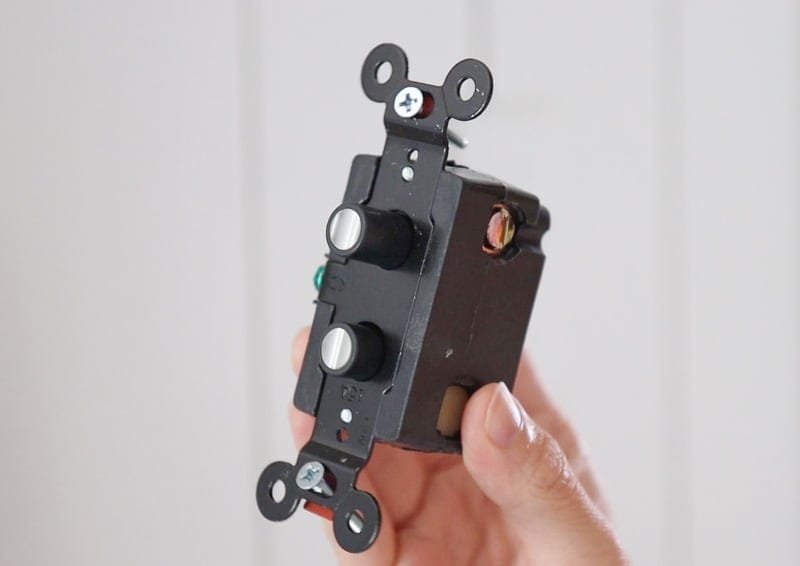
To remove the old light switch, first remove the two screws that are holding the switch to the wall. Then you can pull the switch out a bit in order to disconnect it from electrical wires.
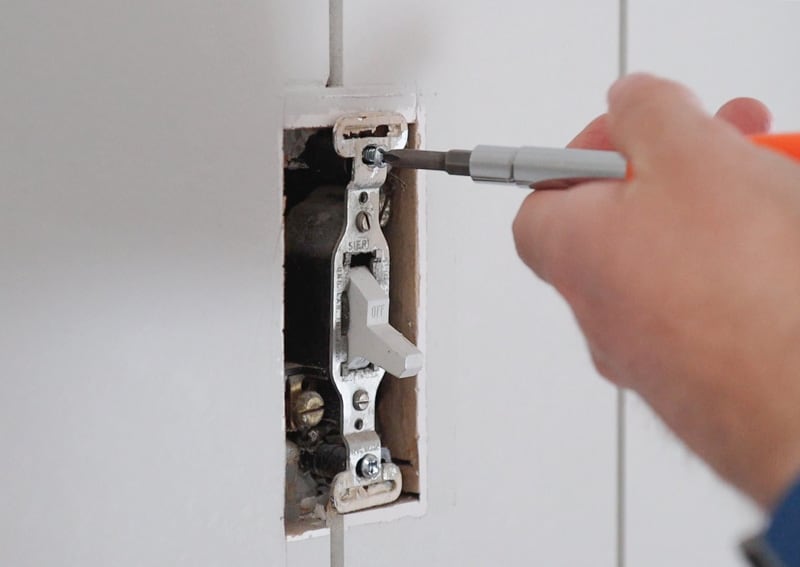
At this point, you’ll be able to see what terminal screws are holding what wires. I recommend you to take a picture of the current situation so that you can refer later when you install the new switch.
Now you can loosen all the terminal screws until you are able unhook the electrical wires easily. After unhooking all the wires, you can remove the old switch successfully.
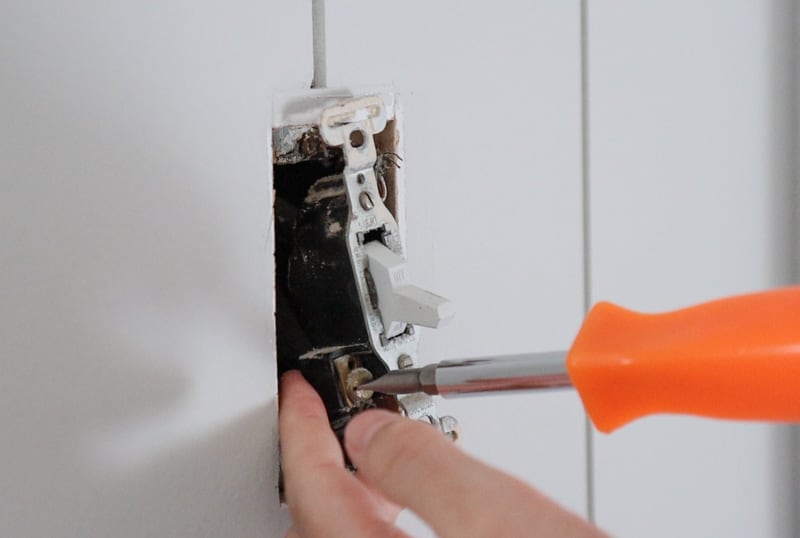
Step 3. Install new light switch
So The idea is to reconnect the same electrical wire to the new terminal screw on the new switch. I’m using a single pole switch with push buttons because I love the analog look. If you are using a three way light switch, there are also 3-way push button switches for modernizing your light switch.
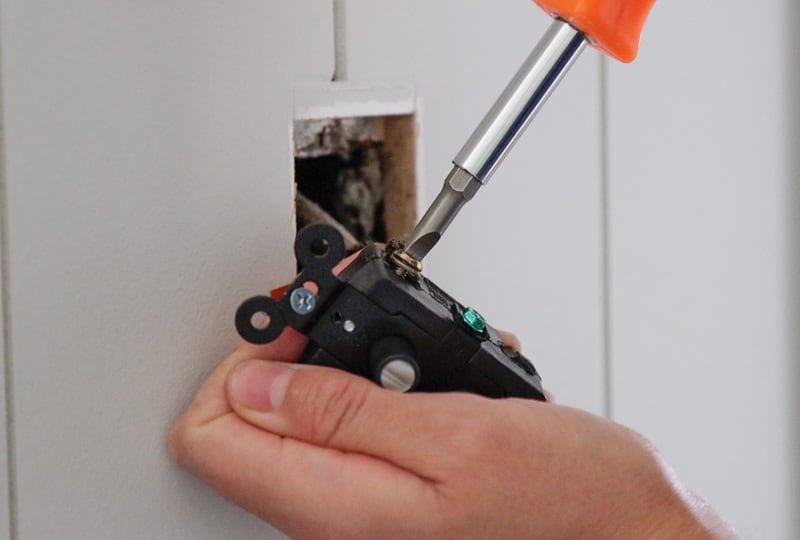
But here’s one tricky thing: our house is super old (built in 1940s), so we don’t have the ground wire for this light. And because of that, we skipped the ground terminal screw (green color). If you have ground wire, you should definitely connect that one as well!
So for us,we hooked the electrical wire to the corresponding screws. You should be able to find which wire connects to what based on the picture you took, or the instruction manual that comes with the new switch. Worst case scenario, a simple google search will also give you a diagram on what terminal wire is supposed to connect to what.

So now just hook up each electrical wire to the corresponding terminal screw, then turn the screws to tighten it so they are holding the electrical wire (metal part) tightly.
For us it was 2 wires, but for you, it is probably 3 wires.
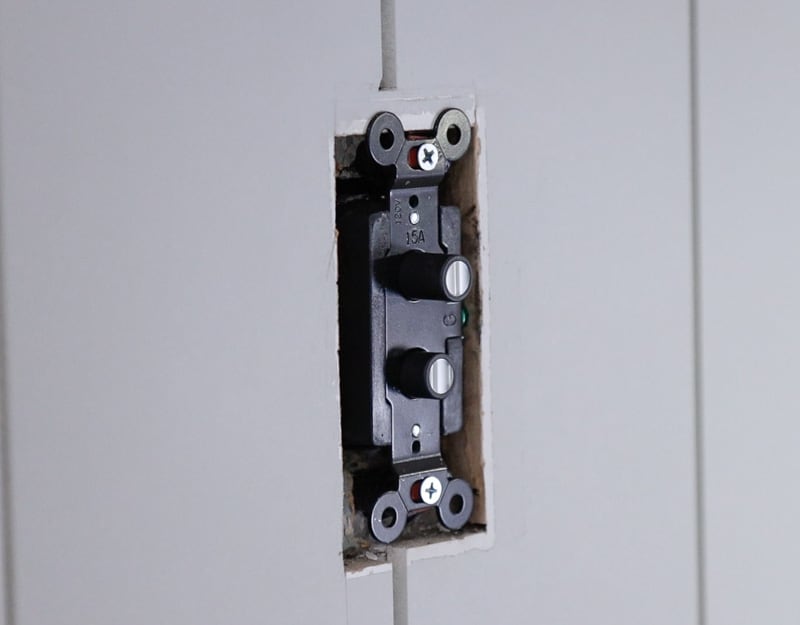
Then you can push the new switch back into the wall opening and use the screw it came with to secure them so that they are flush to the wall.
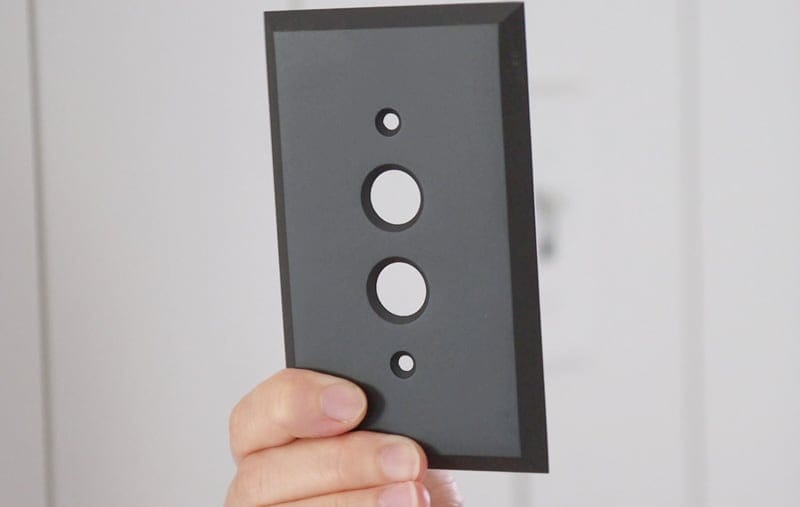
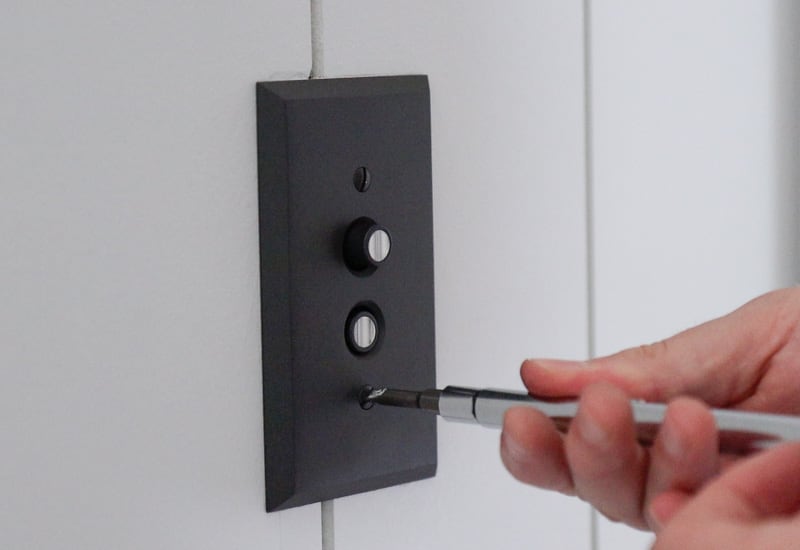
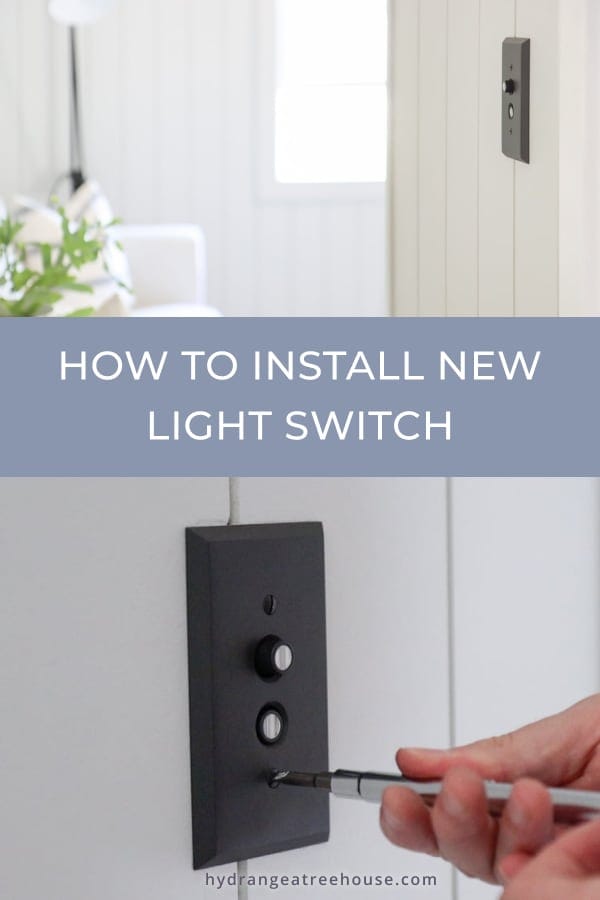
Step 4. add light switch cover plate
The last step is to pop on the new switch plate and add two screws to hold plate cover to the wall! And you are done! Turn back and power and test out to see if the new light switch is working.
So that is all the steps to change old light switch to a new one. This is such a simple project, but I absolutely enjoy turning on and off my light a lot more than before! It’s definitely a place that sparks joy for me!
And speaking of what light switch to update to, I personally love a single push button switch. It is always fun to push in and out, and the vintage style is just classic!
Other DIY projects
DIY Vertical Shiplap Wall and Cost Breakdown
DIY Closet Makeover with Ikea Trofast
DIY Home Office Desk with Ikea Alex Units
Pin it for later
Great post! I’ve been looking to update my light switches, and your step-by-step guide makes it feel manageable. I especially appreciate the tips on safety precautions—definitely taking notes! Can’t wait to try it out.
Great tutorial! I’ve been wanting to change my old light switch for a while, and your step-by-step instructions made it seem so easy. I really appreciate the tips on safety and the tools needed. Can’t wait to tackle this project!
Great post! The step-by-step instructions made changing my light switch so much easier than I anticipated. I love the tips on choosing a cover that complements the room’s decor. Thanks for sharing!
Great tutorial! I found the step-by-step instructions really helpful, especially the tips on safely handling the wires. I can’t wait to try this out in my own home!
Great tutorial! I’ve been meaning to replace my light switch, and your step-by-step instructions are super easy to follow. I appreciate the tips on safety and tools needed. Can’t wait to give it a try this weekend!
Great tutorial! I never knew changing a light switch could be so easy. The step-by-step instructions were super helpful, and your tips on safety were much appreciated. Can’t wait to tackle this project myself. Thanks for sharing!
Great tutorial! I just followed your steps to change my light switch, and it was super easy. The pictures really helped clarify each step. Thanks for the detailed guide!
Great post! I found the step-by-step instructions super helpful, especially the tips on ensuring the power is off before starting. I’m excited to try changing my light switch this weekend—thanks for making it seem so simple!