DIY Closet Makeover with Ikea Trofast Hack | Small Closet Renovation
Ready for a closet makeover? I’m sharing my DIY closet makeover with Ikea Trofast hack to achieve a built-in look, and how to create wall stencil for free! I’m also including all the sources for this makeover at the end of the post.

Small Closet Makeover with Ikea Trofast Hack Video
Let’s start with a video walkthrough of the DIY process, so you get an overview on what I did. Then, I’ll dive in with more details below:
If the video doesn’t work here, you can watch it on YouTube here or scroll down to find it in the middle of this post. I’m posting DIY videos on my channel on a regular basis, so subscribe if you like to see more videos like this!
The finished closet with Ikea Trofast hack
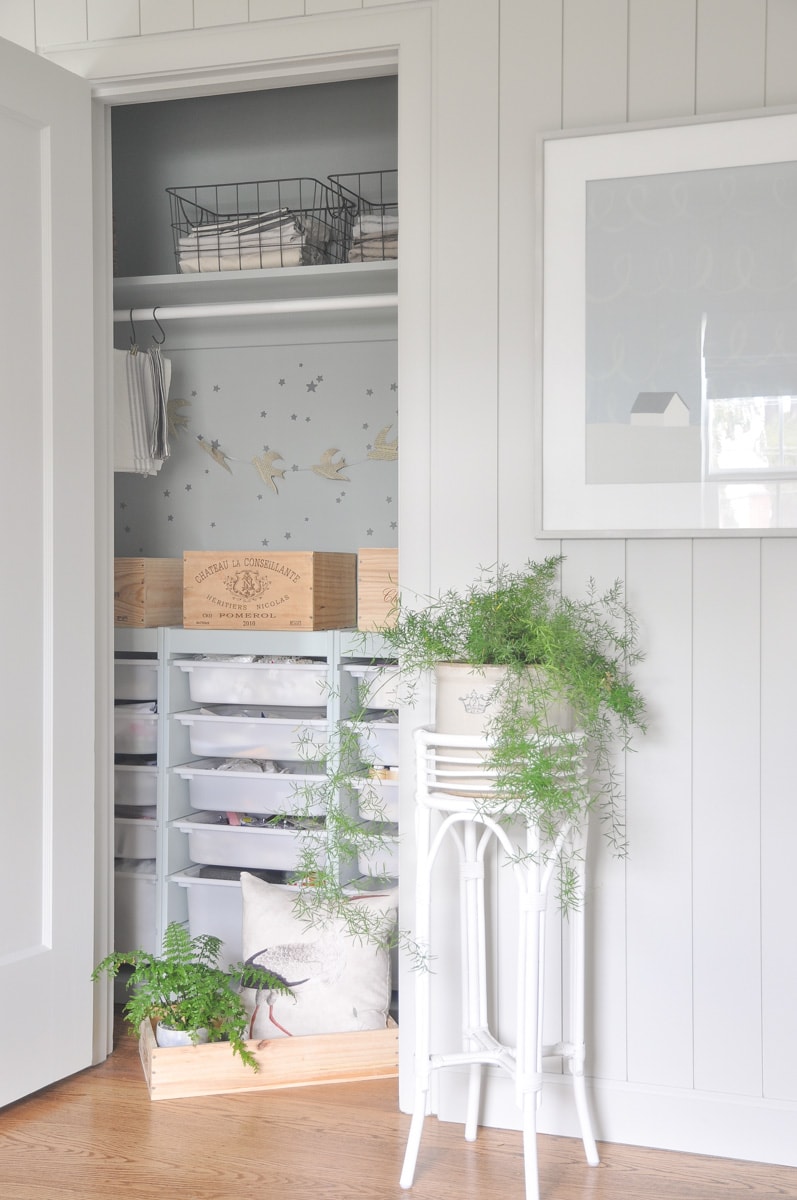
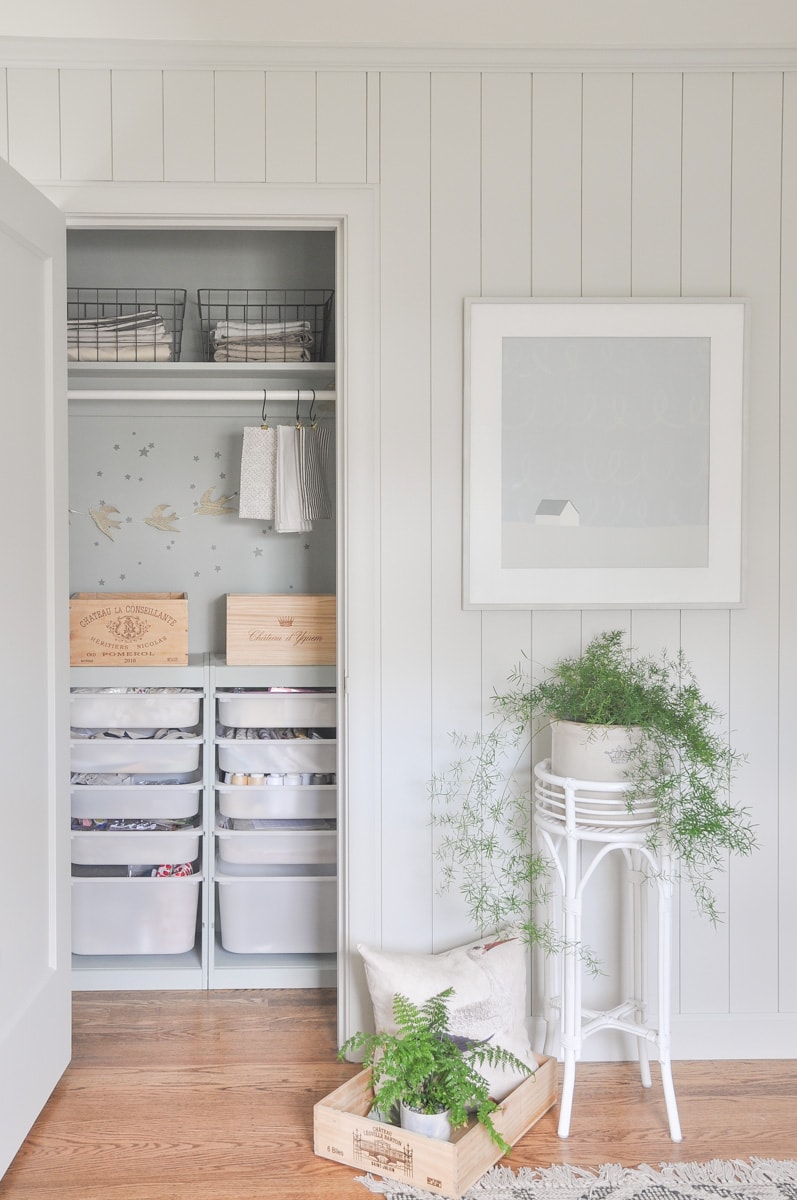
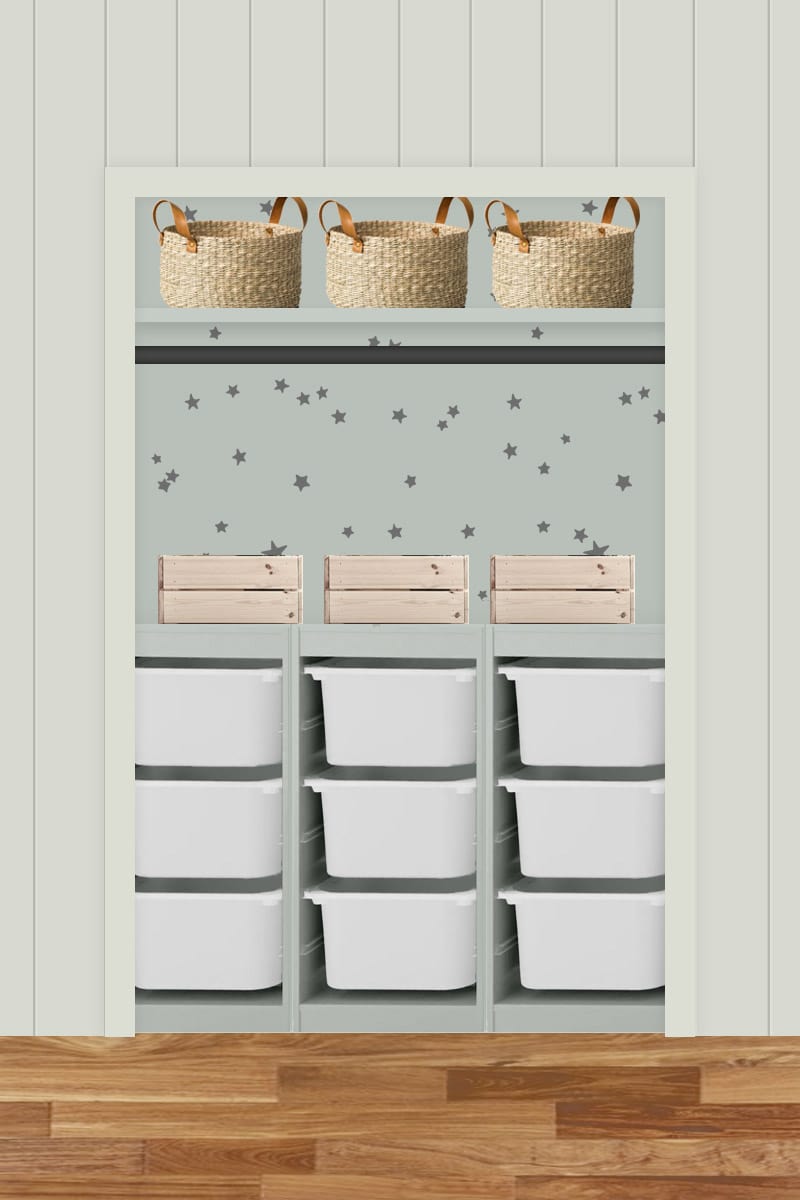
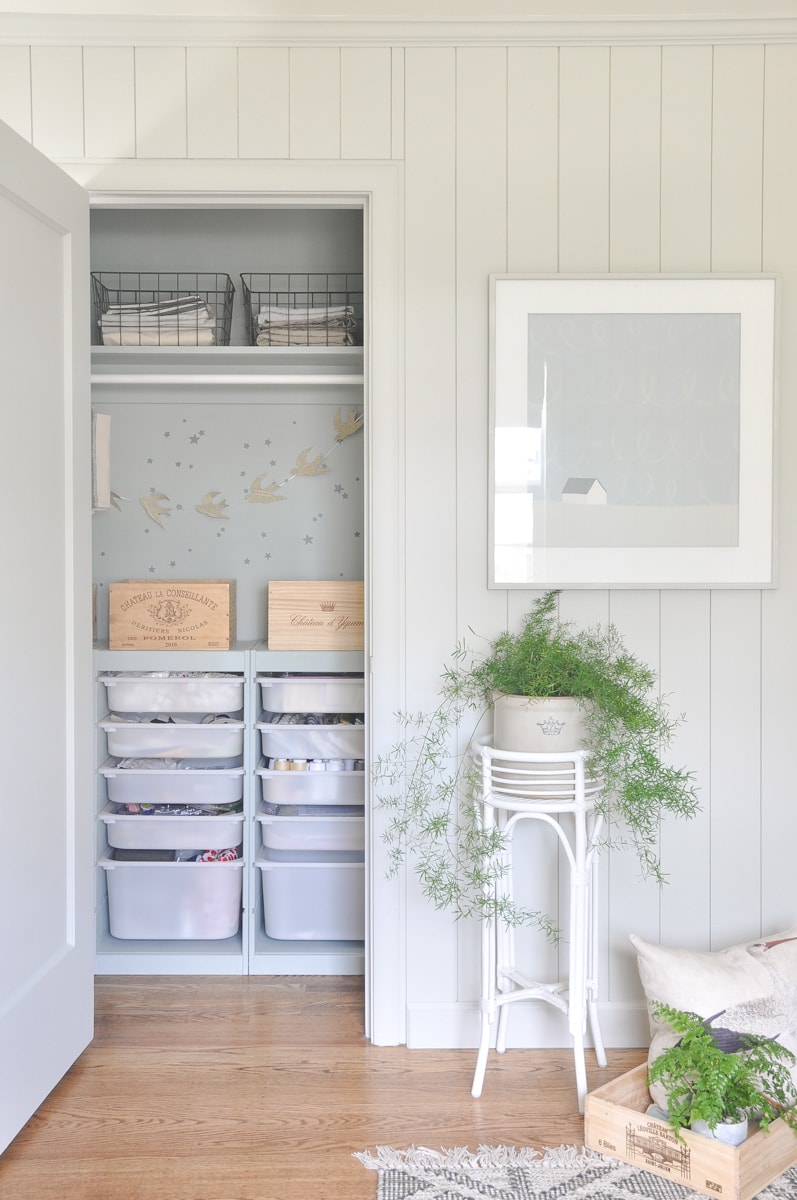
First of all, before the step-by-step of this DIY Ikea Trofast hack, here’s the stuffed and styled home office closet looks like:
Storage solutions
This closet is intended to use as a craft supply closet for me, as mentioned in my home office renovation plan. Since completed this makeover, I have migrated my crafting supplies to the Trofast storage.
Now, they are stuffed with fabrics, sewing notions, and all sorts of crating supplies!
Although it is pretty full, with the Trofast storage system, things are hidden behind those white drawers. Plus, I acquired some cute storage baskets to add more storage with style.
Here’s what it looks like now:

Because the shelf is so high-up, it is important for me to see what’s there.
I chose wire baskets to store medium to large sized items, so I can see what’s inside without having to take them off the shelf.
I placed small sized wooden wine crates on top of Trofast to house small to medium sized items, in order to hide the clutter.
I’m loving how each one looks so individually unique also the wood tone just adds so much warmth to the space!
Keeping closet rod
I didn’t remove closet rod because I want to reserve the closet functionality when guests come – this room needs to serve multiple functions : home office + craft room + guest bedroom
A great thing about that decision is: it makes it easy for me to hang a lot of stuffs! I use S hooks and binder clips to hang fabrics, templates, and cardboard sewing patterns.

Adding art
I created this art print for my home office. You can download it as a digital art print and print it out in your home printer or local stores
This art work feels whimsical and peaceful to me, which goes well with my home office vibe.
DIY closet makeover with Ikea Trofast hack
BTW, this closet is part of my DIY home office renovation project. You can check out what I have done to this space before tackling the closet by following my home office renovation journey here:
Home Office Floor Plan and Mood Board
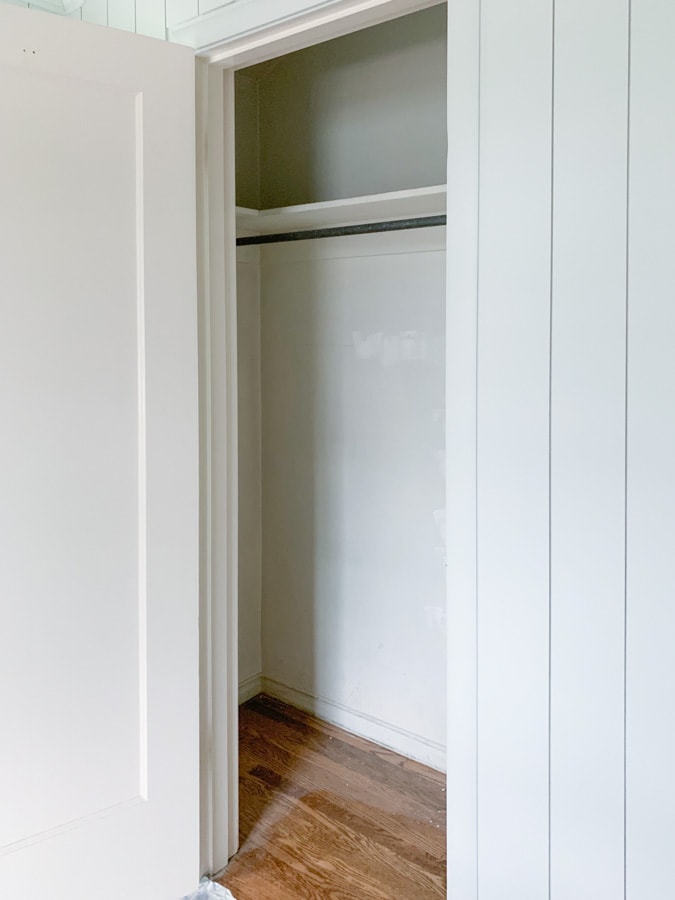
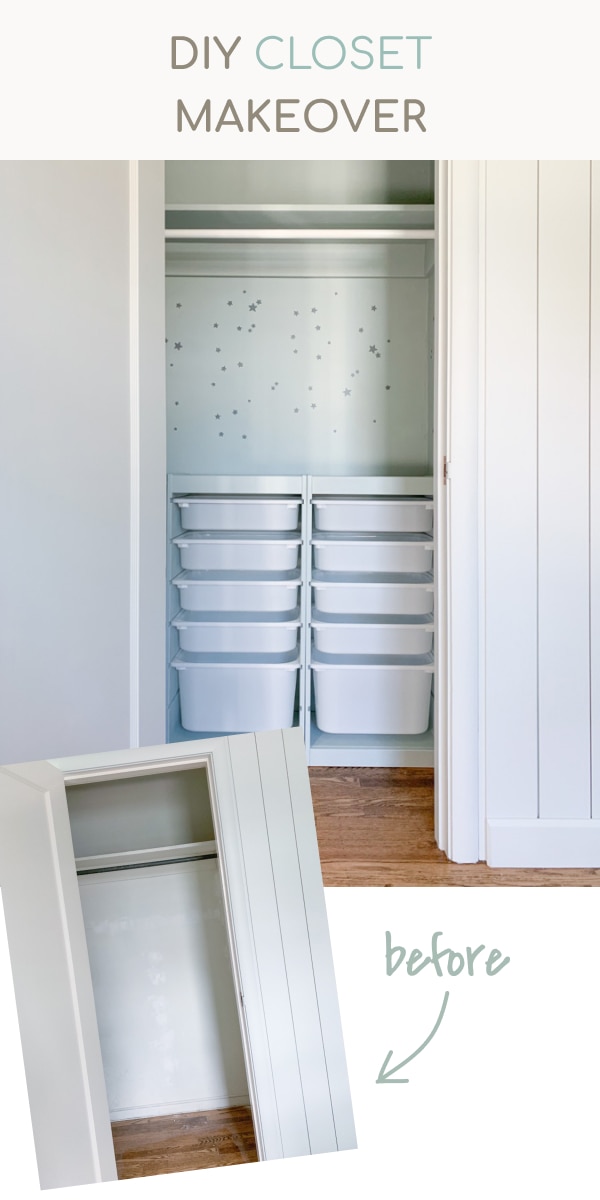
The before
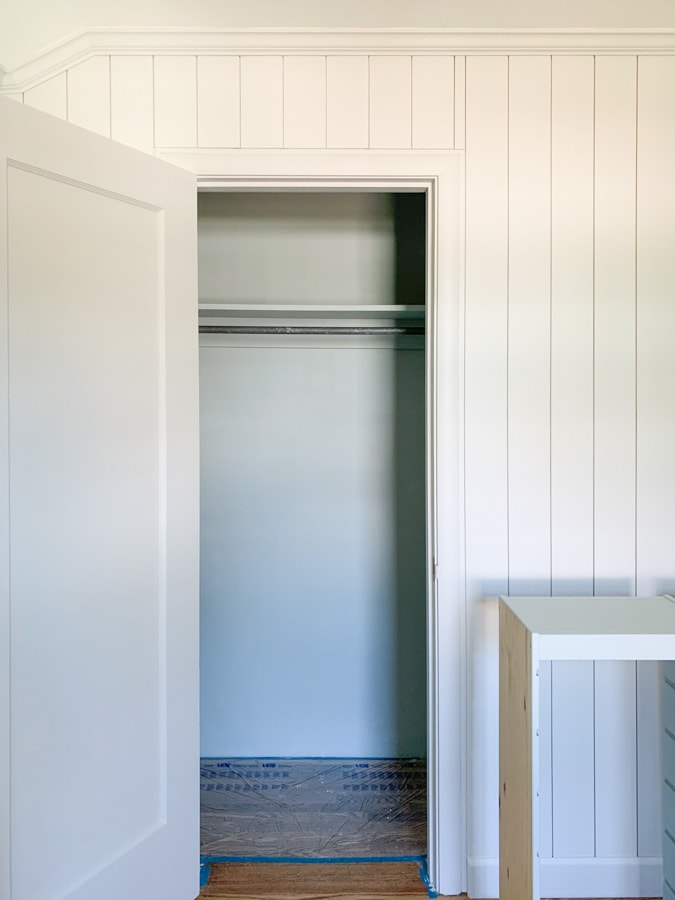
The before is a pretty standard small closet (53″ x 25″).
A single shelf and one rod span the width of the closet – not very space efficient.
Mood board
Here’s the space planning and mood board.
Since this is going to be used as a closet for my home office, I want the main function to be storing office supplies and more importantly, my craft supplies!
I am keeping the closet rod for guest bedroom purpose. When the guests come, I can move those baskets and bins away to clear more space for the guests.

DIY Small Closet Makeover Video
Here’s a video walkthrough of this DIY Ikea closet makeover. Subscribe to my Youtube channel for more DIY videos.
Step1. Painting walls
You might have notices some patches on the wall from the “before” photo. This wall had some damage that was caused by the bathroom renovation. The bathroom is right behind this wall.
So we first patched those damages using joint compound and caulk. Then we removed all the baseboards so that we can put the storage unit right against the wall.
After the prep work is done, we got right into painting.
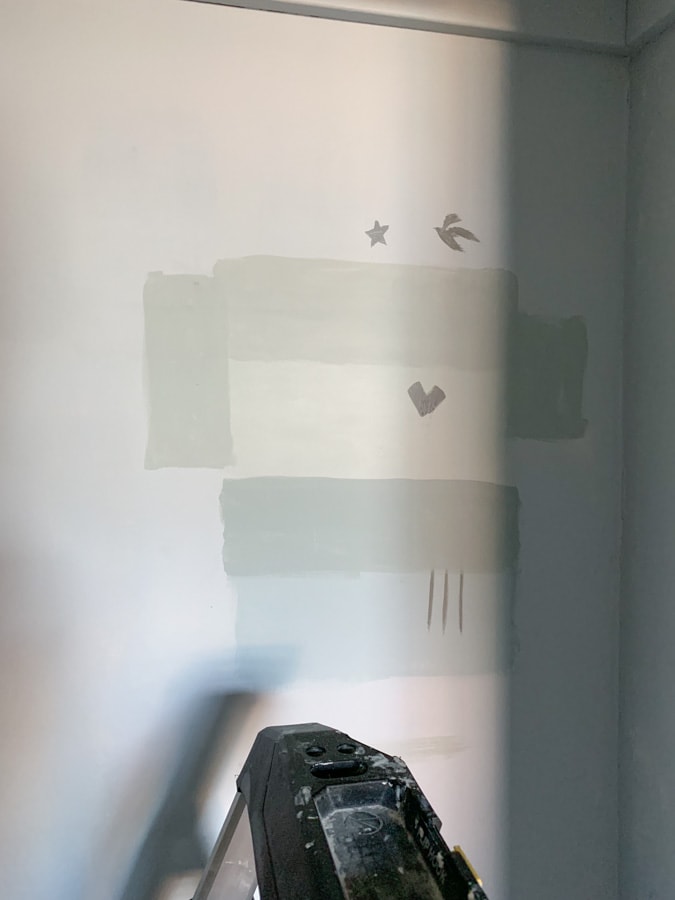
I have tested a few paint colors, but decided to go with Benjamin Moore Quiet Moment, with 50% darker tint. Because the home office paint color is Moonshine, a yellow-green-ish gray, I want to stay in the green color family for this closet.
Quite Moment has a beautiful undertone, but the color is not dark enough to differentiate itself from Moonshine. Tinting it a bit darker helps to define this space more.
The color we picked is the left most one in this photo below, and Moonshine is the one with a heart on it.
Note: The wall in this picture is a light blue color. I originally painted it a light blue but didn’t like the undertone difference of closet and office wall.
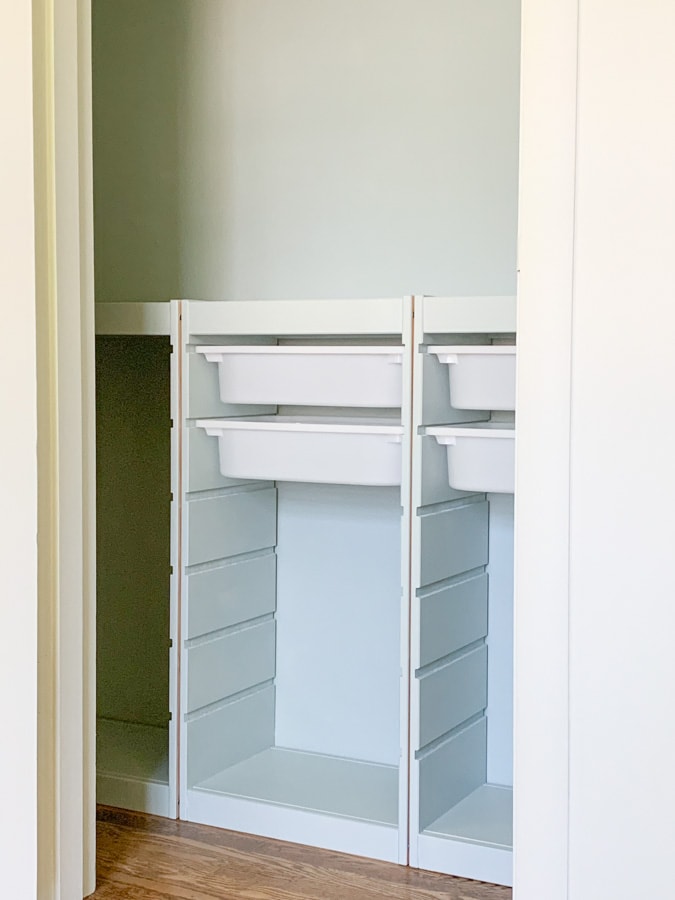
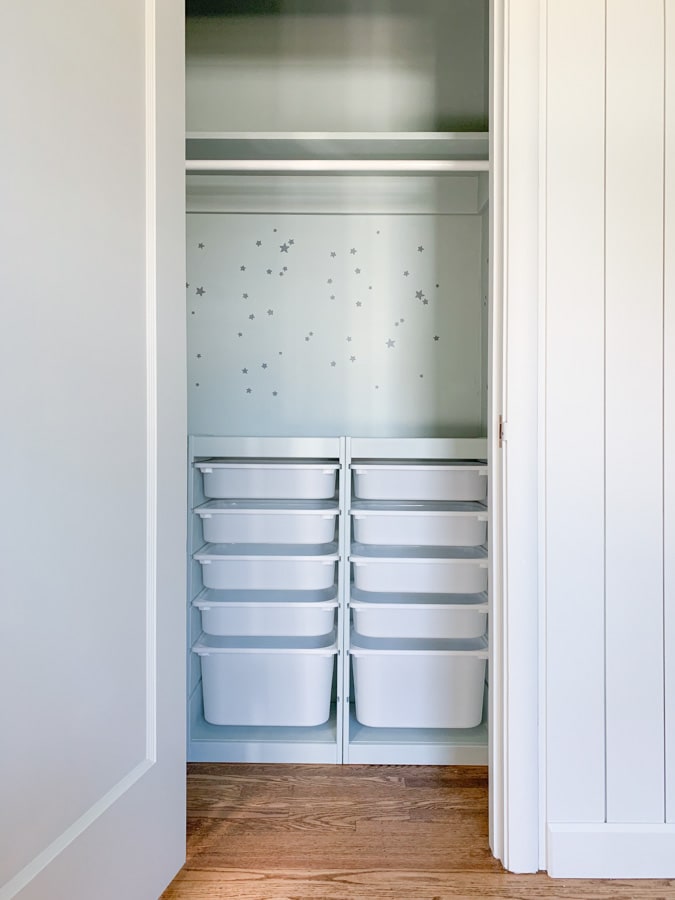
And this is what the closet looks like after we painted it. Different enough from the office wall, but looks harmonious together ? !
Step 2. Closet storage unit – IKEA Trofast hack
I want the main function of this space to be storing office supplies and more importantly, my craft supplies!
If you like crafting like I do, you probably know how much stuff a maker can own ;P So I decided to use IKEA TROFAST storage unit as it offers customization on the drawers, with very affordable price.
This unit made with pine wood is the perfect size for 53″ long closet – I can fit three units in side with only 1″ left!
But to make it look a little bit more expensive, I decided to paint them, and let them sit flush to the wall, to create a slightly more built-in look.
I started by priming the top and front since they will be visible. Since the left and right sides will be right against each other, I didn’t bother painting them.
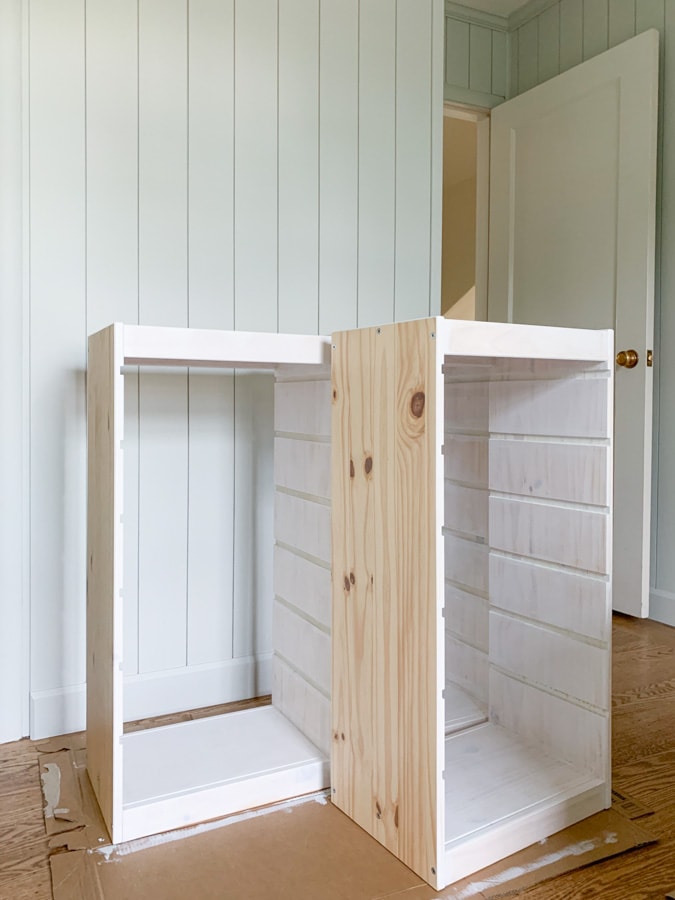
Then I painted them the same color as the closet wall – Benjamin Moore Quite Moment (50% darker).
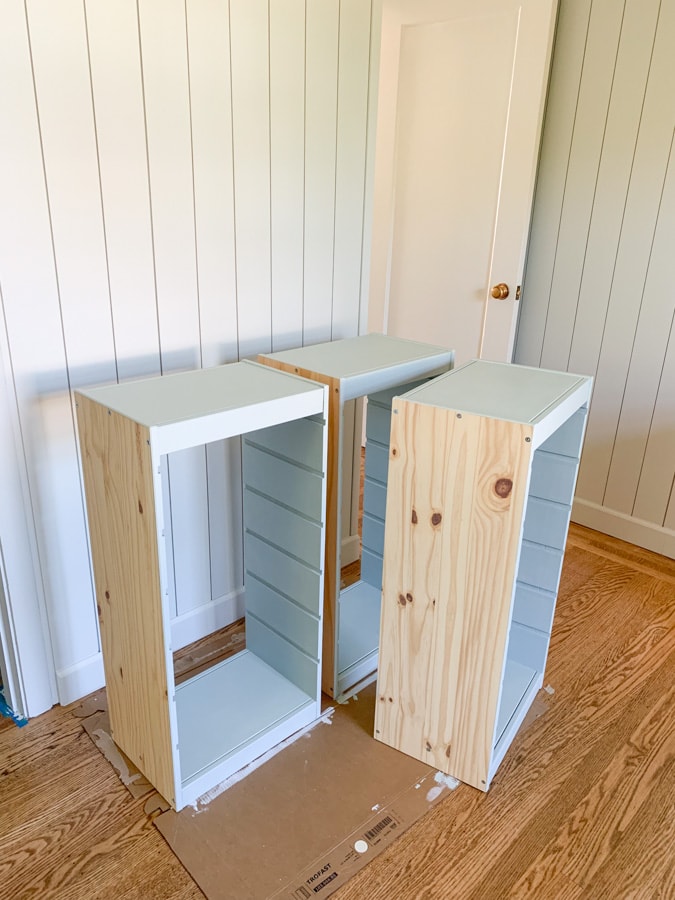
After painting them, I put them in the closet for dry fit.
I noticed that putting them together will have a small gap where the wood color will show through. So I did some touch up to paint a little bit into the sides. about 1 inch from the front into the sides.
Once everything looks good, I used wood screws to secure them together.
One tip is to place the screw at a hidden location. I placed mine behind the top cover, so it is invisible most of the time, also painted it the same color.
To make it more secure to the wall and never tip over, I used the L brackets IKEA provided to attach one of the unit to the wall.
Since those three units are secured to each other and the whole thing will be pretty light-weighted in my case, one wall bracket will do.
Then again, I painted wall bracket the same color.

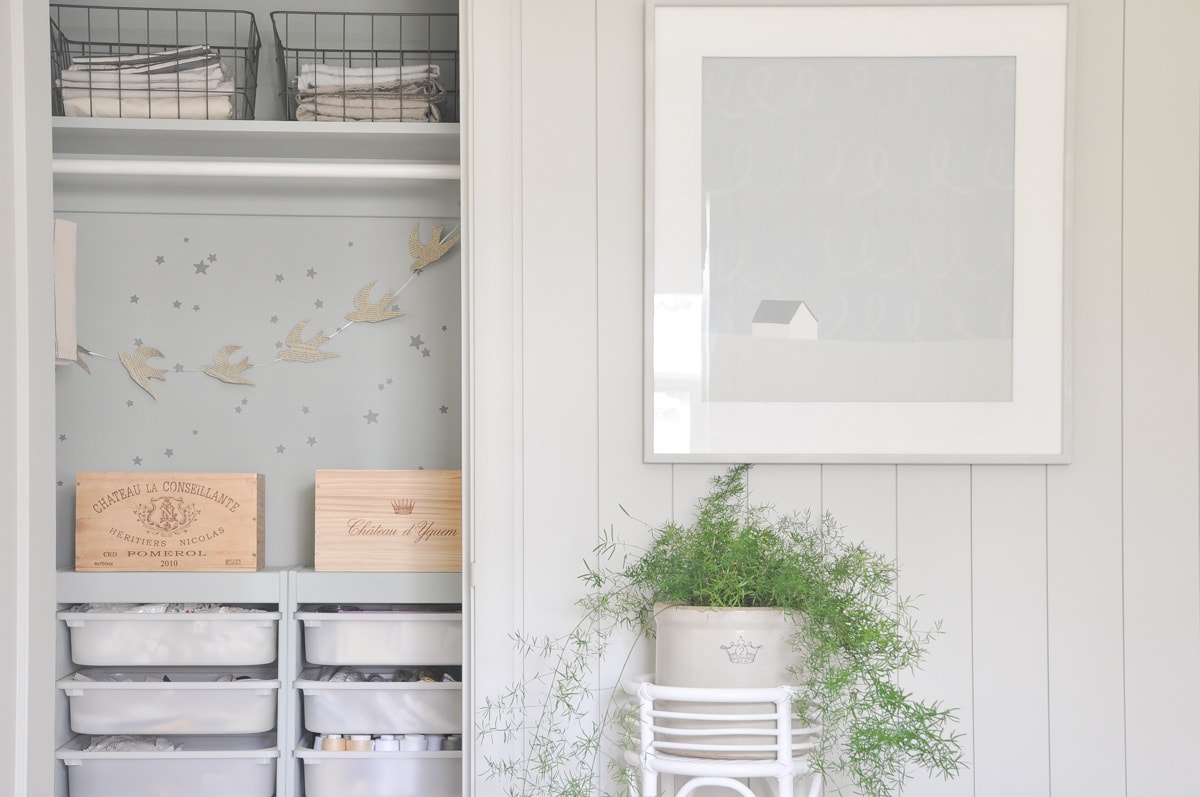
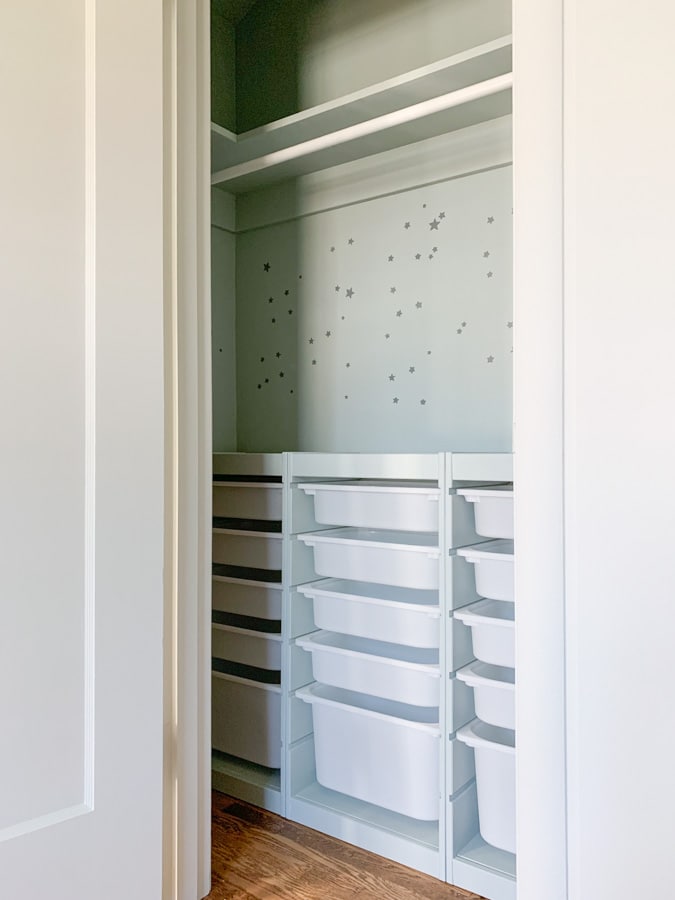
Step 3. DIY star wall stencil
To add more personality, like what you see in the mood board, I wanted to add some stars to add some whimsy to the closet space.
It would take time and money to get a star stencil I like. My goal for this closet makeover is to keep it on a pretty low budget, so I decided to make my own temporary wall stencil.
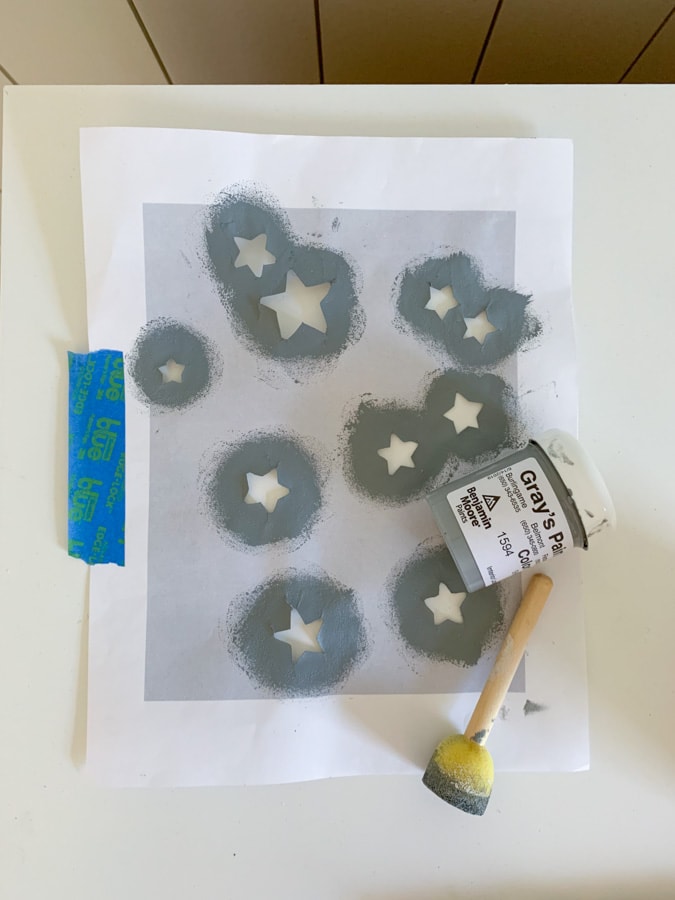
I printed out a star pattern I found online, then cut them out using a utility knife.
I would suggest using an exacto knife, but I have no idea where mine is – the issue of not having a home office/craft room, but luckily I’m making one right now!

Then I used a small stencil brush to blob paint on top of the stencil to the wall.
You can totally use brush if your stencil is on a stronger material. Mine is just a normal print paper, not thick, not sturdy. So I have to use a stencil brush and be delicate on stenciling the walls.
I would highly suggest you to use a sturdier material.
And that’s what it looks like after stenciling!
I did a gradient effect with bigger stars on top and smaller stars on the bottom. To make it look like the stars are falling from the shelf.
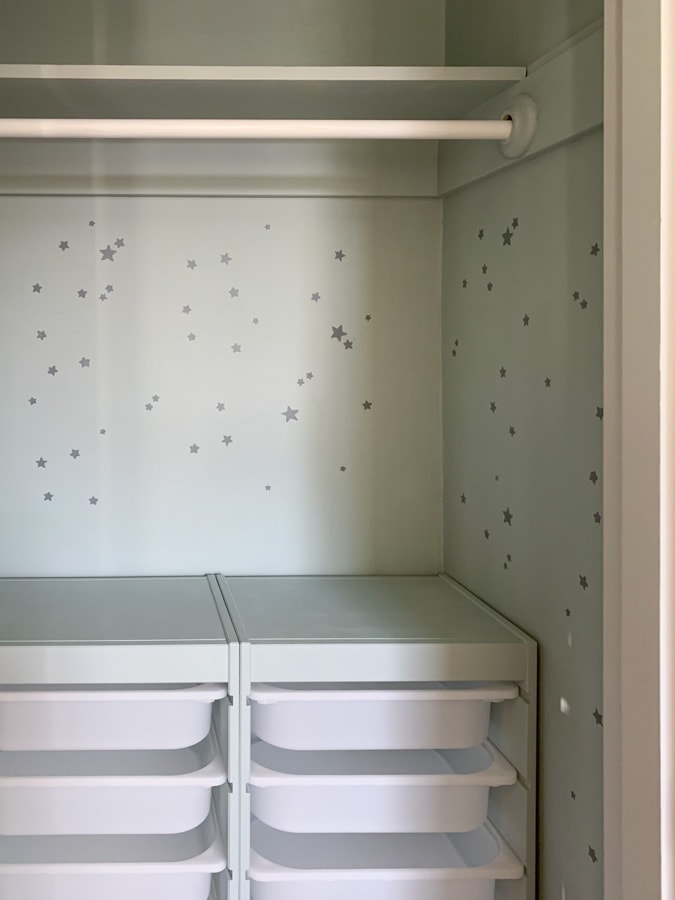
By the way, you might have noticed, I have also painted the closet rod!
The before is a galvanized metal rod, doesn’t match the new style at all. I painted it with white chalk paint, then apply two coats of mod podge to protect the paint surface.
So that’s all for the DIY process. Later I added baskets and really filled things in. I love how adorable it looks and it definitely is a nice surprise hidden behind the closet door.
I hope you enjoy this journey and find it helpful. If you are interested in designing your closet, I have shared some tips on what to consider when designing the mood board for your closet renovation in this article from Porch.com. So check it out if interested 🙂
Shop this space
Paint color: Benjamin Moore Quiet Moment 50% darker

Bird garland on the closet wall
This is a DIY project I did in a past post which you can check out here.
You can download this free printable here:
More Ikea hacks
Ikea Alex Drawer Hack for DIY Desk Built in
DIY IKEA Havsta Banquette Seating Built-in
Bathroom Vanity Mirror with Ikea Frack Hack
Pin it for later
Hi Kelin! I recently found your website and I’m in love! Your kitchen is exactly everything I want for our new kitchen that we are starting to design, I’ve been reading all your posts and bookmarking everything, thank you SO much for sharing! I also love the print with the little house that you have on your office wall. I tried to download it but the link is not working anymore, any chance you can put it up again or send it by email? I would love to have it in my office. Thanks so much! Sending love from Australia, Lara 🙂
Just found your site. Loving your Diy’s. Thanks for sharing. Been searching how to join, can’t find. ????
Great post! So beautiful!
What is your opinion… reviews on IKEA’s website say the bins are slightly too small for the tracks and tend to fall out. Have you experienced this issue at all?
That’s a good call! Actually I have experience this issue but never thought it was a design defect. It happens when the thing you have in the bin is very heavy. Because I don’t use my craft closet everyday and it only occasionally happen, it doesn’t bother me at all. Most of the time I noticed it when I slide the bin out and just put it back on the track. I haven’t experienced the bin fall off.
It doesn’t look like the closet opening is wide enough to pull the bins to the left and right of the door all the way out the access their contents. I have used trofast and bin storage solution in my apartment entry area closet to store things like folded t-shirts and yoga pants and sweaters, basically anything I can fold but the drawers to the far left can’t be slid all the way out without hitting the wall. Other than that I love this idea and am thinking of doing the same thing in my bathroom (for all my tools and hair products) and in another closet to store paperwork.
I’m curious whether we got the same modal of Trofast? They do offer several different depths.
The Trofast shelf I got was just shy of 12″ in depth and my closet is 24″ in depth. So I was able to fully slide out the bins or take them out.